One of the best reasons for having a kid: an excuse to make adorable Minnie Mouse cupcakes for a Minnie Mouse birthday party. I probably wouldn’t have thought of making these years ago, but here I am fancying up some cupcakes for Isabelle’s birthday!
Just for the record: we celebrated Isabelle’s third birthday on her actual birthday with a cake. Two days later, we flew out to Hong Kong for a family reunion so I wasn’t organized enough to throw her a party before we left. Two weeks after we got home, Isabelle got her birthday party. And then it took me another month and half to get these party photos up. Am I winning? Losing? Staying afloat? I am happy to share these photos though: they brought back good memories of the party and I hope you enjoy them as well!

This was the first year Isabelle had a real birthday party with guests from outside the family, and the first time I did invitations and party favors and actual catching up with friends/fellow parents while kids ran rampant through a play space blessedly not in our house. Not surprisingly, my main focus was on theming – and creating a dessert table to match the theme.
When I asked Isabelle what character she wanted for her third birthday party, she immediately answered, “Minnie Mouse.” I guess the Minnie Mouse cake I made for her second birthday was a hit. The multiple visits to Disneyland probably helped as well. (Ironically, as I write this post a couple months later Isabelle has moved onto the Octonauts. Oh, fickle youth! I am actually really excited about the idea of doing an Octonauts party next year because those characters are just too adorable for words, but I figure I should wait and see if she still likes them in a few months, let alone another year.)
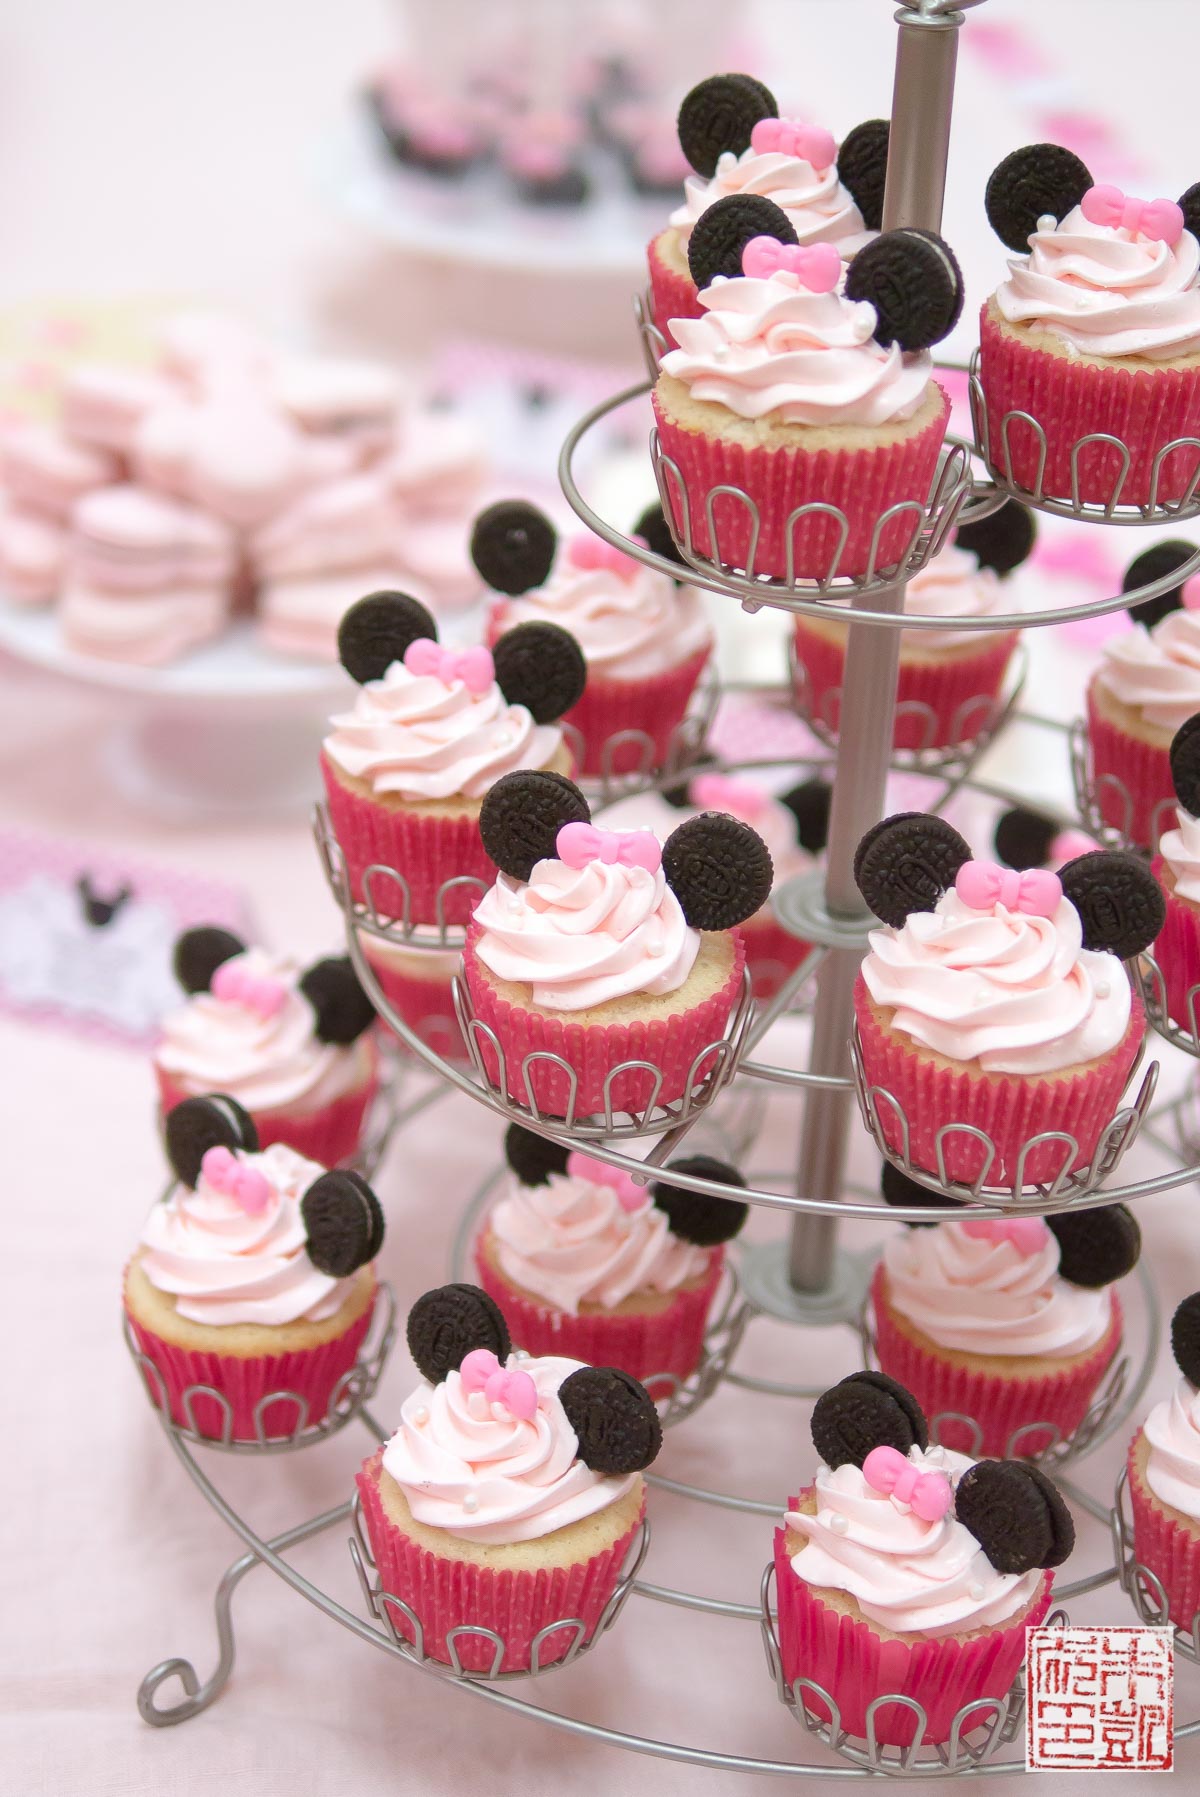
The centerpiece of the dessert table was a Minnie Mouse cupcake tower. I really wanted to have cupcakes for the dessert table, and since we didn’t have enough guests to warrant both an elaborate cake and cupcakes (all the parents might have hit me for overdosing their kids with sugar), I settled on just cupcakes. They are my go-to Tahitian Vanilla Bean White Cupcakes that I’ve taught in my cupcake classes that are perfect for picky kids that don’t like offbeat “creative” flavors and adults who want a sweet, fine-crumbed cake ideal for decorating (and eating!) The cupcakes are piped with a swirl of pink buttercream frosting and then topped with mini Oreo ears and a fondant bow. I have to say it was really fun putting these cupcakes together and seeing Isabelle’s face when she beheld them for the first time.
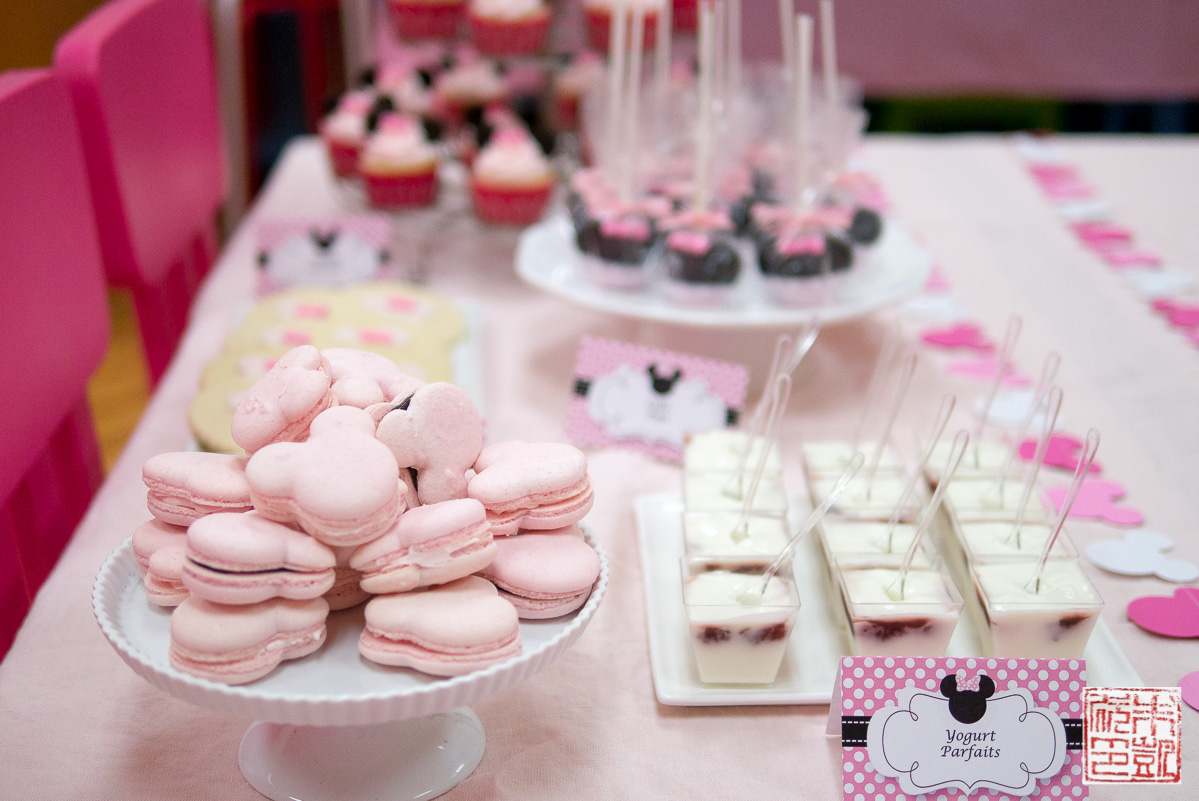
The dessert table spread, including macarons, parfaits, cookies, cupcakes, and cake pops. Oh, there was regular food too, but it wasn’t quite as photogenic and this is a dessert blog, right? Let’s all just focus on the sweet stuff – my favorite part (and Isabelle’s favorite part – she’s turning out to have her mommy’s sweet tooth!)
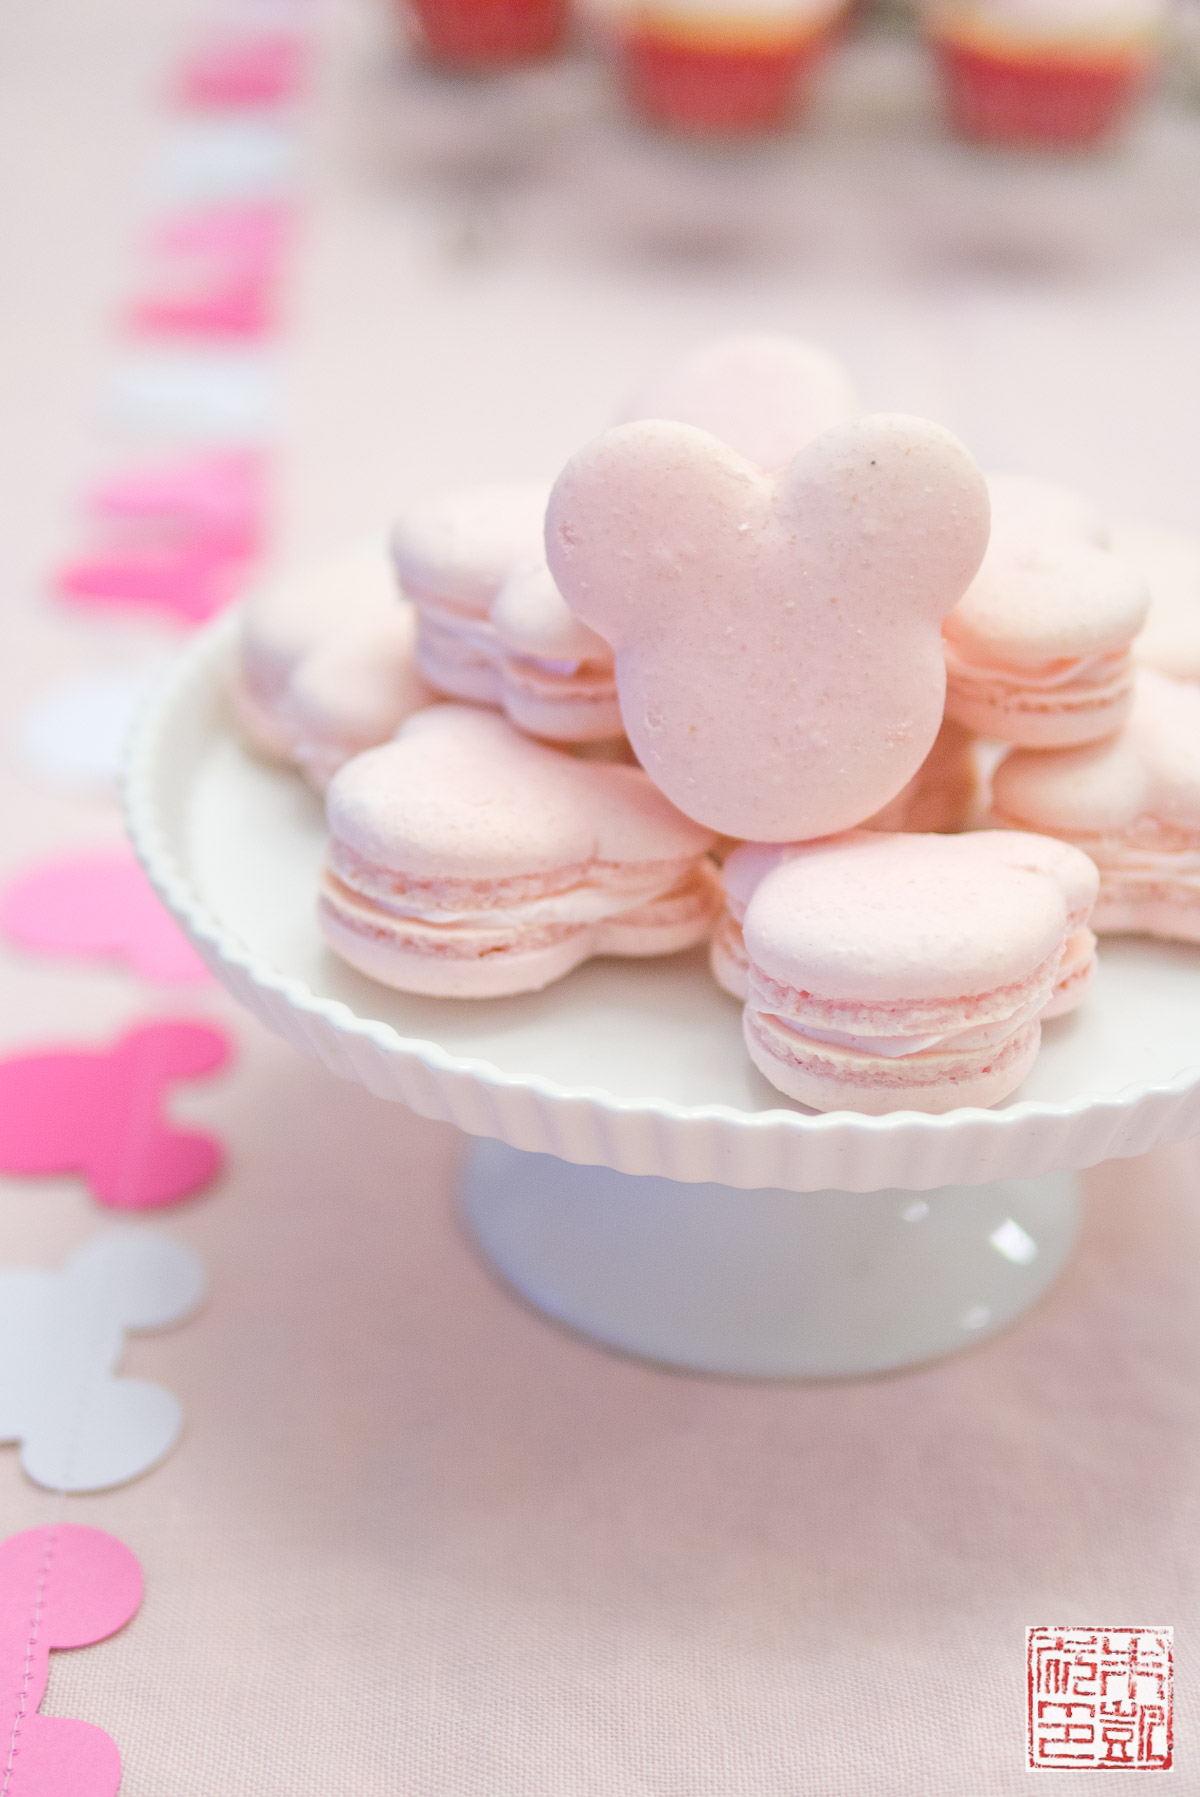
Minnie Mouse macarons with strawberry buttercream filling. Piping Minnie macs is super easy, just I did for the Minnie cake, and it was even easier with this uber cute macaron mat that has a printed template for macarons and optional bear ears! If you’re going for Mickey or Minnie, pipe the ears a little bigger and closer together to avoid having them look like teddy bears. I used my old reliable Italian meringue macaron recipe. For the strawberry buttercream, you can make the buttercream recipe below and add six ounces of pureed fresh strawberries at the very end after adding in the butter. I was really happy with how these turned out!

Sugar cookies with fondant Minnies and bows. Here’s my favorite sugar cookie recipe – you can omit the spice and keep the vanilla extract to make a lovely vanilla cookie base for decorating. I made my own fondant and used this bow mold to make bows for both the cookies and the cupcakes. These keep very well in an airtight container at room temperature so this is one item you can make a week or so ahead and they’ll still be fresh for the part.
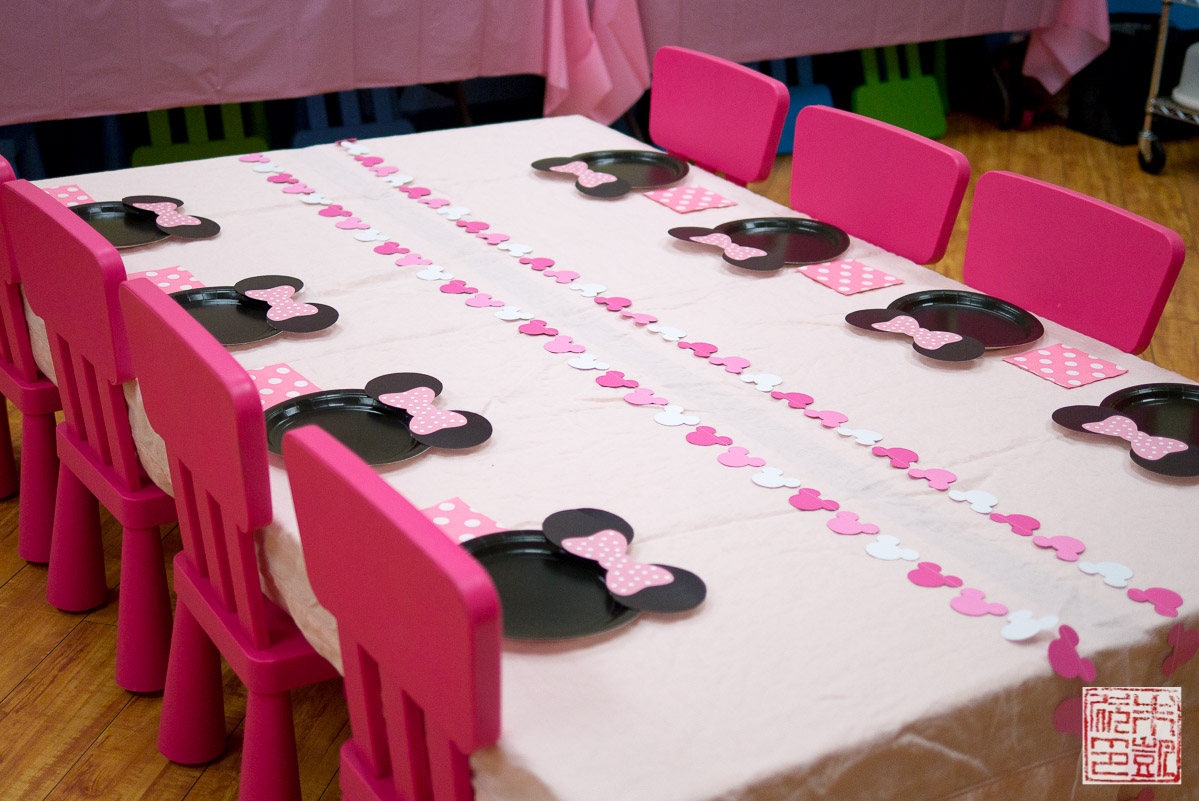
A shot of the party room with Minnie plates and all pink chairs. Here are links to where I found –
Minnie Mouse printable ears for plates
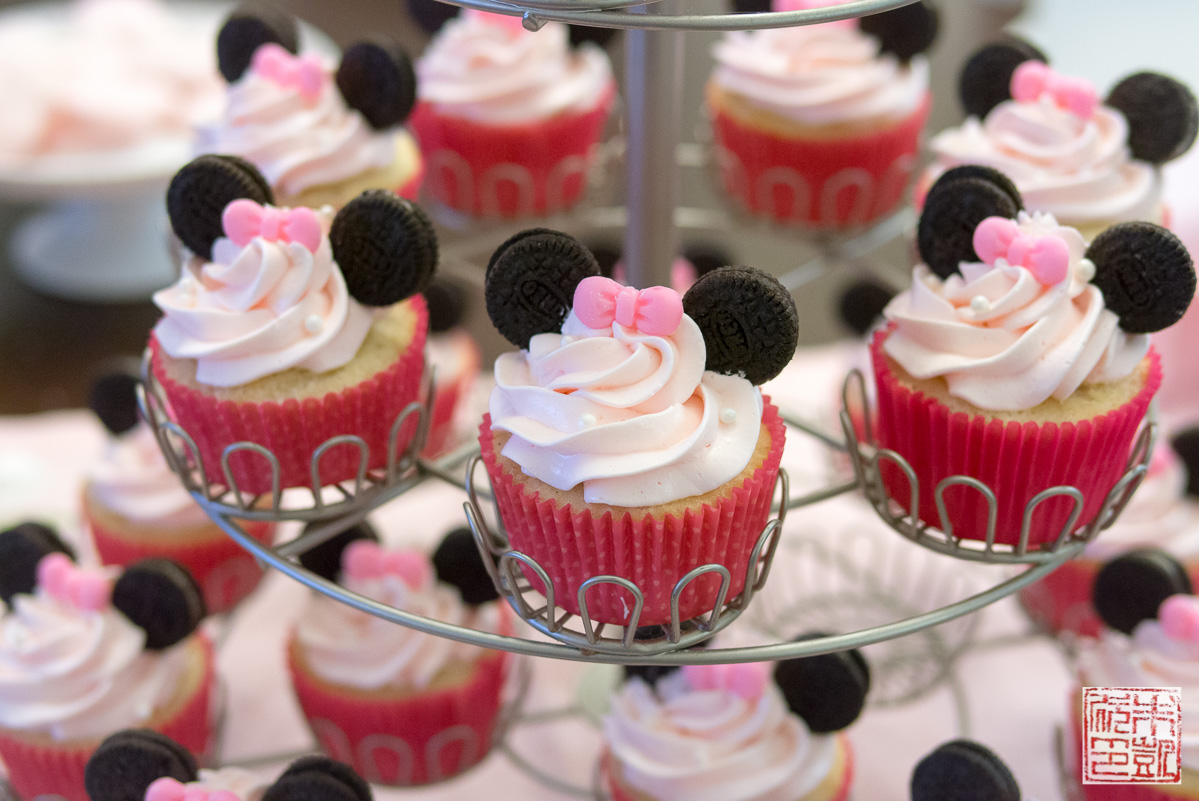
And finally the Minnie Mouse cupcakes. The great part about the cake is that it freezes very well, so you can make the cupcakes ahead of time, put them (after they’ve cooled and before you frost them) into freezer bags, and store them in the freezer up to four months in advance (although I’ve never been that ahead – usually I make and freeze them a week before). After you take them out of the freezer, remove them from the freezer bags immediately to let them come to room temperature – you don’t want to leave them in the bag as they will get gummy and stick to the bag.
It’s best to frost cupcakes the day you are serving them, but if you can’t, you can frost them a day in advance and store them covered in a cool space. Don’t refrigerate them as it will dry out the cake, and they might absorb flavors from the refrigerator. I would also put the mini Oreos and the fondant bows on them as close to party time as possible, as the cookies will get soggy if left in frosting for several hours, and the fondant will also soften up.
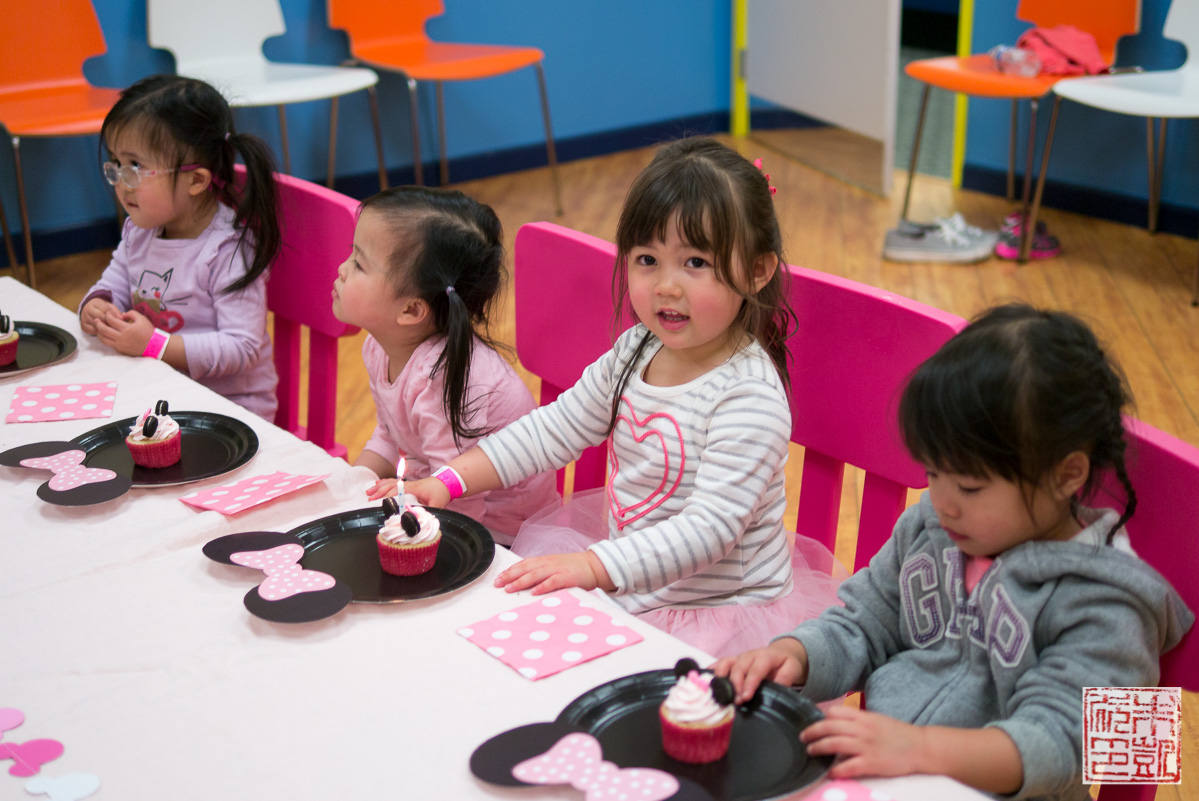
The birthday girl about to blow out her birthday cupcake. I think she and most of the other kids licked off the frosting, took a bite of their cupcake, and ran off to play. Sigh. Remember when you were a kid and it was all about the frosting? So make it a good one – the swiss meringue buttercream below is pretty much foolproof, pipes beautifully, and holds it shape very well at room temperature.
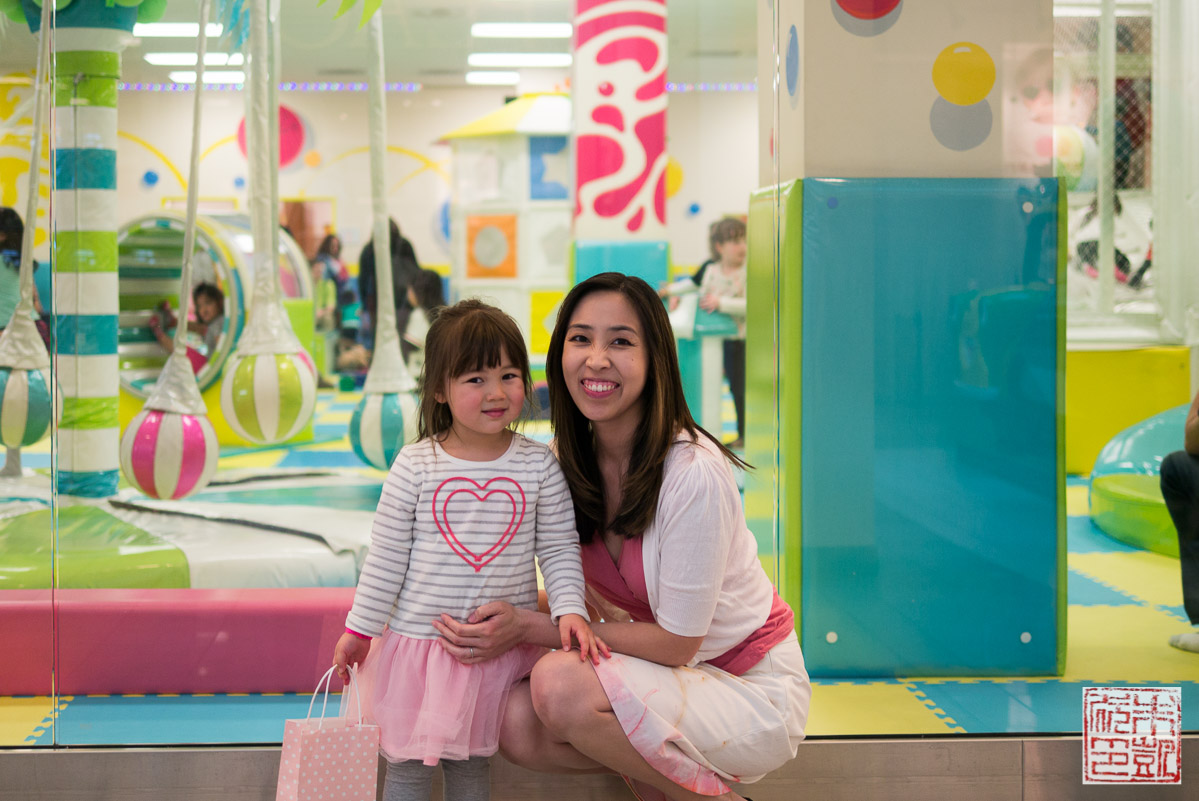
Here we are in front of the playland where we had her party. It’s one of Isabelle’s favorite places to go and I think she couldn’t believe she had a party there! We were there early to set up for the party, and when all the other guests started petering out around naptime several hours later, she was still going strong. Literally the last kid still playing at her own party. This little girl is an Energizer bunny! I can’t believe Isabelle is three years old and I’m sure her fourth birthday (and party planning) will come sooner than I know!


- 3 cups (330 g) cake flour
- 2½ teaspoons baking powder
- 1 teaspoon salt
- 1 cup (230 g) whole milk
- 4 teaspoons Tahitian vanilla bean extract
- 1 cup (220 g) unsalted butter, room temperature
- 2 cups (400 g) sugar
- 3 large eggs plus 3 large egg whites
- 1¼ cups (250 g) sugar
- 5 large egg whites
- 15 ounces (425 g) unsalted butter, room temperature, cut into 1-in pieces
- 1½ teaspoons vanilla extract
- 1 teaspoon almond extract
- 48 mini Oreos for decoration
- Preheat oven to 350 degrees F. Line two 12-cup muffin tin with cupcake liners.
- Sift the flour, baking powder, and salt together into a medium bowl.
- Combine the milk and vanilla bean extract together in another bowl.
- Cream the butter and sugar together in a stand mixer with paddle attachment on medium speed until soft and creamy.
- Add in eggs and egg whites, one at a time, beating thoroughly after each addition to combine before adding the next.
- Add in the flour mixture and milk mixture in three alternating additions, starting and ending with the flour mixture. Beat just to combine each addition before adding the next.
- Using an ice cream scoop or a spoon, fill each cupcake liner about ¾ full with batter. Bake in oven for 16 to 20 minutes, rotating the pan halfway through, until a toothpick inserted in the cupcakes comes out clean.
- Let cupcakes cool in tin on a wire rack until cool before decorating.
- Combine the sugar and egg whites in a medium metal bowl and place over a pan of simmering water.
- Whisk the sugar mixture constantly over heat until the sugar is dissolved and the mixture looks smooth and shiny. Continue whisking until the mixture reaches 160 degrees F.
- Remove mixture from heat and pour into a stand mixer bowl. Whisk on medium speed for about 5 minutes until the mixture has cooled.
- Switch to the paddle attachment and with the speed on low, add the butter a few pieces at a time, beating until smooth. Do not add the butter too quickly or beat too quickly or the buttercream may break.
- When all the butter has been added, beat the buttercream on medium-high speed for about 6-10 minutes until it is very thick and smooth. It may appear to separate briefly but continue beating and it should come back together.
- Add in the vanilla and almond extracts and beat to combine. Add food coloring as desired.
- Place buttercream in a piping bag fitted with a star tip (I use Ateco closed star 846). Pipe frosting onto each cupcake. Place two mini Oreos on top for ears.


ahh, this party looks like it was so adorable, and i love how everything was pale pink! and those minnie mouse macarons look so much more delicate and wonderful than the ones they have in the parks (i didn’t care for the raspberry rose one at all, but the salted caramel was surprisingly tasty).
so fast! happy birthday!
I am loving this whole party! WAY TOO CUTE!!!
Cupcakes look pretty and easy to make. Whole party looks fun.
Omg these desserts are so fabulous they are almost too fabulous to eat!!!!! Loving the Minnie Mouse cupcakes!
What a super adorable party! Love the Minnie Mouse macaroons the most. The cupcakes are also fabulous. Well done!
Great, the party was clearly a success 🙂 The kids are happy! Be healthy!
Those cupcakes are the cutest things ever. My almost 2 year old would LOVE them!
So cute! I especially love the macaroons!
This party looks perfect. I can’t believe you made the macarons and the cupcakes! Your daughter must’ve been so happy (even if the party was later)!
Those are the cutest cupcakes! This party looks amazing!!
These are adorable! Great job!
These cupcakes, and whole party are just WAY too cute!
Oh my goodness this party turned out so cute! I am in love with all of the decorations. I love all of the Minnie Mouse themed desserts that you had. Those cupcakes are just the cutest ever! Such a great job. Thank you so much for sharing!
These cupcakes turned out perfect! I love the decor, food, everything from this party. How fun!
This is so cute. I love it. It’s making me wish I had a girl lol
Cutest birthday party ever! You did such a good job on those cupcakes and cookies. Such cute decor too!
What a fun party theme and those cupcakes are the cutest, definitely adding these to my list for when my friends plan a birthday party for their kids. Happy birthday to the little one, seems like a great party 🙂
xx, Kusum | http://www.sveeteskapes.com
This looks amazing! I love how everything came out! We did a Minnie Mouse theme for my daughter’s first birthday — didn’t quite come out how I hoped, but we had a blast. Love how that play place looks too!
Aww that is the cutest little party! I love Minnie and I actually had a Minnie cake just a couple of years ago because you are never too old!
La Belle Sirene
These are so adorable! I just love them!
Hey there! Just found your blog while researching pastry schools (thanks for your input in that arena!). After reading through this post and seeing the food spread, I thought it would be wonderful if you could include your timeline for the whole process – what was made when – so that it all came together looking fresh for the the party. Am I making sense here? When I’m making multiple things to serve at the same time, I still have difficult figuring out what/when so it all comes together. Thanks! Your work is beautiful.
Hi Beverly Elaine, thanks so much for visiting my blog! I actually had a production schedule drawn up and I’m trying to find it, hopefully in the next couple of days. If I do I’ll add something to the post and I’ll let you know. Thanks for a great question, it definitely was one of the big challenges when I was planning the party! best, Anita
I absolutely love he lil mini cupcakes. I love pink too. This will be such a cute idea for my baby’s 2 year old b day bash in May. Thanks so much for sharing!
http://www.themoderndaybradybunch.com
How did you get that color pink for the frosting?
Hi Brooke, I use AmeriColor gel pastes and add a little bit at a time to the frosting to get the colors I want. They have a lot of colors to choose from. Hope that helps!
So many wonderful ideas. I especially love the cupcake stand. If possible would you post a link or place of purchase.
Hi Sonya,
Thanks so much for visiting! I got the cupcake stand a long time ago at Sur La Table, and they don’t seem to make that style anymore. Here is the most similar one I could find: https://amzn.to/2Jnw4Ne . Good luck!