Apologies for falling behind on the mousse recipes – I wanted to add on a review of my latest kitchen gadget, one that’s very apropos for mousse-making.
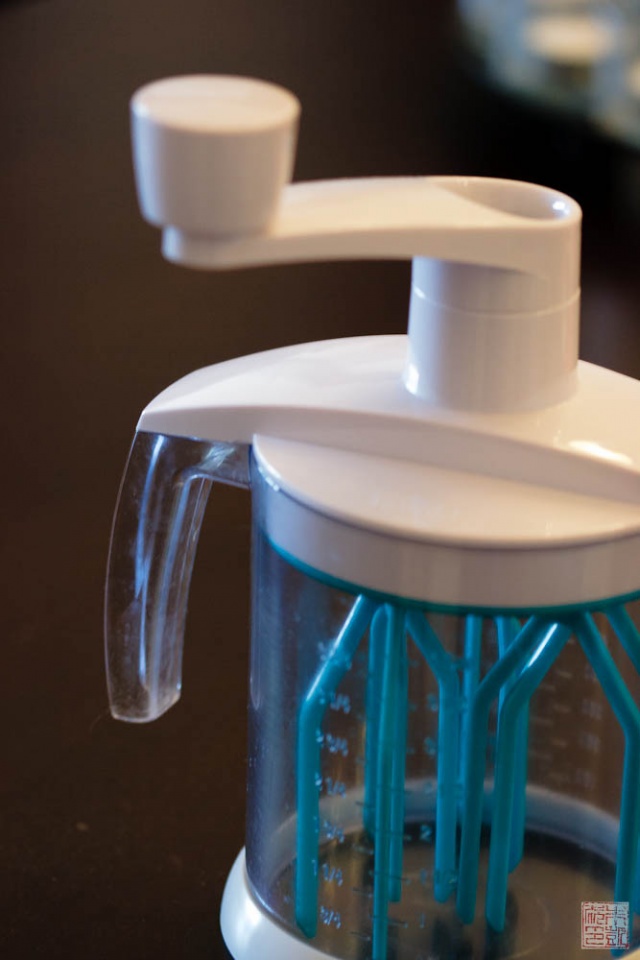
The photo above is of the Tovolo Quick Hand Mixer. I picked mine up on sale from a kitchenware store – I’ll confess that normally I would have passed this by as unnecessary (I mean, all a good pastry chef needs is a whisk and some elbow grease, right?), but the price, plus the fact that it’s a perfect illustration of gear trains and the benefits of mechanical advantage made it too fun to pass up.
I wish I had taken a photo of the inside before I assembled it- apparently you can’t take it apart again, but imagine that instead of the three gears of a traditional egg beater, there’s more like a couple dozen gears, meaning when you turn the crank it sets the blades below spinning with very little force. It’s kind of like a turbo charged egg beater. It’s fun – it took me about a minute to whip about a cup of cream with barely any effort.
A few more reasons I like it: If you often use your stand mixer, you know it’s a pain when you have a recipe that makes a batter, and then requires whipping egg whites or cream in a clean mixer bowl – and you only have the one mixer bowl. Having something like this gadget means you don’t need to clean and reuse the mixer bowl.
Also, the thing about using stand mixers to whip instead of doing it by hand is that it’s easy to overwhip (I have terrible luck with overwhipping egg whites in a stand mixer). When you do it by hand, you use your eyes and your hands to gauge when the whipped cream, or egg whites, have reached the right stage. Using this little prep mixer, I can feel the resistance against the blades increase as the cream begins to thicken, and I can tell when it’s thickened to the right point for me. It encourages you to be more “in the moment” instead of zoning out while baking. Next thing you know, I’ll be getting a butter churn!
Needless to say this little prep mixer came in very handy when I had to whip up a lot of cream for the next few mousses.

Chocolate Mousse #3: Chocolate Chantilly
This is the simplest and most straightforward mousse: chocolate lightened with whipped cream. This is the mousse you whip up when you need a last-minute dessert, or the rest of your pantry’s run bare (perhaps you used all your butter to make some pies?). Because there’s virtually nothing to this recipe, it’s all the more important to use a really good chocolate, and to whip the cream properly.
One thing I’ve noticed is that people tend to overestimate how whipped “whipped cream” has to be. Most everyone knows not to overwhip cream into crumbly butter, but they often think that “soft peaks” means a cream that’s solid with defined peaks that hold their shape – which is really closer to firm peaks. It may not be intuitive at first, but whipped cream has the most volume when it reaches soft peaks. For the airiest and lightest of mousses, you want to incorporate the whipped cream when its volume is maximized.
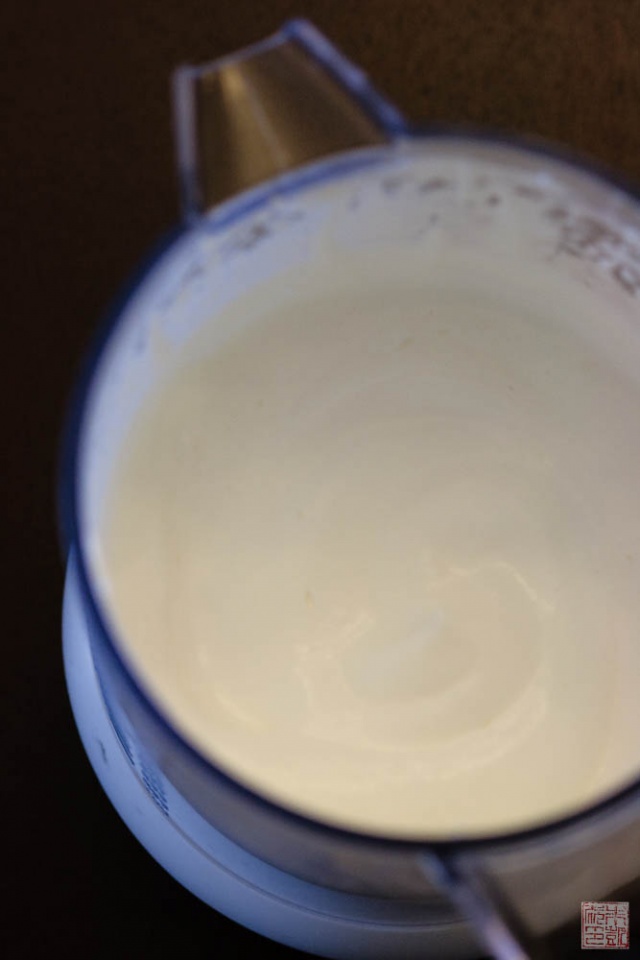
If you look at the photo above, you can see that the cream is starting to hold swirls, but it’s still on the very edge of liquidy. If you whip until you can see peaks of cream standing up and they stay in place without collapsing, it’s reached firm peak stage. It’s not overwhipped, but it’s already lost volume as the cream is beginning to pack into itself. When I was at a Valrhona demo, I was surprised to see how loose and soft the chefs kept their whipped cream. But they had to be doing something right, as the finished desserts were wonderful, so I’ve followed their cream-whipping example since.
Cream whisks better when it is cold; it you want to be extra careful, you can also chill the bowl and the whisk. It’s also best to whip cream at a medium speed, as it allows air to incorporate into the cream in a more even manner, resulting in a more stable final product. As with many things in pastry, measured and methodical wins over hurried and haphazard!
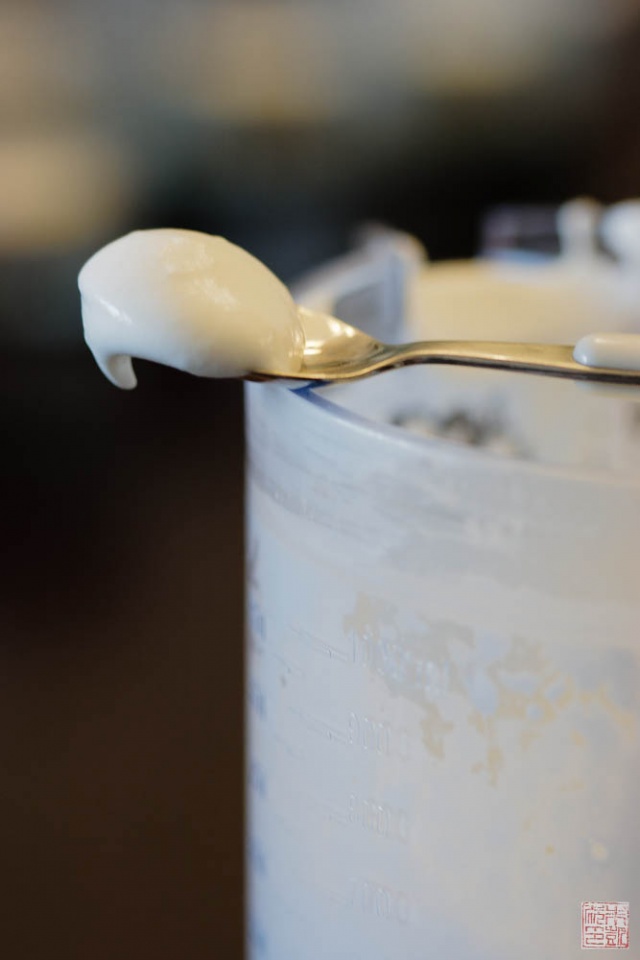
Here’s a spoonful of the whipped cream: the cream is just holding its shape, but the tip is curling over. After I snapped the photo, it continued to droop and eventually collapsed. Time to fold it into some waiting chocolate.
After all that talk about whipping cream to the proper stage, it’s a little ironic to note that this mousse has the thickest texture of the three mousses so far, with a dry, brushed-velvet finish. Note that this is after the mousse has been chilled: if you eat it right after you make it, it’s absolutely has that creamy-foamy mouthfeel, so for me this is another candidate for of those consume-immediately-mousses. I guarantee you’ll fully appreciate the importance of soft peaks in whipped cream if you have a spoonful of this mousse when it’s newly made. The chocolate flavor is somewhere between mousses #1 and #2: mild, but definitely chocolatey.
Don’t put your whisk away yet, as there’s two more mousses to go this week!

- adapted from Cooking with Chocolate
- 12 3/4 oz (360 g) bittersweet (60-68%) chocolate, finely chopped
- 1 3/4 cup (400 ml) + 3/4 cup (200 ml) whipping cream, chilled
- Place chocolate in a heatproof bowl and melt over a pot of simmering water. Remove from heat and set aside.
- Place 1 3/4 cups cream in bowl of a stand mixer and whisk with the whisk attachment until soft peaks form. Cover and set aside in refrigerator.
- Bring remaining 3/4 cup cream to a boil in a heavy saucepan. Remove from heat.
- Pour about one-third of the cream into the chocolate and whisk quickly to combine.
- Pour in another third of the cream and whisk to combine. Pour in the remaining cream and whisk to combine. The mixture should be very smooth and shiny.
- When the chocolate mixture has cooled to 113-122 degrees F, fold in the whipped cream from the refrigerator with a flexible spatula.
- Divide mousse among dessert glasses and chill for 12 hours. Mousse will keep for up to 2 days.


oh man now I want that mixer:(
Another great one! And so quick 🙂
Thanks for the little lesson on whipped cream. Definately will try it at a lower speed and stop whipping way earlier. The mousse looks so easy and delicious!
Hey Anita! I just caught up on your mousse experiment and I have to say that I love your process. This is very much how I approach one type of recipe if I’m trying to find my perfect, favorite one. And this now also make me wish I had enough chocolate at home to make some mousse tonight…might have to make a little detour on my way home. 😉
I love anything chocolate and look forward to trying your light, chocolatey mousse. Your blog is beautiful as well. Please take a look at my recipes when you have a chance.
Hi! Lovely experimentation with the various mousse recipes!Which mousse would be recommended as a layered cake filling? I’m looking for a firmer type that can stand at room temperature for a longer time without collapsing. Thanks!
Hi Al,
I’d recommend either #3 or #4 – both will set up fairly firm. I hope that helps – happy baking!