Do you have your standard “test” item when you visit a new restaurant or bakery? Whenever I check out a new bakeshop, I like to try out their croissants – and their tarts. If I love their puff pastry and their tart crust, I’m sure to make a return visit.
Chinese bakeries have a different standard repertoire; I usually go for the cocktail buns, while hubby goes for the red bean buns. But typically there’s one basic bun that most customers expect to see, and expect to see done well in a Chinese bakery: the pineapple bun, or bolo bao.
Pineapple buns, a soft roll-like bun with a sweet crunchy topping, were invented in Hong Kong and are ubiquitous fare in bakeries and cafes as a morning pastry or an anytime snack. A very classic Hong Kong breakfast is milk tea, hot noodle soup, and a pineapple bun to round it off. They really are sort of like the Hong Kong version of croissants.
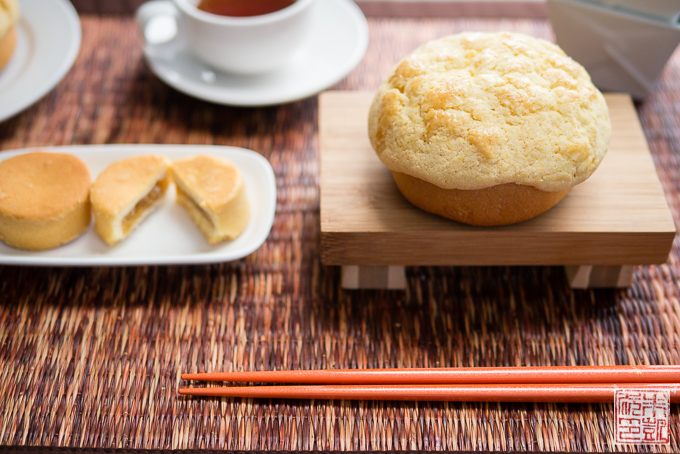
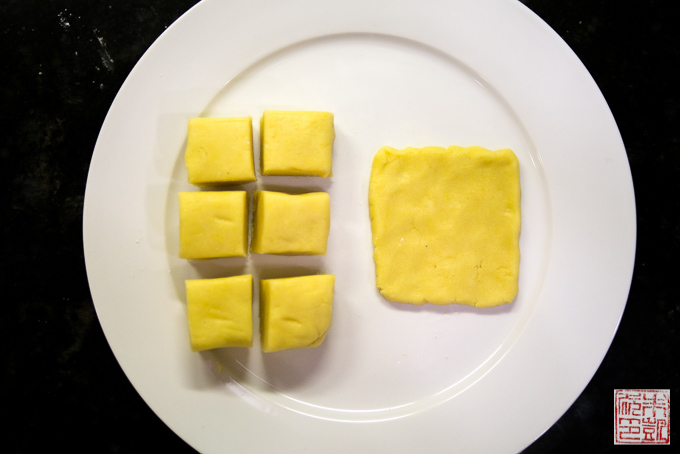
Before I go further, I also have to address the name – where’s the pineapple, you ask? There’s a little visual joke in the above photo: there’s only one item that actually contains pineapple, and it’s not the pineapple bun. The little cakes on the left are pineapple cakes, another traditional Chinese sweet from Taiwan, which actually do contain pineapple. Pineapple buns get their name from their sweet, crackly topping which resemble the outside of a pineapple. I think almost every Chinese kid remembers the moment when they realized, “Hey, pineapple buns don’t actually have any pineapple! They don’t taste like pineapple, or smell like pineapple, but mom says it looks like a pineapple…?” Well, as confusing as that logic is, the name has stuck throughout all these years.
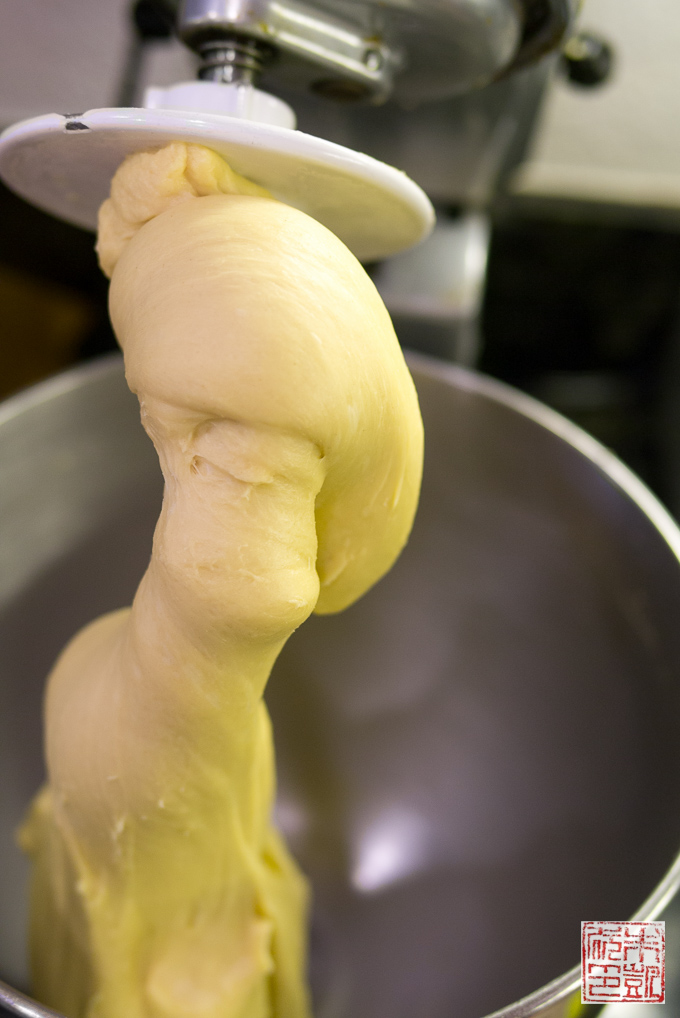
I made my pineapple buns with the tangzhong (water roux) method, the same method I used to make Hokkaido milk bread. This base recipe (or some version thereof) is very commonly used for many of the breads and buns you see in Chinese bakeries. Same as with the milk bread, using the tangzhong makes the buns light and fluffy, and they stay tender for longer. Don’t be afraid to beat the dough for the 10-15 minutes the recipe indicates: that will help it achieve this beautiful smooth, elastic texture you see here.
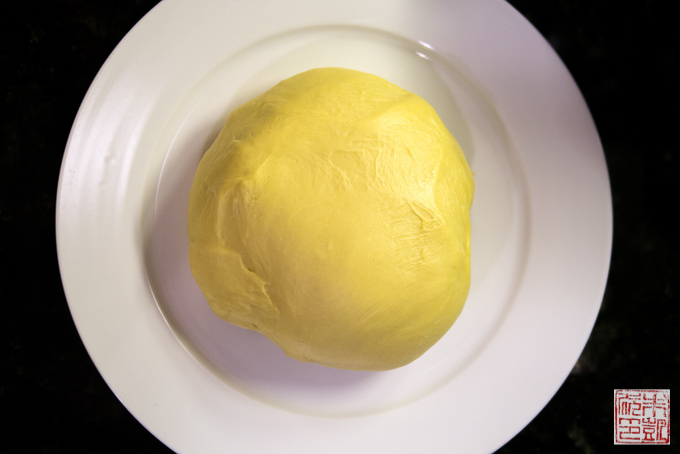
The finished dough. See how smooth and shiny it looks? The golden hue comes from the butter and the added custard powder. Most Chinese buns use milk powder or custard powder to give the finished product a sweeter, more milky (or vanilla) taste. The most common brand of custard powder is Bird’s Custard Powder, sort of a British precursor to pudding mix, which makes sense since Hong Kong used to be a British colony. If you don’t use it, the buns will still come out but they will taste a little plainer. If you’re looking to get as close to that bakery flavor as possible, add in the custard powder. If you can’t find custard powder, you can substitute instant vanilla pudding mix – I haven’t tried it, but apparently it works!
The topping is what gives pineapple buns their distinctive appearance and flavor. It’s essentially a soft cookie dough, made with flour, lard or butter, sugar, eggs, and more custard powder. The very traditional versions of pineapple bun recipes called for ammonium bicarbonate, which was used as a leavening agent before the more modern baking powder and baking soda were invented. Yes, that’s how long pineapple buns have been around! Baking powder and baking soda work just fine in this modern update.
I never realized this until I made pineapple buns, that the technique for making the cookie-like topping and covering the dough with it is very, very similar to the craquelin technique used by French patissiers. Interesting coincidence? The topping serves the same purpose that the craquelin does: it helps the buns bake into a round, uniform shape, and it adds a crisp top layer for contrast and flavor. If you really want to emphasize the resemblance to a pineapple, you can lightly score the topping in a crosshatch pattern so it will bake with a more regular crackly appearance, but if you forget (like me!) they turn out with a beautifully variegated crust anyway. I kind of like the more free-form effect anyway.
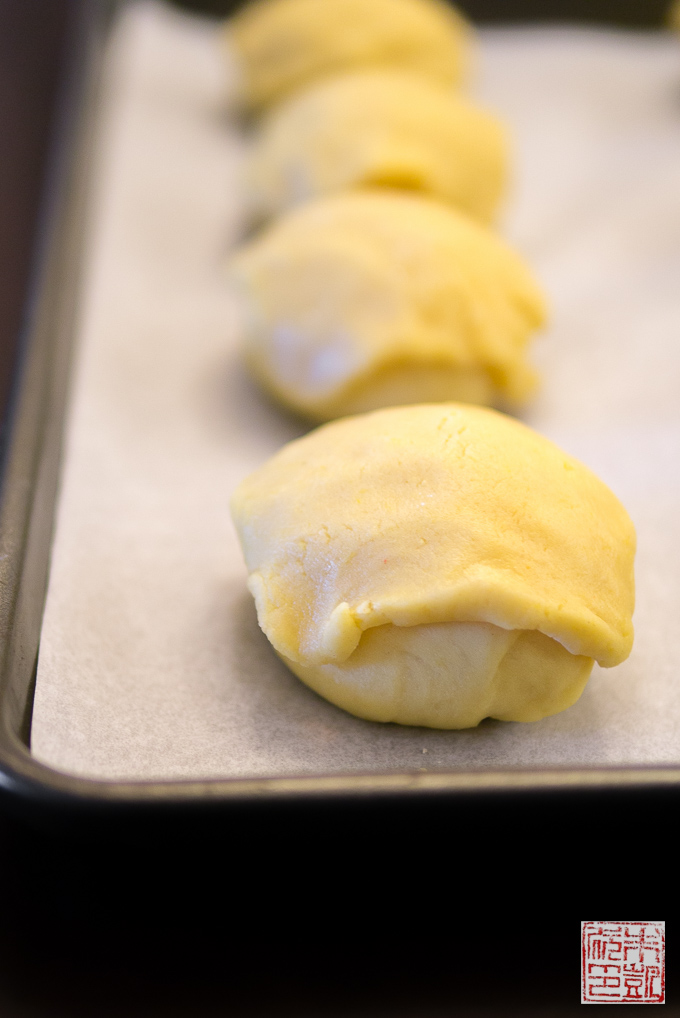
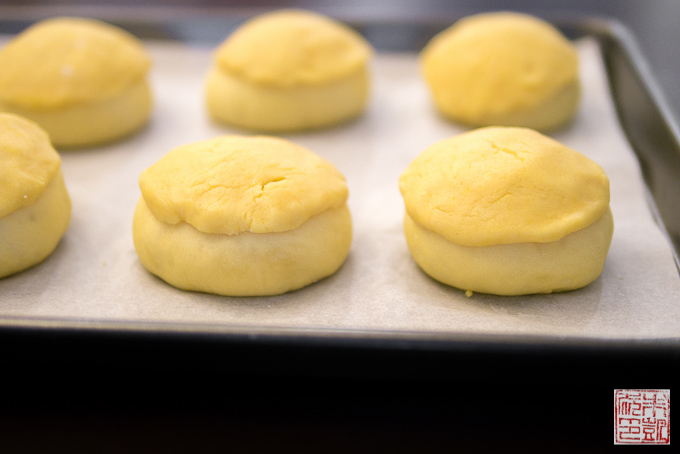
Another shot of pineapple buns with topping, ready to bake. You don’t need to be perfectly precise with the placement, but do note about how far over the bun the topping extends. Keep in mind that the topping will soften and droop further down as it bakes, so if the topping covers too much of the bun from the beginning, it might end up covering the entire bun by the time it’s done baking. That doesn’t mean the buns are no good – they’ll still be tasty – but I find the buns easier to eat and the ratio of topping to bread more ideal when it only covers the top of the bun.
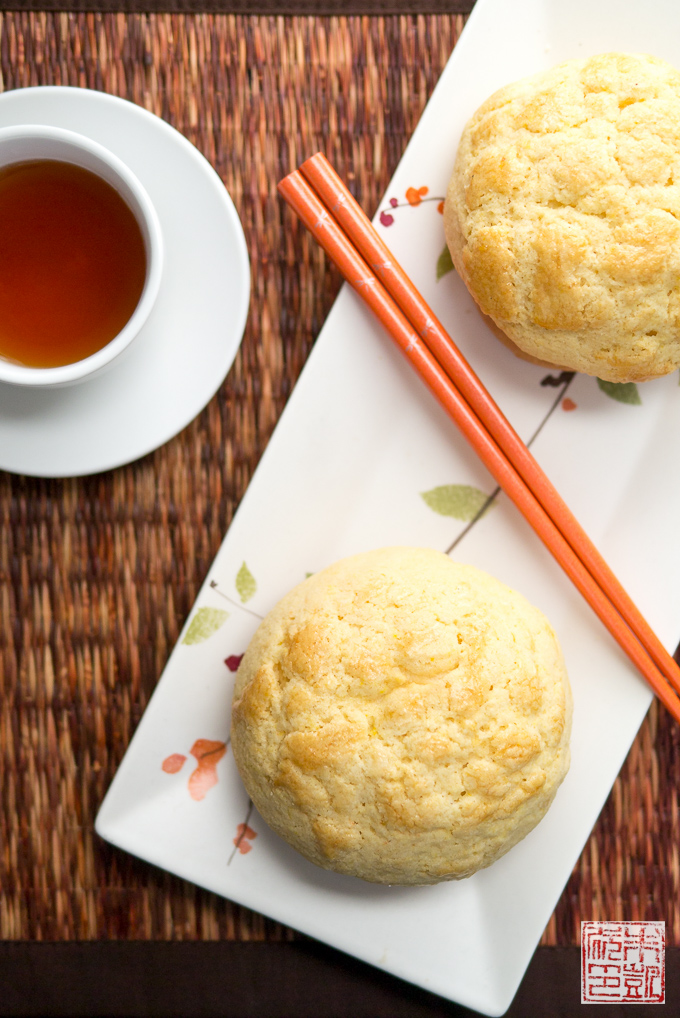
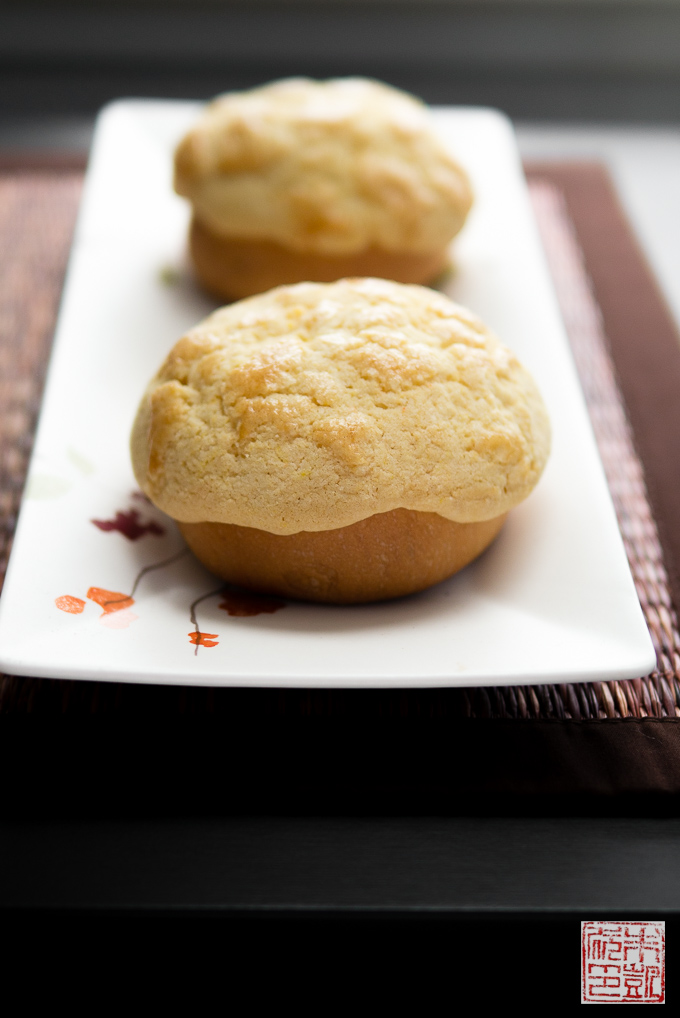
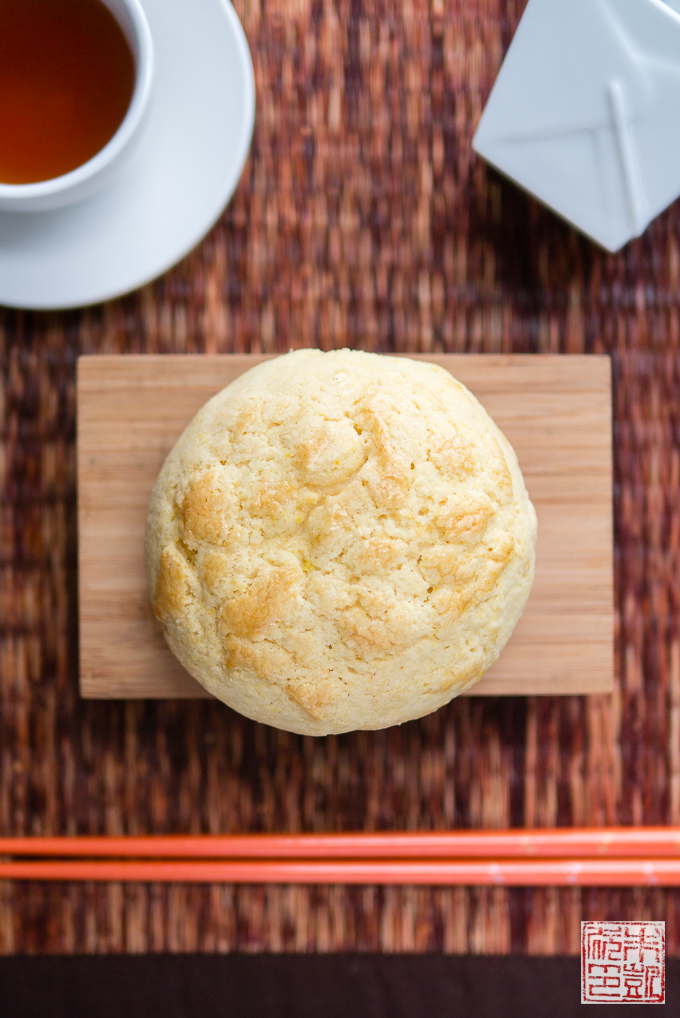
And the finished buns. You can see how the topping has puffed up and spread over the bun like a golden blanket (or like a pineapple skin!) and is shiny and crackly on top. You don’t want the buns to get too dark, as they are meant to be soft without a hard crust, so be sure to check the buns a few minutes before they’re done to see how fast they are browning.
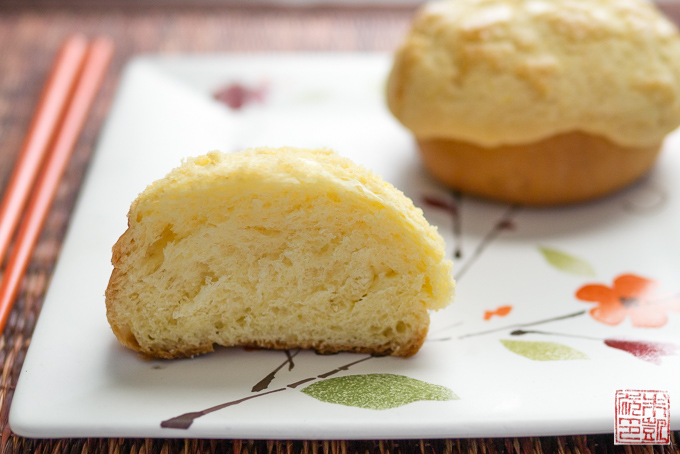
A shot of the interior of a bun. Pineapple buns are best warm from the oven, when the interior is at its softest and fluffiest, and the topping is pliable and crumbly. The bread portion is fairly plain on its own, which is why there’s some custard powder added to the dough to give it a bit more flavor, but it works well as a base for the sweet, streusel/cookie-like topping. If this bun alone isn’t enough decadence for you, you can also slice the bun in half and tuck in a pat of butter to slowly melt. This version, called bolo yau (pineapple butter bread), is as luxuriously decadent as any brioche I’ve ever had. Pair with a cup of tea and you have yourself a perfect Hong Kong teatime!
- 25 g (2 tablespoons) bread flour
- 100 ml (1/2 cup) water
- 170 g (1½ cups) cake flour
- 2 tablespoons custard powder
- ½ teaspoon baking soda
- ½ teaspoon baking powder
- ⅛ teaspoon salt
- 113 g (1/2 cup) unsalted butter, room temperature
- 100 g (1/2 cup) sugar
- 2 large egg yolks, room temperature
- 125 ml (1/2 cup) whole milk, lukewarm
- 2¼ teaspoons active dry yeast
- 86 g (1/3 cup + 1 Tbsp) sugar
- 125 g (1 cup) bread flour
- 250 g (2 cups) all-purpose flour
- 22 g (1/4 cup) custard powder
- 1 teaspoon (5 g) salt
- 1 large egg + 1 more for egg wash
- 60 g (4 tablespoons) unsalted butter, room temperature
- Whisk flour and water together in a small saucepan. Place over medium-low heat on the stove.
- Cook, whisking constantly, until the mixture thickens into a pudding-like consistency and you can leave lines in the mixture, about 5 minutes. You might be tempted to walk away from the mixture at the beginning when it's taking a while to thicken, but don't - it will come together surprisingly quickly and you don't want it to overcook. If you want, you can check the temperature - it's finished when it reaches 65 degrees C (149 degrees F), but I don't find it necessary.
- Let the tangzhong cool to room temperature before using. You can also store in the refrigerator for a couple days and bring to room temperature before using. If you see grayish spots in the tangzhong, discard it and make a fresh batch.
- Combine flour, custard powder, baking soda, baking powder, and salt in a bowl and set aside.
- Combine butter and sugar in bowl of a stand mixer. Beat to combine until light and fluffy.
- Add in the egg yolks and beat to combine.
- Add in the dry mixture and beat until it forms a smooth dough.
- Turn out onto a lightly floured surface and form into a block. Wrap in plastic wrap and refrigerate for about 30 minutes to let it firm up. You can use it immediately after making, but it might a little too soft to work with, so I find a little chilling time makes it easier.
- The milk should be at 108-110 degrees F to develop the yeast (any hotter and it will kill the yeast). Combine yeast and milk and 2 teaspoons of the sugar in a small bowl and let stand for about 5-8 minutes until yeast is bubbly.
- Combine the remaining sugar, flours, custard powder, and salt in the bowl of a stand mixer. Add in the yeast mixture, the tangzhong, and the egg.
- With a dough hook attachment, mix all the ingredients until it comes together into a soft, sticky dough, about 10 minutes.
- Add in the butter and mix to incorporate. Continue beating the dough for about 10-15 minutes until the dough is smooth and elastic. You should be able to stretch the dough out fairly thin without it breaking (the windowpane test). If it breaks right away when you try to stretch, mix it for a couple more minutes.
- Turn out the dough into an oiled bowl and cover with plastic wrap. Let proof for about 40 minutes until dough has doubled in size. The amount of time this takes will depend on the ambient temperature. I like to leave the bowl on top of the stove (no burners turned on) but with the oven turned to 250 degrees. Meanwhile, line two baking sheet with parchment paper. You can also make the bun topping during this time.
- When the dough looks like it has doubled in size and is puffy to the touch (if you poke the dough it should hold the indent and slowly fill back in), take the dough and split into 16 equal pieces. Roll each piece into a ball, tucking the edges below and rolling to form a smooth surface. Place them on the prepared baking sheets, 8 to a sheet. Cover with plastic wrap and let proof again for another 30 minutes, until buns are puffy again and almost doubled in size.
- Preheat oven to 350 degrees F while the buns proofing for the second time
- Beat the remaining egg lightly to make an egg wash.
- Take the bun topping and divide into 16 equal pieces. Flatten each piece into a round circle about ⅛" thick. You don't need to roll it out or spend a lot of time manipulating the shape. The piece should be big enough to cover the top of the bun but should not cover the entire bun, as the topping will spread down as it bakes.
- Place a piece of topping on top of each bun. Brush the tops with a little egg wash.
- Bake the buns for 18-22 minutes, until the tops are golden brown. Cool on wire rack.


Whenever I try a new pizza place it always has to be plain. if it tastes good plain it will taste amazing with toppings. Great recipe. thanks for sharing.
my test item when i go to chinese bakeries is a dan tat (golden gate bakery is my favorite!!), though i love bolo baos (it’s such a comfort food to me).
I know so little about true Chinese food but I’m always interested and very happy to see authentic recipes so I can learn more. These buns sound absolutely delicious – pineapple or no!
That must be funny to grow up eating these buns and wonder, where’s the pineapple! They remind me of the Mexican conchas with the lovely sweet topping. And oh, how I’d love one with my coffee for breakfast!!
I’ve wanted to try making bao buns for a long time. Your photos and instructions make it look very easy. Thanks for sharing this recipe. I’ll have to try making them very soon.
I’ve never seen or heard of these buns but they sure do look amazing! You are one talented baker!
These sound amazing, they really remind me of my favorite Mexican sweet buns, conchas! I am saving this recipe to try soon.
These are gorgeous! I would have totally been looking for the bits of pineapple…but feeling a bit wiser by your post…and wishing I could have a taste!
Ah ha! Thanks for explaining the story behind the name… I’ve always wondered why they were called pineapple buns even though they’re not actually made with pineapple! 🙂 I’ve tried my hand at duplicating a few of my Chinese bakery favourites, but I haven’t tackled these yet… filing this away to try as a rainy day project.
My husband is that way – he judges an Italian restaurant by the quality of their eggplant parm! These look delicious – I’ve never had this type of bun before!
They look and sound amazing!!! Great photos!
Hi Anita, thanks for your lovely recipes! I’ve tried the Hokkaido milk bread and it turned out really well (: I plan to try this recipe next week! However, I do have a tiny question about this recipe – steps 5 and 6 of the last part (“to finish the buns”) are about brushing the bread with egg wash and baking for a further 30-35min? Is this necessary, or is it accidentally brought over from the milk bread recipe? Cheers.
Hi Kelly,
I’m so glad the bread turned out well for you! Thanks for reviewing the pineapple bun recipe; you are right that the final steps were repeated so I have gone and deleted them. There is only one bake time. Good luck and let me know if you have more questions!
Thanks for the recipe – my husband loves bolo bao and I have made it with your recipe twice now.
After wondering for years where the name bolo boa came from, when I saw tijger bols in Amsterdam – bread rolls with a crackled top crust – I hypothesized that it was the inspiration. “Tijger” is impossible to pronounce by Cantonese speakers and to my imagined inspired baker who spoke no Dutch, “bol” became bolo.
I hope you will post a recipe for yesee bao – the oval roll with a slit down the middle filled with buttercream, with a light sprinkling of desiccated coconut over the entire top. I can use your bun recipe for the pillowy bread, but how to cut a tidy slit and how to get the coconut to stick?
Hi Diana,
Thanks for visiting my site and I’m so glad the bolo bao worked out for you! I will work on doing a yesee bao recipe!
Interesting theory about the tjiger bols! I don’t know about those so I’ll definitely have to look them up! It’s really fascinating how you can find similarities in dishes around the world and wonder how they’re connected!
For the coconut, perhaps try brushing the tops of the buns lightly with some milk or beaten egg yolk and then sprinkling it on? For cutting a neat slit, I find sharp kitchen shears work the best. Good luck and let me know how it works out!