
How’s the weather where you are? It’s positively spring in the Bay Area: sunny skies abound, pollen is everywhere, and everyone I know seems to be going on spring break (maybe to escape the pollen). Our own trip is coming up soon, plus we’ve got to get through Easter first!
First off, thank you to everyone who entered my Lollipop Love giveaway last week! The post has been updated with the randomly selected winners and I’ve notified them. Thanks again!
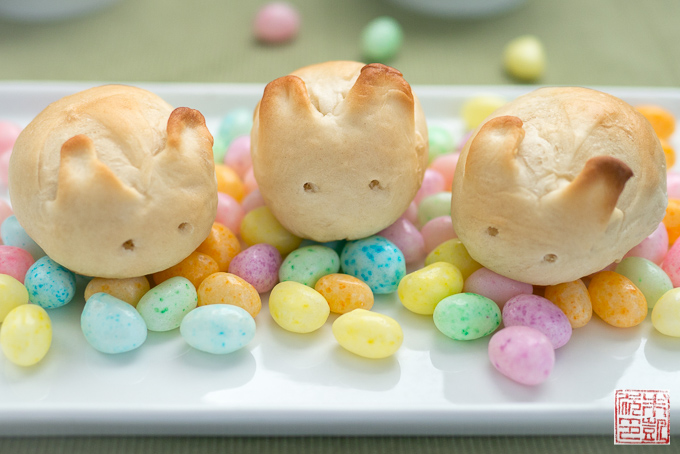
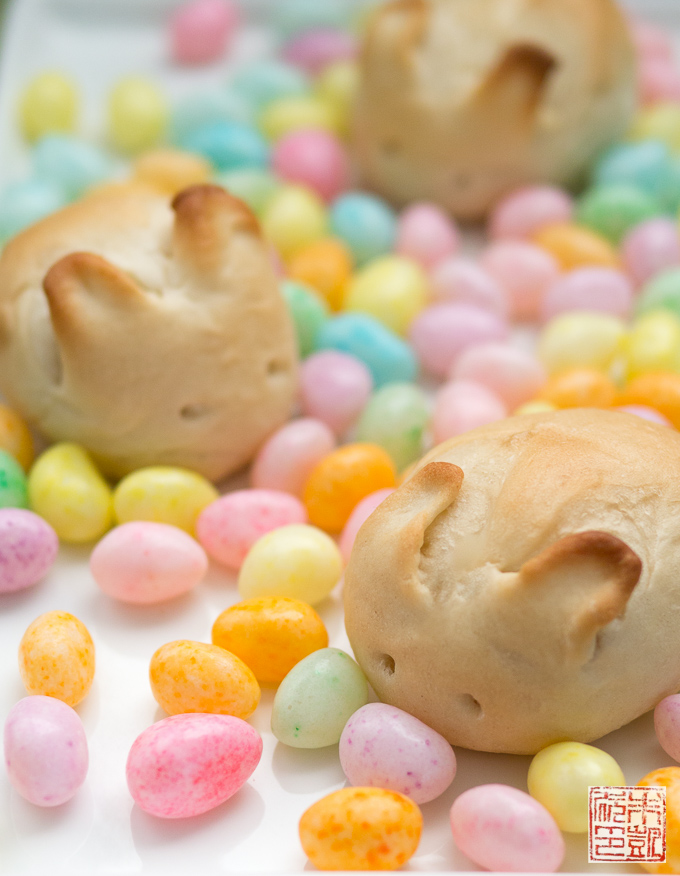
This post is a little tardy; I wanted to post it last week but the recipe required a few more rounds of testing than I anticipated. You may have seen these adorable rabbit bunny-shaped buns on the internet before; they are just perfect for the Easter table. However, forming them requires a little bit more effort than one might think. Although there are several recipes for making these buns, most of them didn’t offer much advice in the way of forming the rabbits. I made a few that looked more like cartoon monsters or anime creatures before I figured out a few tricks to make these bunnies more bunny-like.
This is your basic soft white roll. Originally I was trying to make this a Chinese baking post as well, but the doughs weren’t as amenable to the fine shaping work I was doing. However, you’ll still probably see some version of these soft rolls in most Chinese bakeries. They are often made with the Tangzhong method for extra tenderness, and are usually enriched with milk or milk powder, and sometimes egg to make them sweeter and richer. In the future I’ll do a post comparing the more enriched Chinese bakery-style rolls to the leaner western style breads. For this post though, I found this basic recipe to work out the best for me. These rolls are fluffy and very tender, and work great as dinner rolls or just for snacking.
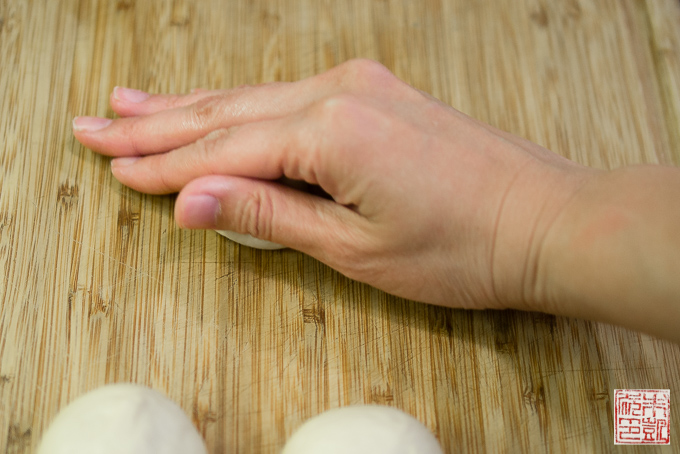
Tip #1: In order for the rolls to bake up evenly so you don’t get lumpy bulgy mutant rabbits, the dough should be formed as smooth and tight as possible. Although the natural instinct is to roll them into a ball with both your hands, I find the classic bread baker’s technique of rolling them with one hand against the counter is much more effective. We called this “boule-ing” at my pastry school: I don’t know if that’s the correct French term, but it refers to the traditional round ball-shaped loaves of bread. Boule means ball in French, and both boulanger (baker) and boulangerie (bakery) come from this word.
In order to get this shape with the rolls, take your piece of dough and try to fold all the edges underneath so they form a seam. Then place the dough on a surface and cup your hand around the dough like you’re cradling it gently. Make a circular motion with your hand, rolling the dough into a ball. Your hand should be pressing gently against the ball but not squishing it down, so it’s free to roll. As you keep doing this you should feel the dough start to come together and form a ball.

Here’s a look at what the balls of dough look like after “boule-ing” – they should be even and round. The roll on the upper right is the underside, where you can see all the edges of the dough tucking into the center. If you’ve shaped the roll correctly, all the edges should get pulled into the center, keeping the rest of the surface of the dough tight and smooth.
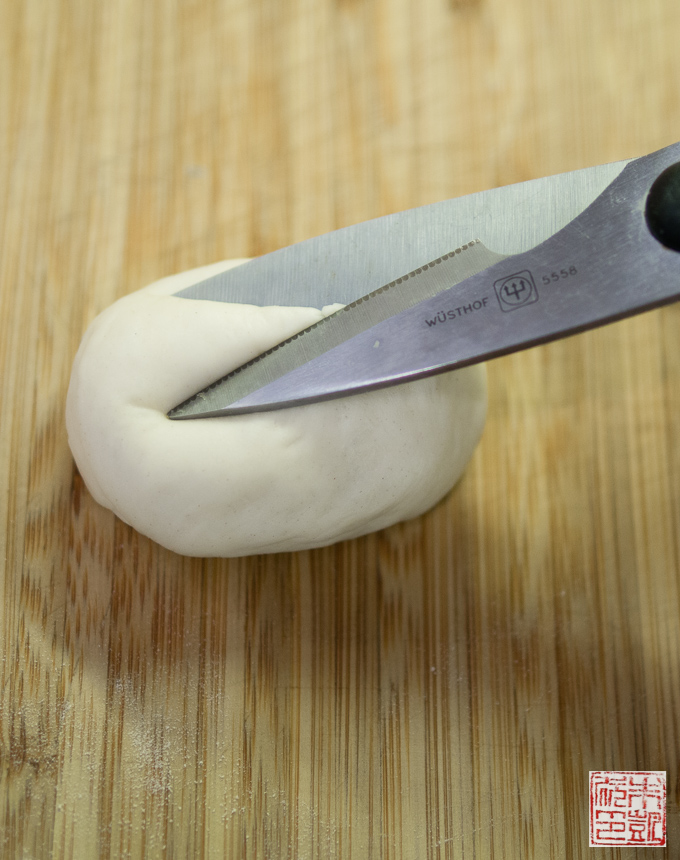
Tip #2: To make the bunny ears, lay a pair of kitchen shears flat against the top of the roll. Snip to make a triangular point of dough. I found though that digging the points of the shears deeper in as you cut will help you cut a bigger point – one of the problems I encountered was that if you cut too shallow and short of a point, you won’t have enough dough to form a long bunny ear. You can also make additional snips to cut more dough free if it seems like the point is too short.
Tip #3: By the way, I also discovered that making your rolls smaller will not only help them keep their shape better, but it makes the ears more proportional to the body. I divided my recipe below into about 16 pieces, 35 grams each. If you have a giant roll of dough, unless you’re able to cut a long point of dough with some super long scissors, it will end up looking like a tiny cat ear against the body. Keep the roll small and you won’t have to work and stretch the ears so much to make them look rabbity. Make sense?
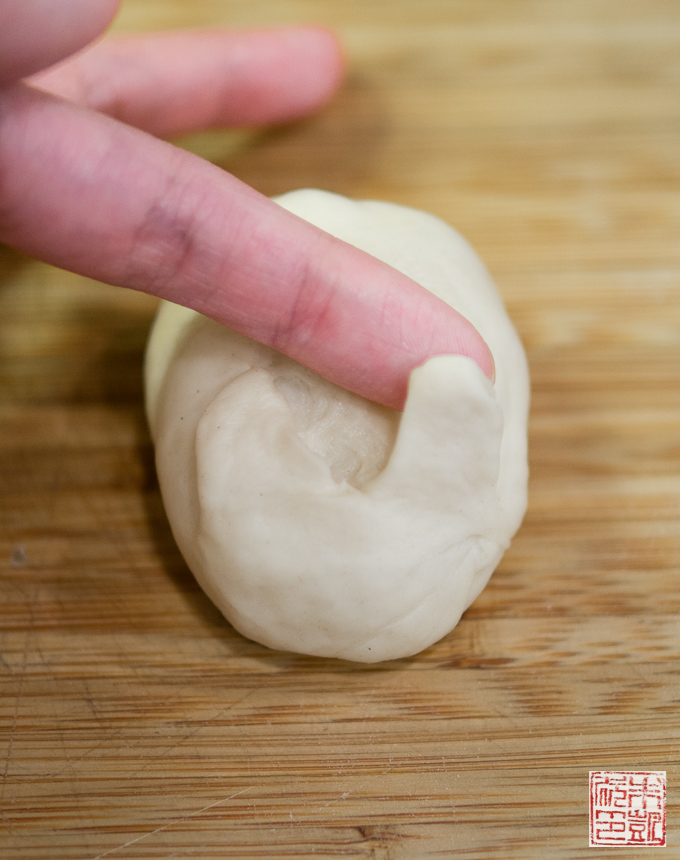
Tip #4: Once you’ve cut the ears, the next thing to do is to press and form the dough into rabbit ears. If you don’t, the ears will stay pointy and the resulting roll will probably look more like a cat. So this method is actually good for making cat rolls too, if you’re not into bunnies. The dough will shrink back a bit, so the trick is to try and stretch out the dough as long as you can without making it too thin. You can let the ears lay flat against the roll after you form them; this will prevent them from burning as they might if they were sticking up.
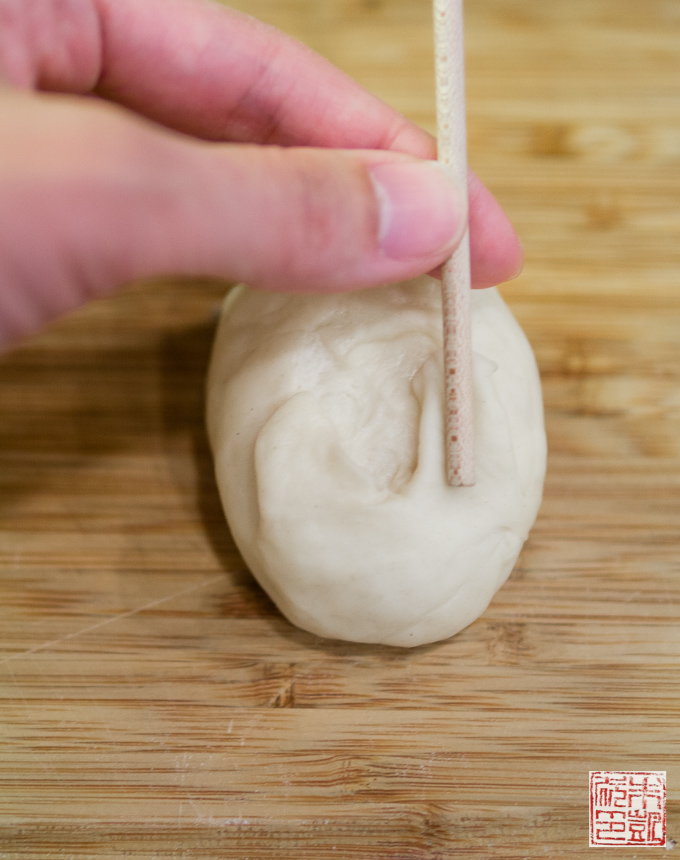
Tip #5: It helps immensely to have a thin wooden dowel or other small rounded tool to help press in the dough and make the ears look more realistic. If this seems like a bit of work – it is! It can be pretty fiddly to get the ears just right, but after a couple rounds you should get an idea of how you need to form them to bake up looking nice and rabbit-y.
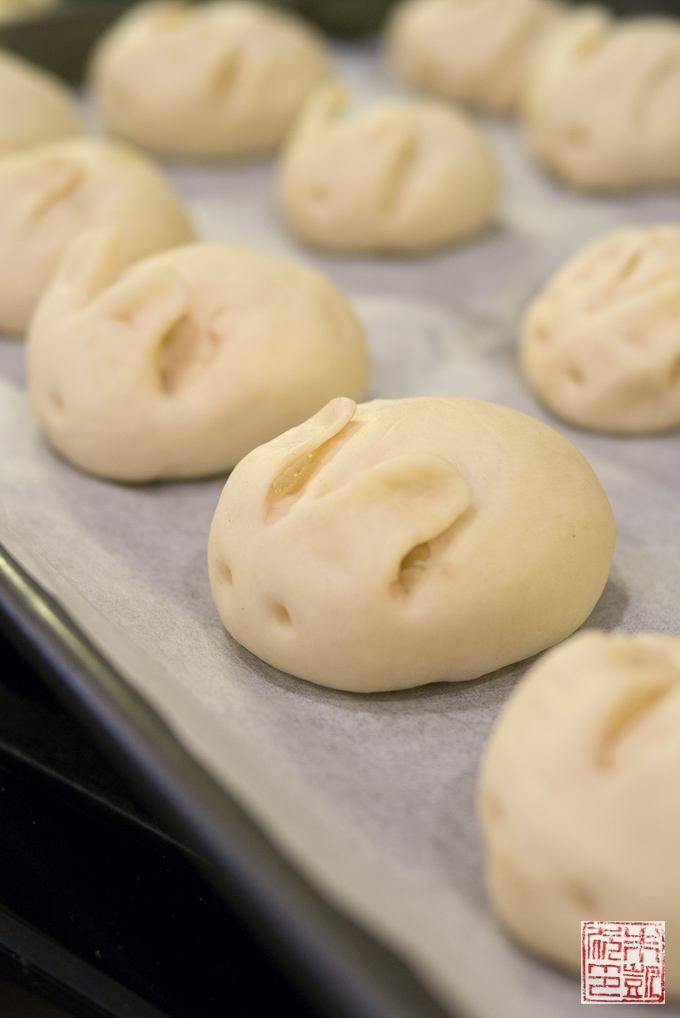
What the shaped rolls look like before baking. You can see after the second proof they are nice and round and puffy. You can also take this chance to fix any of the ears before you bake off the rolls.
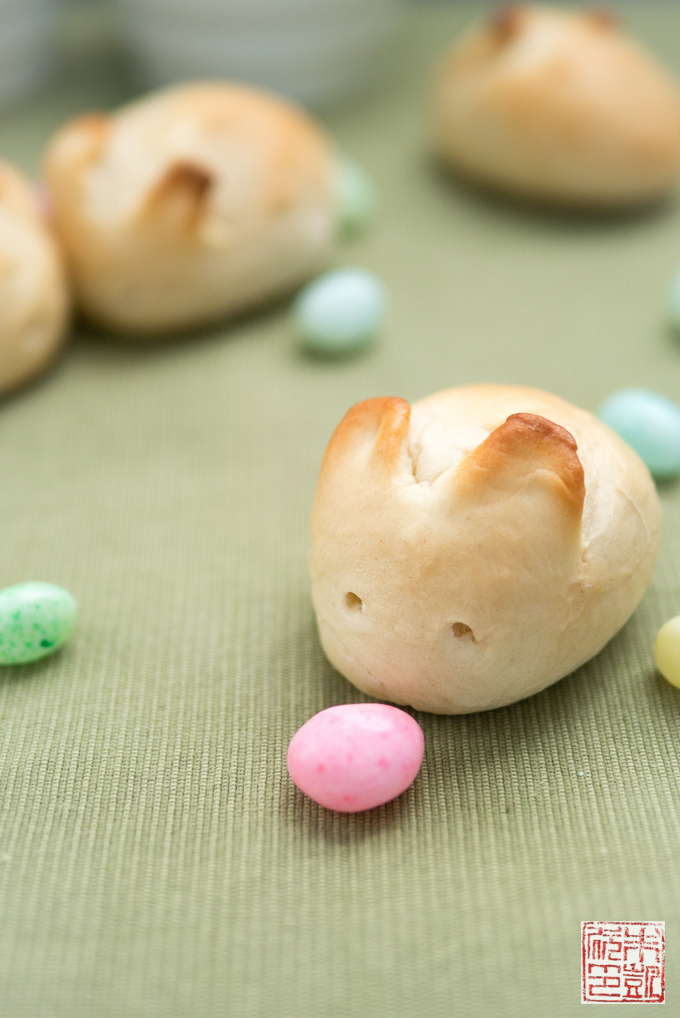
After baking: not too bad! One of the things to note is that the rolls will naturally expand as they bake, so even if you’ve tried to form the bunnies carefully they might still end up looking like round blobs and not very bunny-like. That’s why I think keeping them small will help keep them more compact – that plus making sure they are firmly oblong-shaped so they stay rectangular as much as possible.
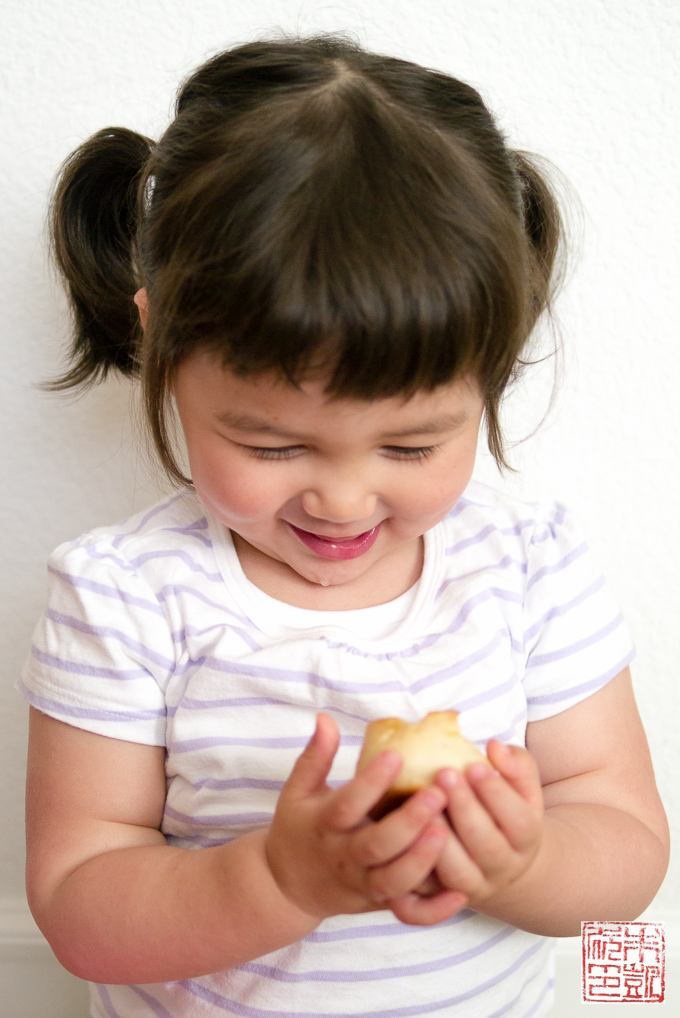
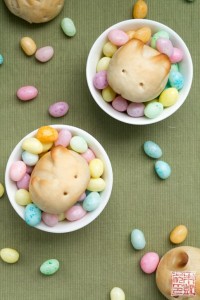
Although the primary appeal of these buns is obviously their cute looks, they taste pretty good as well. I knew the final iteration of this recipe was a winner when Isabelle kept asking for another roll (not just to hold, but to eat). They are ideal anytime rolls, soft, slightly sweet, perfect with butter and jam or for scooping up sauce at dinner. And they would make a very cute Easter centerpiece. Hopefully some of the tips I’ve discovered will help you make your own adorable bunny rabbit buns of your own.
Happy Easter!
- 100 mL (100 g) water
- 80 mL (83 g) whole milk
- 2 teaspoons active dry yeast
- 250 g bread flour
- 50 g cake flour
- 50 g sugar
- 1 teaspoon salt
- 45 g unsalted butter, room temperature
- extra milk for brushing
- Combine water and milk in a microwave-safe container and heat in microwave. It should be at 108-110 degrees F to develop the yeast (any hotter and it will kill the yeast).
- Combine yeast and milk mixture and 2 teaspoons of the sugar in a small bowl and let stand for about 5-8 minutes until yeast is bubbly.
- Combine the flours, remaining sugar, and salt in the bowl of a stand mixer. Add in the yeast mixture.
- With a dough hook attachment, mix all the ingredients until it comes together into a soft, sticky dough.
- Add in the butter and mix to incorporate. Continue beating the dough for about 5-10 minutes until the dough is smooth and elastic. You should be able to stretch the dough out fairly thin without it breaking (the windowpane test). If it breaks right away when you try to stretch, mix it for a couple more minutes.
- Turn out the dough into an oiled bowl and cover with plastic wrap. Let proof for about 40-60 minutes until dough has doubled in size. The amount of time this takes will depend on the ambient temperature. I like to leave the bowl on top of the stove (no burners turned on) but with the oven turned to 250 degrees.
- When the dough looks like it has doubled in size and is puffy to the touch (if you poke the dough it should hold the indent and slowly fill back in), take the dough and split into 16 equal pieces. Roll each piece into a ball. Place on a baking sheet lined with parchment paper. Cover with plastic wrap and let rest for 15 minutes.
- Handling the dough gently, form the balls into more oval shapes to make the bunny's body. Use a pair of kitchen shears or scissors to snip two triangular points at one end (see photo in blog post).
- Carefully form the points into long bunny ears. Use a wooden dowel to help shape them. Try not to stretch the dough too thin and let the "ears" lay back against the body to help prevent them from over browning while baking.
- Cover with plastic wrap again and let proof for another 40 minutes until the rolls look like they have doubled in size again and are soft and puffy.
- Preheat oven to 350 degrees F while the rolls are proofing for the second time.
- Brush the top of the rolls with a little milk. Place in the oven and bake for about 15-20 minutes, until the tops are golden brown.
- Turn out rolls onto wire rack and let cool before eating.


The weather in my part of the UK is horrible right now! It’s raining!! 🙁 but your Spring coloured pictures have cheered me up and I’m imagining the smell of fresh baked bread.. mmhhh! x
Ah! These are seriously so cute and creative!! How fun 🙂
Cutest little Easter rolls ever. I bet the kids think these are the best.
These are great!
Oh how cute…I may need to make these
These are the cutest rolls in the world! My daughter would love these!
Oh my gosh oh my gosh! I HAVE to make these!!!! How adorable are they! Is it wrong that I’d rather hold one and admire it’s cuteness than eat it? lol
Now that is a super cute bread idea for Easter!
These are adorable – I think that sweet face says it all!
These are just too cute and the photo of your daughter holding a bunny roll is just priceless!
I just love your detailed photos~ These bunny buns are so, so cute and so wonderful Easter!!
The look of delight on your little girl’s face says it all! Great tutorial!
Oh my gosh, they’re perfect! You did just a great job on making them! Perfect for Easter!
oh my goodness these are adoreable!! They look pretty intimidating, but with all those great tips i might actually give them a shot.
Great idea for the kids.
These are so cute! I wish spring would get it’s butt in gear here in NY. It snowed this morning…sigh.
Omigosh, these are just too cute for words. I love how turn a simple bread roll into something really special for Easter. Can’t wait to try!
OMG! I’m dying of cuteness! I *HAVE* to try these myself!