SF Cooking school macaron class
It’s been a while since my pastry school days, and oftentimes I feel the itch to get back into class to keep up with the newest trends, brush up on old skills, or just to be around some nice shiny professional equipment again.
After talking to chef Nicole Plue about her role as the instructor for SF Cooking School’s professional pastry program, I was eager to have the chance to see her in action. My opportunity came with the pastry workshops for enthusiasts she’s also teaching. These intensive classes are usually three days long and focus on specific topics like laminated doughs or breakfast pastries. One came up on the schedule that really caught my eye: macarons Pierre Hermé style, using recipes from his gorgeous cookbook MACARONS. You can never get too much macaron making practice, so thanks to Jodi, the head of the SF Cooking School, I was in!
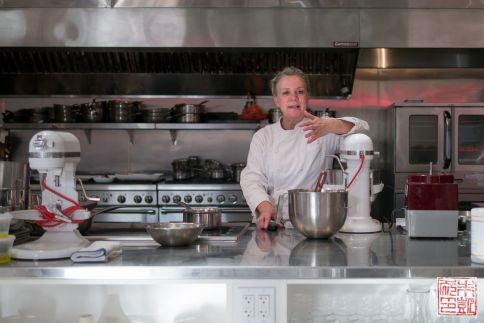
Chef Nicole Plue
Although the workshops are geared towards home bakers, they are also appropriate for professionals who are looking to sharpen their skills. Mainly this is because Chef Plue is such a dedicated and knowledgable instructor. I found her to be very patient and encouraging while embodying the precision that is the hallmark of the pastry profession. While she was demonstrating techniques, she would continually describe what to look for and how to tell when something was done whipping or emulsifying, etc, while also giving pointers about why things might go wrong and possible remedies. For example, what to do if your cooking sugar crystallizes, what to do if your meringue is overwhipped – basically all the pitfalls and hazards that anyone who’s made macarons have encountered. Essentially if you have any questions about anything, she will do her best to answer it.
Since I’ve made macarons before, I brought some of my questions about various problems I’ve had, and she took the time to give me thoughtful answers and suggestions. This is probably one of the key tips I can give about going to pastry school or any class in general: the more you put in, the more you’ll get out of it. Especially with an instructor like Plue who’s so generous with her help – that’s an invaluable resource!
macaron tips
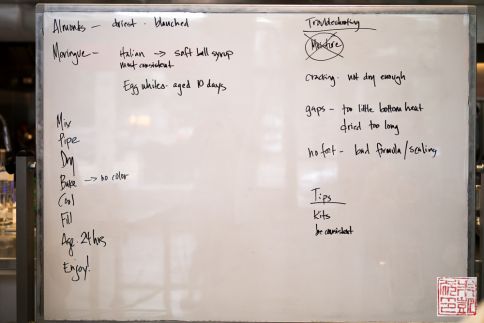
Chef Plue’s macaron method and basic troubleshooting. Pierre Hermé uses the Italian meringue method for his macarons, which I also prefer. I’ve gone into detail about the method in my own macaron post, so head on over if you want to see some more discussion. Some of the tips that Chef Plue passed on in the class:
– She firmly believes in aging the egg whites, which will dry them out and help them whip up better. Take them out of the refrigerator a few hours before making macarons to let them come to room temperature.
– She prefers using almonds to make macarons, because they are the driest of all nuts. I’ve used other nuts to make macarons before – it’s possible, obviously, but I think the idea is that using other nuts may affect the outcome because of the different moisture/oil content, so just be aware when you’re experimenting.
– She is a stickler for consistency. I’ll come back to this a little later, but she emphasized the need to use a scale and thermometer for proper measurements, and to use the same baking sheets and oven if possible for consistent results.
Here’s the brand of ground almonds that the school used. I like my macaron shells smooth, which means a lot of painstaking work grinding and sifting almonds (even using pre-ground almonds like this, we still gave them a quick spin in the Vitamix). The better the quality, the easier it will be to get a nice fine grind. You can order this brand directly from their website.
For each day of class we got to make a batch of macarons and then fill and decorate them as we liked. Chef Plue had already made all the fillings beforehand, but we had time to make one or two of them ourselves for practice. The fillings ranged from traditional favorites like lemon curd and chocolate ganache to some of Hermé’s signature ones like salted butter caramel cream (dreamy), lychee rose (Ispahan, I can’t quit you), and olive oil vanilla (might be a new favorite). There was plenty of room and equipment for everyone to have the space and time to make what they wanted. Some of the especially ambitious students even brought in their own ingredients to customize their macarons, like the guy who made his own s’mores macs.
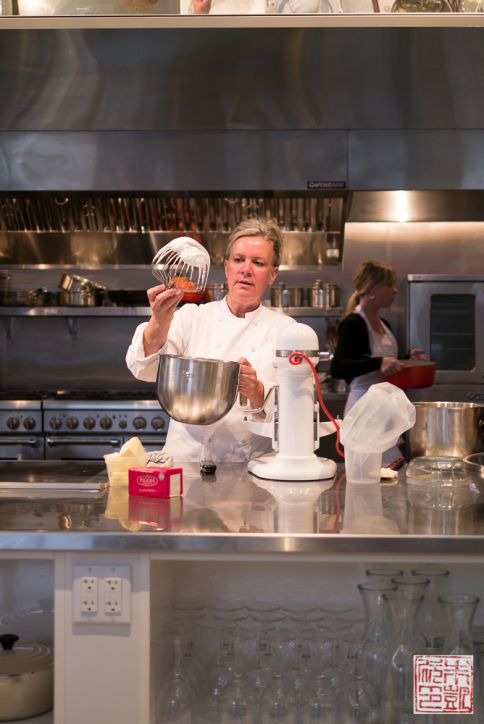
Here is chef Plue demonstrating how the Italian meringue should look after whipping. Going back to the consistency thing, one of the things I noticed after making macarons three times in a row was how much the little differences in making the batter could affect the outcome. On day 2, my macarons had really big, fluffy feet, which Plue attributed to me perhaps over whipping the meringue a bit. On day 3, one tray of macarons baked much faster than another one, because they were in different ovens.
The thing is, as I’m sure most of you who have made macarons know, is that they can be devilishly confounding. Even chef Plue admitted that sometimes she was stumped when a batch came out not quite right. There are so many different factors at play that the only way to get really good macarons is to keep making them, again and again. Which makes sense, like any other skill. I appreciated that we had three days to practice making macarons (I don’t often have a reason to make that many at home!) so I could really get my technique refined by the end of the workshop.
I asked her about some of the tips and tricks offered up in various cookbooks and the internet, like double panning, propping open the oven door while baking, using silicone baking mats. Her response was that most of these were probably developed in response to different baking conditions, like a conventional oven where the heat coming from the bottom element was too hot so double panning prevented the bottoms of the macarons from burning. So it’s not that they tips are wrong, but they may or may not be useful for your particular setup. You can try them and see if they improve your macarons, but if they don’t, there’s no need. Conclusion: don’t believe the one-size-fits-all “foolproof” methods flogged elsewhere – you still need to use your own baking judgment.
She did mention that if that recipe is sound, like the Hermé one, it should generally work out. If the macarons are constantly turning out wrong, it might be a bad recipe. So again, find a recipe and method that works for you and stick with it!
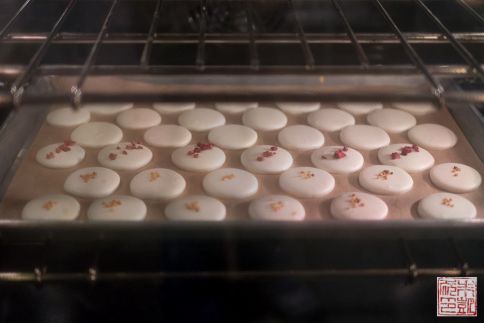
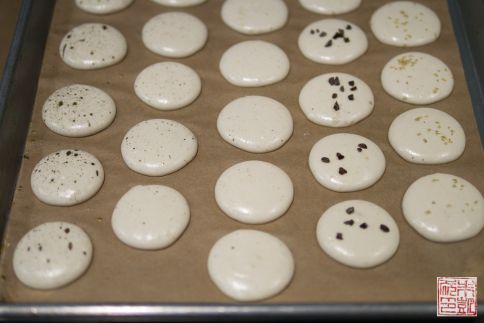
Freshly piped macarons ready for decorating and “curing”. Chef Plue mentioned that she wasn’t a big fan of coloring her macarons (although Hermé is famous for his brightly colored ones) but she loves decorating with all sorts of toppings.
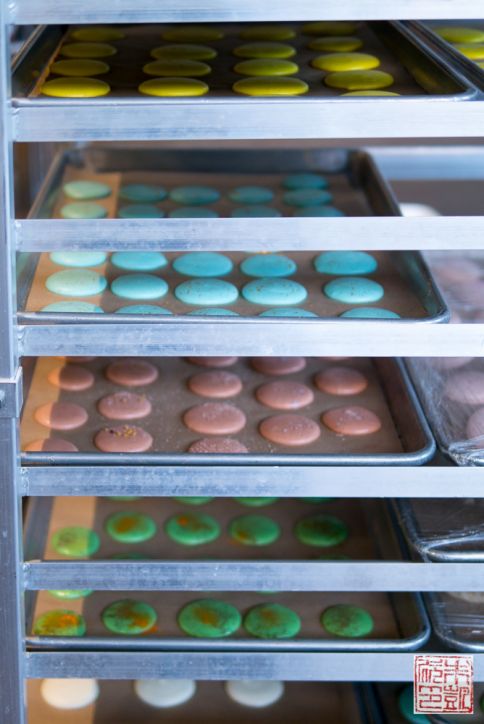
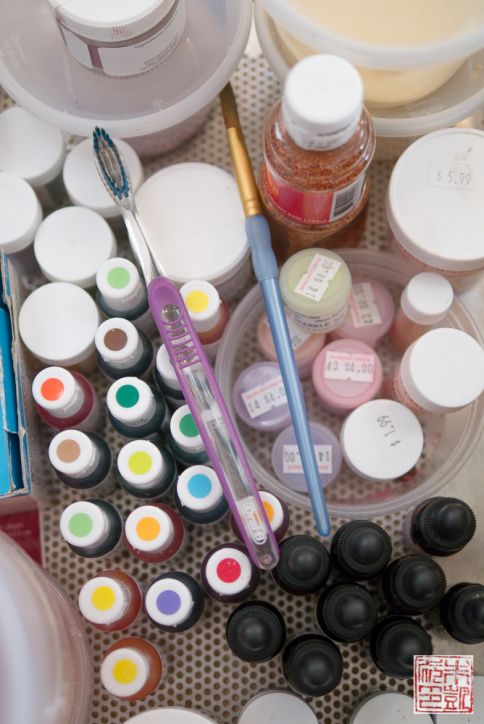
Of course that didn’t stop people from playing with the huge range of colorings laid out for us to try. Here are everyone’s macarons drying away on the speed rack.
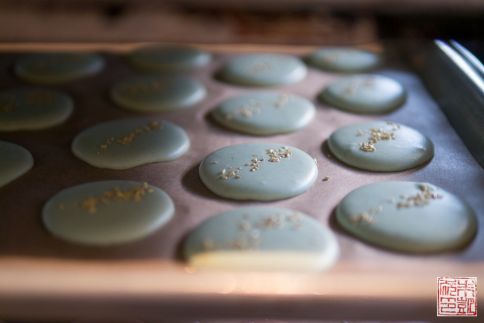
Bee pollen adorning the tops of these macarons. One of the nice luxuries of taking class at this school is all the wonderful, top-flight ingredients available for us to use. While I might not be able to use Valrhona every day in my kitchen, or be so profligate with the gold leaf, it was lovely to be able to play around freely with decorating powders, Valrhona chocolate, cocoa nibs, and glitter.
From left to right, the three fillings we did for day 1: Lemon curd, Valrhona 64% chocolate ganache with dried raspberry bits and pistachio bits, and coffee white chocolate ganache. All the fillings were from the cookbook; although I’m familiar with his lemon curd and chocolate ganache recipes, the coffee white chocolate was a revelation.
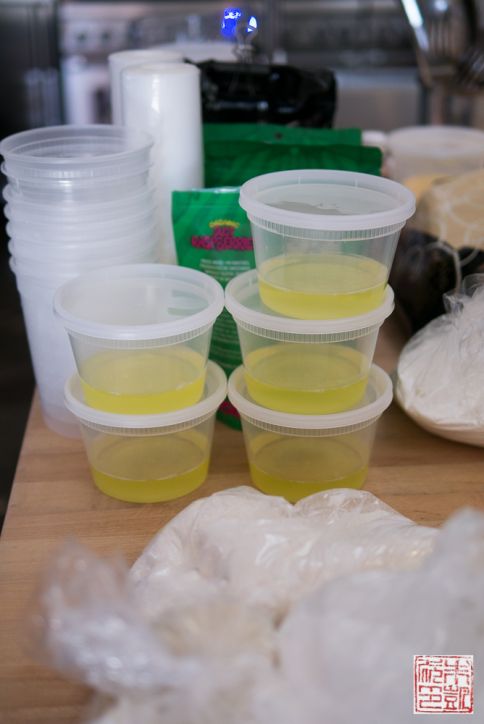
sf cooking school macarons mise
The importance of mise. One nice thing about this class is that since it’s an enthusiast class and not a professional class (this is not to say that the level of instruction was any less), we had such niceties as having our ingredients pre-weighed and prepared for us, and we didn’t have to clean up the kitchen afterwards. I actually felt really guilty about that, after working in professional kitchens!
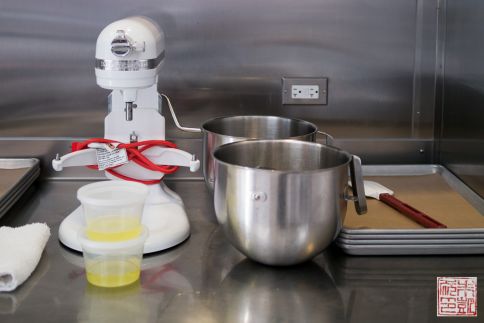
The setup at each of our stations. Note the two mixer bowls, one for the almond meal mixture and one for whipping egg whites, and the stack of prepared sheet trays. In general I found the kitchen well stocked, the equipment clean and modern, and chef Plue and her assistants were quick to bring us anything we needed. Nicely done.
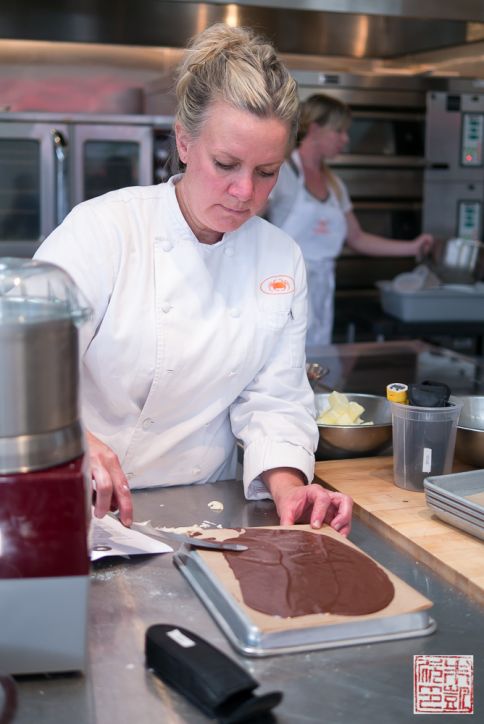
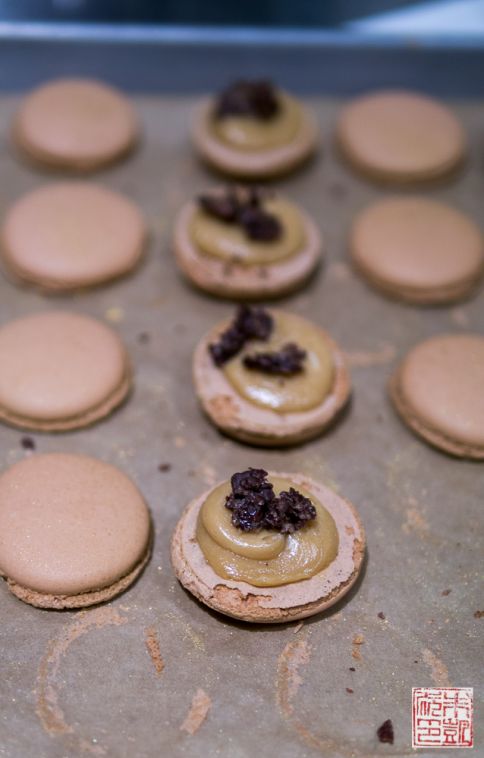
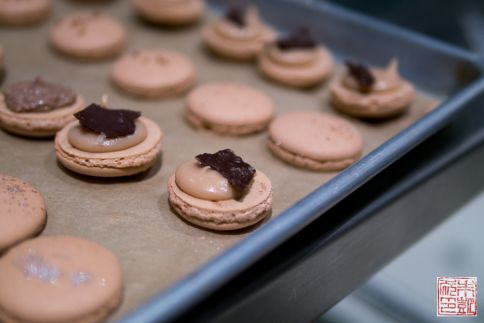
Chef Plue on day two, demonstrating how she creates the chocolate “shards” to be used in the macaron filling. Another concept she drew out of Hermé’s book was inclusions: adding something to the filling for flavor and textural contrast, such as pate de fruit, fresh or dried fruit pieces, chocolate bits, etc. She mentioned that now when she makes her own macarons she always adds one of these “third elements”.
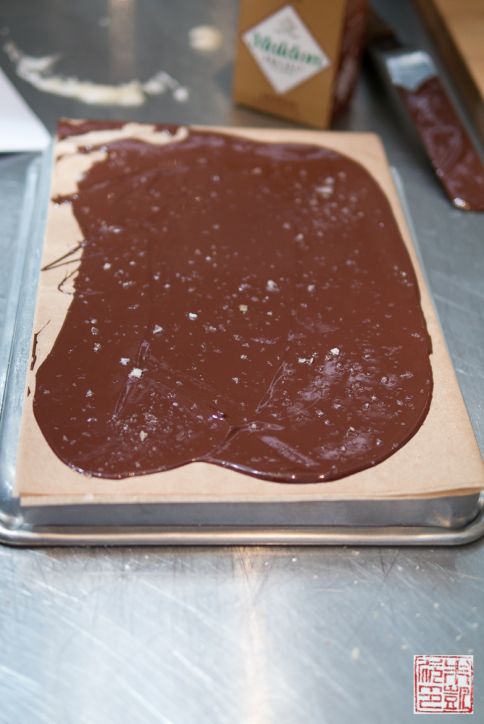
The chocolate layer, sprinkled with sea salt and ready to be placed in the refrigerator to set. Afterwards you can break off small pieces to place on the macaron filling.
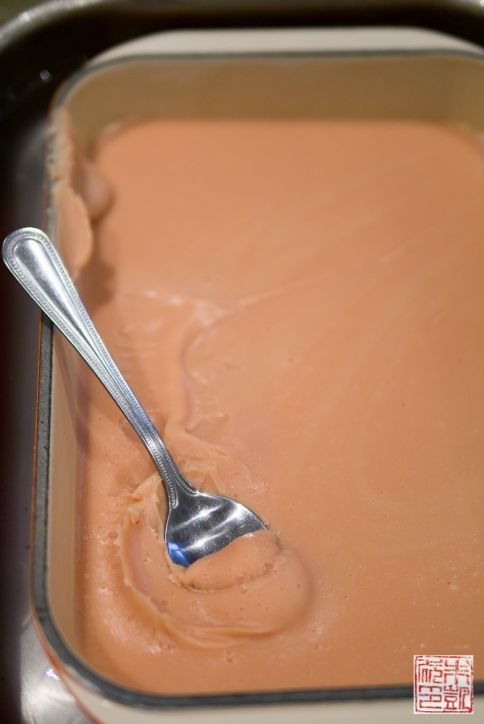
A pan of blood orange curd. Chef Plue was a big fan of Hermé’s fruit-and-white chocolate ganaches. After tasting this one, I could see why: tart, fruity, and creamy, and the perfect consistency for sandwiching between macarons.
An example of the “inclusions” theme for day two. This is salted butter caramel cream with some chocolate feuilletine.
Here’s the blood orange curd with pieces of the chocolate sheet on top. Although it’s extra work to add to the already not-inconsiderable number of steps in making macarons, I agree with chef Plue that it’s totally worth it to create some really interesting and memorable combinations.
Decorating inspiration. Colors, powders, glitter galore.
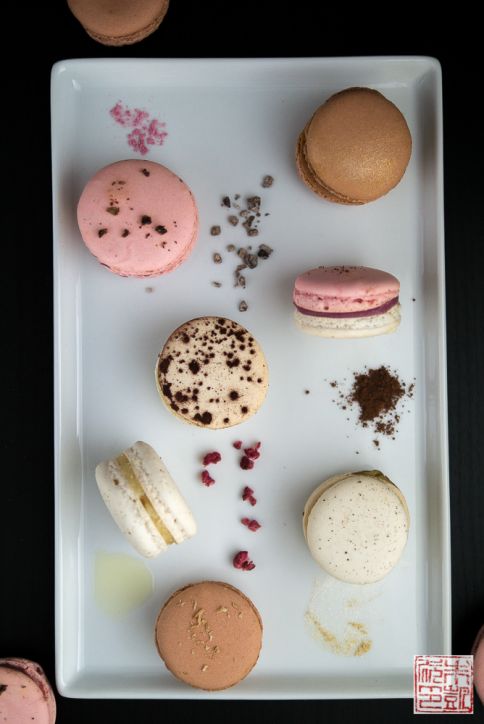
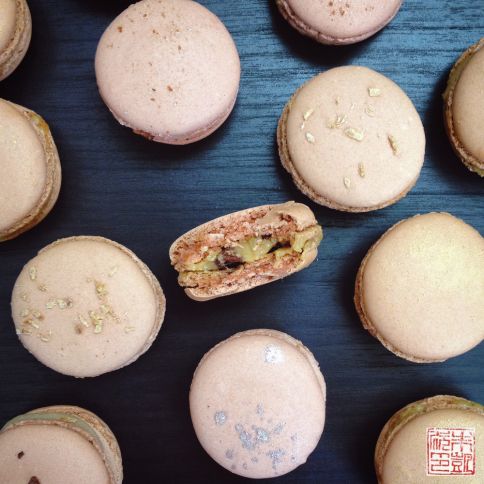
Some of my macarons from the second day: milk chocolate coconut ganache, blood orange curd with salted chocolate shards, and salted caramel buttercream with chocolate feuilletine.
For the final day, we were encouraged to get creative and make up our own combinations or try some of the ones from Pierre Hermé’s book. Some of the fillings we made included: rose and lychee, lime and basil cream, olive oil and vanilla, and milk chocolate and passionfruit.
For the macaron beginner, this would be a great introduction to get over your fear of making these little guys. There’s plenty of time to practice, a great kitchen setup, good recipes, and a passionate instructor to guide you along. For the veteran, this is a good place to brush up on your skills and get a little inspiration. (One of the students in the class was a graduate of the professional culinary program who had only learned to make macarons with the French meringue method, and wanted to try out the Italian meringue method). The atmosphere is relaxed (I especially enjoyed the 70s soundtrack in the background) and I got to meet some other pastry lovers, both amateur and professional.
Thanks to Jodi, Nicole, and the SF Cooking School for letting me be part of this class. I had a great time honing my macaron-making skills and I was really impressed by the organization of the class and the school. Check out the schedule for future classes both sweet and savory. Also, if you want another review of chef Plue’s workshops, my good bud Irvin attended her laminated doughs class.
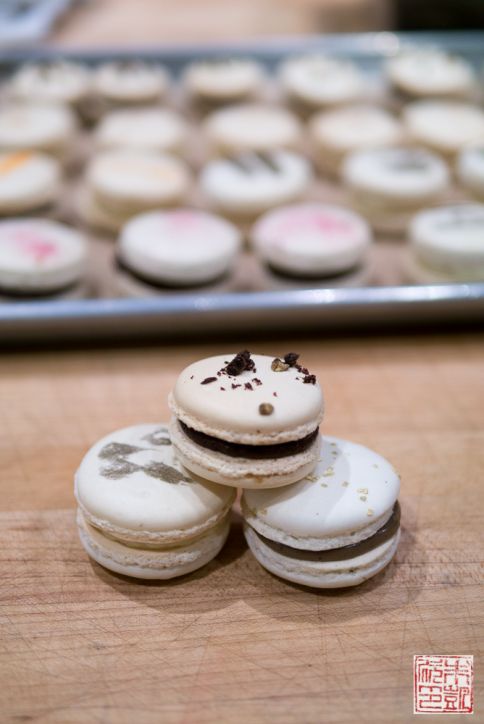
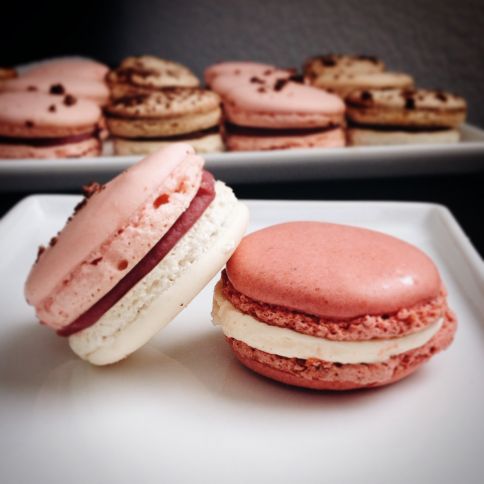
Some of my final macarons. The macaron on the right is actually a real Pierre Hermé macaron from one of his Hong Kong boutiques – my parents came into town to visit at just the right time for me to do a little taste comparison!
I was invited to be a guest for the macaron workshop at SF Cooking School. I was not compensated for this post and all opinions are my own.
Lychee and Rose Ganache
- 400 g lychees
- 410 g white chocolate
- 60 g heavy cream
- 3 g rose essence
Macarons
- 300 g powdered sugar
- 300 g almond meal
- 110 g egg whites
- 300 g granulated sugar
- 75 g water
- 110 g egg whites
For the ganache:
- Drain lychees. Blend with immersion blender to achieve a fine puree. Strain and measure out 240 g of puree.
- Melt chocolate over a pot of simmering water. Take off heat.
- Combine cream and lychee puree in a saucepan and bring to a boil. Pour over the melted chocolate 1/3 at a time, mixing well with each addition to form a shiny emulsified mixture.
- Add the rose flavoring to taste and stir well. Pour ganache into a gratin dish and press plastic against the surface. Refrigerate to thicken.
For the macarons:
- Preheat oven to 160 degrees C/320 degrees F. Grind together powdered sugar and almonds. Place in a bowl of stand mixer fitted with the paddle attachment.
- Add 110 g of the egg whites. Mix to obtain a firm consistency. Color may be added at this stage.
- Place remaining 110 g of egg whites in a clean mixer bowl. Fit mixer with whip attachment.
- Combine granulated sugar and water in a saucepan. Cook to 118 degrees C/244 degrees F. When mixture reaches 104 degrees C/220 degrees F start whipping the egg whites to soft peak.
- Pour sugar syrup over egg whites while mixer is still whipping. Whip until meringue cools to 40 degrees C/104 degrees F.
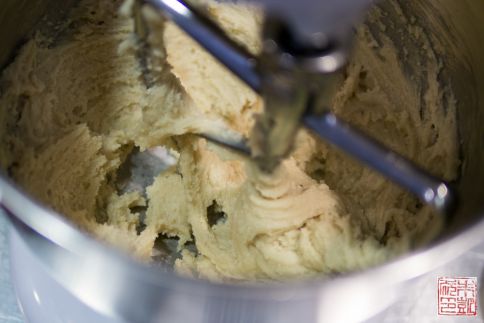
- Add 20% of the meringue mixture into the almond meal mixture and beat with paddle attachment until incorporated. Fold in remaining meringue.
- Pipe onto baking sheets lined with parchment paper. Let sit uncovered until surface of each macaron is dry to the touch, about 15-20 minutes.
- Bake for 18 minutes until done. Let cool before removing and filling with ganache. Let filled macarons rest for 24 hours before eating.


Do you have a cook book that I can buy for pastry items?
Hi Joe,
I’m not sure I understand your question. Do you mean if I have my own cookbook? I have written cookbooks on cookies and candy, if you are looking for general pastry books, click on “shop” in the upper right hand side of my site and I have recommendations there. Thanks!
Hi there, love the post! 1. Where do you let the filled macarons REST for 24 hours – in the refrigerator? In an airtight container?
2. Did you add flavor to your macaron shells? Or just almond or vanilla extract? Does Pierre Hermes flavor his shells?
Hi Ann-Marie, 1. I would let them rest in the refrigerator. Bring them out shortly before serving to let the fillings come to room temperature.
2. No, I didn’t. Although many other macaron recipes add flavoring, Pierre Herme actually believes that all the flavor should come from the filling. His macaron shells are always just made with almonds – sometimes cocoa powder is added for the chocolate ones, but otherwise it’s just coloring. Hope this helps!
Thanks for sharing your experience. I wish I could attend this course one day – a bit far from Canada at the moment 😉
I wonder if you could offer some advice on making such a large batch of macaron biscuits. I find I get the best results if I don’t have more than one tray of macaron’s baking in the oven at once. However, with a typical batch (or even half) of Pierre’s recipe, I am afraid that baking one tray at once could result in later batches staying out too long.
Have you had any problems leaving out subsequent 2 or 3 trays while you bake?
Any advice is greatly appreciated!
Hi Kang,
Thanks for e-mailing! It is true that you get best results from baking only one tray of macarons in an oven at one time. That said, I have not found a problem with making a whole recipe and baking the trays one by one. While it’s true the later trays may be sitting out for a little longer than the first, as long as you bake them one after the other and don’t leave the trays out for hours, I don’t think there should be a big effect in the results. Good luck and happy baking!
Hi….love your blog. Btw…is rose essence is the same with rose water?
Hi Linda,
Thanks for your kind words! Rose essence is more concentrated than rose water, so you would use less of it than rose water, but if you can’t find it, you can substitute rose water in a pinch! Hope that helps!
Hi, what measurement units are you referring to “3 rose essence?” Also, If I were to substitute it for rose water instead of essence, how much (including you specifying the measuring unit) would I put in according to your recipe? Thanks!
Hi, thanks for catching that! I meant 3 grams of rose essence. Rose essence is a more concentrated form of rosewater, so you can use about 10 g of rosewater in place of the rose essence. Thanks!
Good day,
I noticed that you bake your macaron shells at 320 degrees for 18 minutes. Ive made experiments with my macarons and this temp doesnt work for me. maybe placing them on the middle rack?
Thank you…
Hi Abegaile,
Can you let me know what you mean by this temperature doesn’t work? Are they underdone? Are you placing them on the bottom or top rack instead? I would try adjusting the temperature up or down as needed, and see how that works for you.
Hi Anita,
I find Macarons made with the Italian method to be a lot sweeter than the regular way. Unfortunately the italian method is “almost” foolproof and is used primarily for production. Did you find the Herme recipe very sweet as well? What I dislike most about macarons is tasting sugar before actually tasting a flavor. Thxs!!
Hi Iman,
It’s difficult to adjust the proportions for a macaron recipe too much because then the macarons won’t turn out properly. So I would say these macarons are about as sweet as most macarons made with the Italian meringue method. I don’t find them too sweet, but that may be because I’ve gotten used to them. I do agree that they are less sweet made with the French method. If you feel comfortable that you can make Italian meringue macarons successfully, you could try experimenting with reducing the amount of sugar and seeing if it will still work. I also tend to use less sweet, more rich fillings like ganaches rather than buttercream which also help cut down on the sweetness. Hope this helps!
Hi, I was wondering what type of almond meal was used to make the macarons? Did you use blanched or natural almond meal?
Hi Cre,
I used blanched almond meal but you can use natural (I assume that means with the skins still in). It will give your macarons a flecked appearance. If you don’t want that, use blanched almond meal. Hope that helps!
What is the best type of coloring to use?
Hi Julia,
Some professional chefs recommend powdered food coloring for the best results, however I think gel food coloring works well to and is relatively easier to find. Don’t use liquid (water-based) food coloring as too much will affect the texture of the macarons. I also find it’s not strong enough to give vibrant color – gel or powder is definitely more effective. Hope that helps!
Hi,
how many macarons does this recipe make?
Hi Kachina,
This recipe makes about 144 shells, or 72 filled macarons. Hope that helps!
hi,Anita, I am struggling from making a non-hollow mac for about 2 weeks now until I saw your page. I can get a nice shape with pretty feet mac now, but hollowness haunts me still.I use oven for home use and the heat is only coming from the bottom. The best version so far is to put double-panned mac to the 2nd rack at first, and move it the middle rack when the feet came out, and using parchment paper. But sometime it works, sometime not. So do you have any suggestions? thanks
Hi Ranitahe,
I still get hollow macarons myself from time to time – I think it is because there are so many factors that can affect it, like the temperature and humidity of the kitchen, how long you beat the egg whites, etc. Don’t be discouraged! Two things you could try: 1)Make sure you knock the air out of the macaron batter by folding the whites thoroughly into the mix. It’s a balance between over-mixing and turning the batter into liquid, and deflating the whites enough so that the air bubbles don’t turn into hollows when baking. You’ll have to practice to see what technique works for you. 2)Bake your macarons a little longer to help dry them out – sometimes if the batter isn’t fully baked, it will collapse while cooling, leading to the empty space. You might end up with slightly crisper macarons, but you can always fill them and age them in the refrigerator for a day and they should soften up. Hope these tips help. Happy baking!
Hi, I’m a little confused by the directions. The list of ingredients says 110g of egg whites. The directions say to add 110 g of egg whites to the almond mixture. Then it says to put remaining 110g of egg whites in clean bowl for whipping. Is there supposed to be 220g of egg whites total (which seems like a lot of eggs)? Or is there supposed to be a total of 110 g that is divided into 55 g in each step?
Thanks!
Hi Ashley,
There is a total of 220 g of egg whites. You’ll see in the ingredient list that 110 g of egg whites are listed 2nd and last. That is two separate measurements of 110 g. I am out of the country right now but as soon as I can I will double check my sources and make sure this recipe is correct. Thanks!
Thank you for the reply. I just noticed it was on there twice.
THANK YOU for sharing this!! My first attempt resulted in crooked macarons (for half the batch) and macarons that were a little crunchier than I’d have liked, but the second time around I made sure not to over whip the meringue and I also aged my egg whites for 4 days instead of 2. I also made sure to watch the sugar so that it didn’t go above 118C.
They turned out BRILLIANTLY!! I made a Lychee ganache (my Rose extract went bad after a few years….) and it tasted super yum. Now I don’t feel like I have to buy Laduree or PH macarons again! Hehehe
Thanks so much for the report, Nancy! So glad to hear you found macaron success! Hope you continue to have fun making them!
Hi,
I’ve been trying to make French macarons but I just can’t seem to get it down perfectly. So I saw your recipe for Italian macarons but I was wondering if you had any recipes for Italian macarons that yields less shells/filled macarons. Probably something using around 1-2 eggs worth of grams of egg white. Thank you so much! ^^
Hi Brian,
Thanks for visiting my site! So I know it seems like the recipe makes a lot of macarons, but in my experience making macarons is such a tricky process that having the right proportions of ingredients is key. I think that trying to make macarons with only 1 or 2 egg whites is pretty hard to do consistently – small amounts of egg whites don’t seem to whip up very well in a stand mixer. With the smaller amount of batter it’s also easier to overbeat while trying to combine everything together. If you really want to try it, I would just half the amounts in my recipe – 75 g of egg whites is a little more than two egg whites. However, I think it might be easier to just make the recipe straight and freeze any macarons you don’t want to use right away – you can defrost them later and having extra macarons is never a bad thing. good luck and let me know if you have other questions!
I know this sounds super silly but with regards to “Pour ganache into a gratin dish and press plastic against the surface. Refrigerate to thicken”, is it still pipeable after that? Can I just stick it in the piping bag and leave to refrigerate?
Hi Nicole,
Thanks for writing in! Yes, the ganache will still be pipeable. The ratio of cream to chocolate means the ganache should never solidify rock-hard. If it does seem too firm, you can always take it out of the refrigerator to let it soften, but I’ve never had that issue. I don’t think you can put the ganache straight into the piping bag because it still be liquidy so it will just flow out of the bag. Let me know if you try it and need more help! Thanks!
Hi Anita!
I want to say thank you for shearing bits and pieces of macaron’s baking techniques. I looked through your post and found some new tips which I decicded to check immidiately and this time I’ve got the best result I ever had! No hollows, well shaped, a little-bit chewy. I am happy and thank you very much!
Hi Natalie, thank you so much for visiting my site and for your lovely words. I’m so glad my post could help you and I hope you continue to have tons of macaron-making success!
Hi Anita, thank you for your very complete explanation! Just some questions: do you make your own almond meal? Or do you use the pre ground one? Do you grind it together with the sugar and then sift? Is there any leftovers from this process? I have tried both making my own almond meal or buying it and I am having difficulties in sifting it with the sugar. I tried grinding it at a KitchenAid proline food processor but when I sift, it sticks and I have to push with my hands to have it sifted. My macarons are both hollow and overcooked at the base. I have an electric oven and I am cooking at 150-160C for 12/14 minutes, opening the oven at 8, 10 and 12 as recommended by PH. Any guessing on what I am doing wrong? Thank you!!
Hi Marina, thanks for visiting my page! I used to grind my own almonds but now there a lot of pre-ground almond meals available (like bob’s red mill) that saves me a lot of effort! If you do grind them yourself yes you have to have a lot of patience and carefully sift out the large bits and keep it from clumping together.
Your other question about hollow macarons is a tricky one because there are a lot of possible reasons. It sounds like your macarons might be baking too fast at the bottom. Do you use doubled up sheet pans to bake your macarons? Try lowering the oven temperature about 15 degrees F and seeing if that helps. Overbeating the egg whites is also another possibility, so watch your technique in beating the batter together and see if changing how you it (beating less, letting piped macarons rest) helps. Good luck!
I have a question about the meringue. In the recipe you said to add the sugar syrup and continue whipping the meringue until it was 104F. In your post, though, you mentioned that Chef Plue attributed your big feet to over whipping the meringue. How would you account for not over-whipping but also whipping until it reached the right temp? I ask because I tried this method out and had pretty unsuccessful results for the first time ever and to me the meringue just didn’t seem stiff enough at 104F but I was scared to whip more. Now I’m thinking I should have whipped more (mine turned out much flatter than I’m used to). Thanks!
Hi Dallas,
Thanks for visiting! That’s a good question you raised. I looked at several macaron recipes using this method, and not all of them specify a specific temperature. Some just say to “whip until the mixture has cooled”. My own macaron recipe on my website actually doesn’t have a temperature either! So I think the best answer as happens a lot with macarons is to do some trial and error to see what works best for you. If you run your mixer really fast like me, that might be how you end up with overwhipped meringue. It sounds like you have the opposite issue where your meringue was underwhipped – was the final macaron batter very soft and didn’t hold its piped shape? Try whipping it more next time, even if it’s already at 104, and see if that helps. When I make macarons, I usually have to make little adjustments based on so many factors, like how stiff the batter looks, how humid the day is, etc. Hope this helps!
Hi, I want to ask again just to make sure.
1) After pouring in the sugar syrup and whipping, which peak would it be? Is it soft like bird peak or stiff peak? I know it should be done when the meringue is glossy and the bowl is no longer hot. But some recipes mention either soft or stiff, so I’m confused.
2) The consistency of batter after folding: I used to get really nice ribbons but the macarons are still failed anyway. So, would it be able to make figure 8 like somebody said or not? Can you explain more?
Thank you so much!
Hi Quyen,
1. The meringue should be form a small stiff peak but should droop if you tilt the whisk – if you see the photo in my post, the tip of the meringue droops down like a bird beak. I know, the terminology is confusing! You don’t want the entire bowl of meringue to clump into one big peak – at that point it’s too stiff and you’ve overwhipped the meringue.
2. I’m not sure how your macarons are failing – are they losing their shape or baking up with problems? Making a figure 8 is a good test – you should be able to pipe it and it will keep its shape, not turn into a puddle, but you don’t want it to be so stiff that it doesn’t spread out at all.
Hope that helps! Good luck!