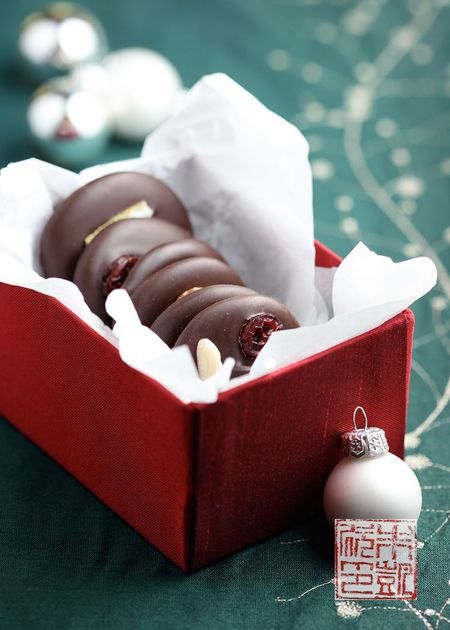
How is it nearly the night before Christmas already? I hope you all are enjoying the end to another year. It's been a full, exciting one for me – I moved to a new home, gained a new kitchen, and wrote a second book, among other things. I think 2010 may have some more adventures in store – well, I hope so, at least! Before the new year gets here, though, I still have a bit of present-wrapping and candy-making left to wrap up. I needed a quick confection to make a couple nights ago, and realized I hadn't made any mendiants yet – the perfect Christmas candy!
I love the story behind mendiants: the word means "beggar" in French, and is related to mendicants - religious orders that relied on charity, or begging, for income. Mendicant orders originated in Europe in the Middle Ages; it is from there that the classic image grew of the poor friar who has given away all his earthly possessions and lives off the charity of the faithful. The original chocolate mendiants had as their toppings four fruits and nuts meant to symbolize the colors of the robes of the four major mendicant orders of the Roman Catholic Church: almonds (Carmelites), hazelnuts (Augustins), dried figs (Franciscans), and raisins (Dominicans).
Further fascinating information: those four fruits and nuts are part of the 13 Desserts of Christmas, part of the Christmas tradition in Provence. At the end of the big Christmas dinner, thirteen sweets representing Christ and his 12 apostles, are served to finish off the meal. Honestly, 13 Desserts sounds a lot more appealing than the 12 Days of Christmas! The thirteen sweets can vary but usually include the four aforementioned fruits and nuts, dates, nougat, and more recently, a Yule log. (It's delightful the delicious information you dig up while doing research for a book on candy!)
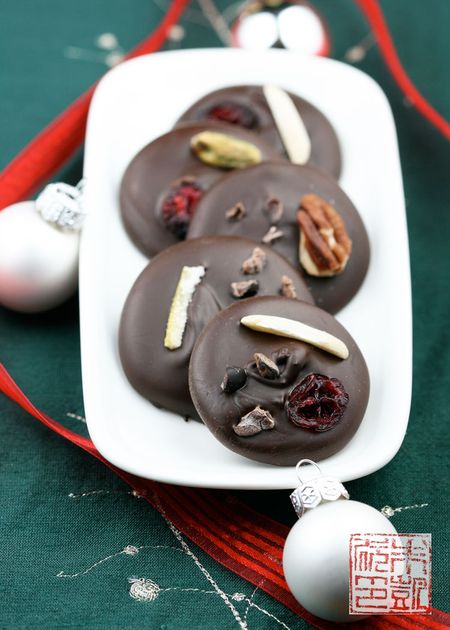
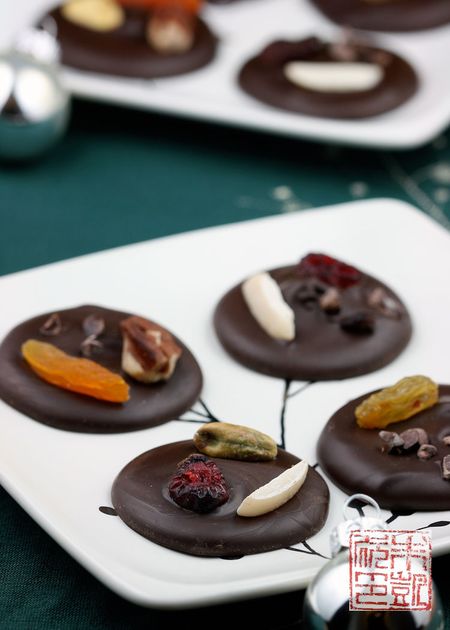
Back to chocolate mendiants. A perfect example of how chocolate works as an ideal canvas and also just makes everything better. A disk of chocolate, a dollop really, sprinkled with toppings like a bedecked Christmas tree. The original quartet of toppings has long since expanded into a nearly boundless list of things that go with chocolate – and you know these days just about everything has been paired with chocolate.
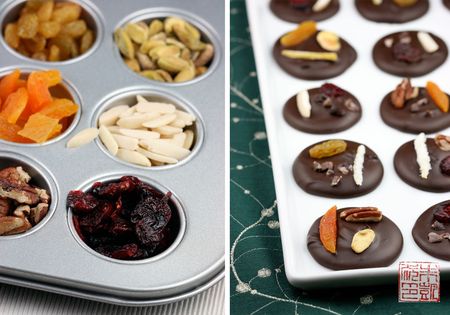
So really, mendiants are now an exercise in aesthetic and gustatory creativity. Seeing the little blank circles of still-liquid chocolate in front of me is like seeing a fresh pad of blank paper, sheets ready to be colored however you choose. There's a certain art, you'll discover, in choosing and pairing toppings for mendiants, a careful balancing act of color and shape and flavor. Cranberries with almonds with cocoa nibs? Dried apricots with golden raisins with pecans? Pistachios with candied lemon with dried blueberries? You'll realize making mendiants is also a great way to use all the various dried fruits and nuts and other bits in your pantry. What I've also noticed is that the arrangements I make on the chocolate disks tend to end up looking like smiley faces. Do you see them too?
Making mendiants is so surprisingly simple, it's something you can do at the last moment. I found it almost hypnotically relaxing to be arranging bits of pecans and apricots and cocoa nibs on chocolate while Christmas songs were playing in the background.
In my last long piece about chocolate tempering, I mentioned that the easiest and most foolproof way I found of tempering chocolate was the seed method. I got a lot of questions asking about the seed method, so I thought I'd describe it here. This is also the method I describe in my Field Guide to Candy book. Note the temperatures given are for tempering dark chocolate; they are different for milk and white chocolate.
The Seed Method (for dark chocolate)
1. Temper about 1 to 1 1/2 pounds of chocolate at a time. It's harder to temper small amounts of chocolate because it's difficult to keep the temperature of the melted chocolate stable.
2. Chop the chocolate finely. The pieces don't have to be tiny, but smaller pieces that are roughly the same size will melt quicker and more evenly – you don't want one big chunk of chocolate that will take forever to melt. If you can find chocolate buttons, they are a great timesaver.
3. Place about two-thirds of the chocolate in a double boiler or metal bowl set over a saucepan of simmering water. Make sure the bottom of the bowl does not touch the water. Also, the water should be just at a simmer – one common mistake is to have the water at a bubbling boil – too hot water and it's easy to burn chocolate. You want a nice slow controlled melt.
4. Place a candy thermometer in the chocolate. As it starts to melt, stir with a rubber spatula to encourage even melting. Do not let the temperature of the chocolate exceed 120 degrees F.
5. When all the chocolate has melted, remove the bowl from heat and wipe the bottom of the bowl down to remove condensation. You want to avoid any chance of getting water in the chocolate or it could seize up into a chunky mess.
6. Stir in the remaining third of the chocolate a little at a time, letting each addition melt before adding more.
7. The chocolate will start cooling and thickening as you add more unmelted chocolate. When the temperature of the chocolate has dropped to 82 degrees, place the bowl back over the pot of simmering water.
8. Heat the chocolate back to 88 degrees F. Be sure to stir and check carefully, so you don't overheat one part while waiting for another section to heat up. Do not let the chocolate get over 91 degrees or the chocolate will be out of temper and you'll have to start over again.
9. Spread a small bit of chocolate on a piece of parchment or wax paper. If it dries shiny with no streaks, you're good to go!
By introducing a "seed" – the unmelted 1/3 of the chocolate that is still in temper, you are encouraging the rest of the chocolate to reform its melted cocoa butter crystals in a tempered state. This is easier and faster than tempering without using a seed, since then you have to wait for the proper crystals to form on their own in the melted chocolate.
Give it a try! And remember, if your chocolate doesn't come into temper, you can always redo the process, meaning no chocolate is wasted. Once you have a nice bowl of shiny tempered chocolate, it's the easiest thing to dip truffles, fill molds, or perhaps make the mendiants below!
Happy holidays, everyone! Thank you to all my lovely readers – I hope my site has been able to tickle your sweet tooth this year, and I wish you the sweetest this holiday season!
Mendiants
1 pound bittersweet chocolate
1 cup dried fruits and nuts (Go for variety and contrast – see my suggestions above)
1. Line several baking sheets with parchment paper or silicone baking mats.
2. Melt and temper the chocolate – my preferred method is the seeding method (see above)
3. Drop small spoonfuls of tempered chocolate onto the baking sheets. The chocolate should spread out into circles; use the spoon to fix any misshapen rounds.
4. Gently place some of the toppings on each chocolate round.
5. Place baking sheets in refrigerator to let mendiants set, 15 to 20 minutes.
Store in an airtight container between layers of wax paper in the refrigerator for up to one week.


these look so nice and sophisticated . Hope I ll manage to temper the chocolate since I wish to try these. Happy Christmas to you and your family.
What gorgeous candy. PRETTY! I love your method of tempering chocolate.
Happy holidays Anita!
I’ve never had a mendiant before, but yours look delightful. The dried fruits look like jewels set in the chocolate. Beautiful!
Oh Anita, these are lovely. Absolutely gorgeous!
Going to make some tomorrow. When are you back in Texas?
Happy Holidays!
I almost forgot about these! How pretty! We used to have them as children -not sure if it was for Christmas though- and made an effort to choose the prettiest, my sis picking off the nuts of hers.
Merry Christmas!
What a great post on a wonderful treat – they look like Christmas baubles. Great idea for gifts too! Hope you have a Happy Christmas and New Year, Anita ! 🙂
I’ve always wanted to make mendiants – they just look so tasty and festive 🙂 Thanks for the summary of the seed method too; maybe I’ll get up the courage to temper chocolate someday too!
A good friend just recently gave me some dried fruit – I have been searching for the perfect recipe – I may have just found it here! Thank you!
Those look SERIOUSLY good.
Those might just be the next thing I bake.
OH.MY.GOSH :9
<3 Emily
[ http://www.iBAK3.blogspot.com ]
Happy New Year 2010! to you and family. 🙂
Happy New Year to you, Anita.
They looks so elegant and festive. Never tried one of these. Surely bookmarked 🙂
Wishing you a fabulous year ahead 🙂
These are so precious, Anita – the toppings look like jewelry!
Happy New Year!
This looks so tasty.
I have to cook it right now. Steering on this pics arent stoping my suffering
Thank you for sharing your chocolate tempering technique. I’m going to need to try it out. Beautiful mendiants…yum!
Natalie @ gluten a go go
Thank you for your detail tutorial. I just made some mendiants and they turned out beautifully! I’ll have a blog post later on and will send you the link when it’s published! THANK YOU again and have a wonderful Christmas in HKG! ^^
Still here checking out all of your posts! Anita, I made mendiants for X-mas this year too, I wonder if we were making them at the same time 🙂
Have you ever tried chocolate transfer sheets? I put a choco dollop on a transfer sheet, then added the fruit. It really adds a nice festive touch. xoxo
Hi Kat,
I love using chocolate transfer sheets! And I like your idea – easier than trying to place on dipped chocolates. Thanks so much!
I love this.. Thanks for posting this.. I was looking up the word mendiants, and found this.. very nice!