Here’s a little irony for you: when I went to the midwest for Thanksgiving a couple weeks back, I was told there might be a chance of snow, that I might get to experience the joy of the first snowfall. So I packed my suitcase full of woolly scarves and cable-knit sweaters, only to encounter crisp, clear skies and sunshine glazing the snow-free roofs of decoration-bedecked homes. FYI, I have seen snow before, but when you’ve got to travel miles from home to see it, “White Christmas” unfortunately becomes more of a pleasant, Norman Rockwell-ish fantasy rather than actual nostalgia.
So imagine my surprise when I was driving up northeast of San Francisco this week, on my way to Sacramento, and I discover the hills dusted with white! We received the briefest of visits from Jack Frost, his passage leaving powdered-sugar mantles draped across rolling hills, still green with grass underneath. Even though I’d driven up this way before, I slowed down, just like everyone else around me, marveling at this strange and wondrous fairy country we’d all wandered into. Only the cows remained unchanged, standing placidly in a world gone monochrome. Suddenly I realized why the boyfriend would wax wistful about the white Christmases of his midwest memories. I’m sure the rare snow I saw has already melted, but I’ll remember it in my mind’s eye as we move into the more familiar steel-grey skies and chilly rains of San Francisco winter.
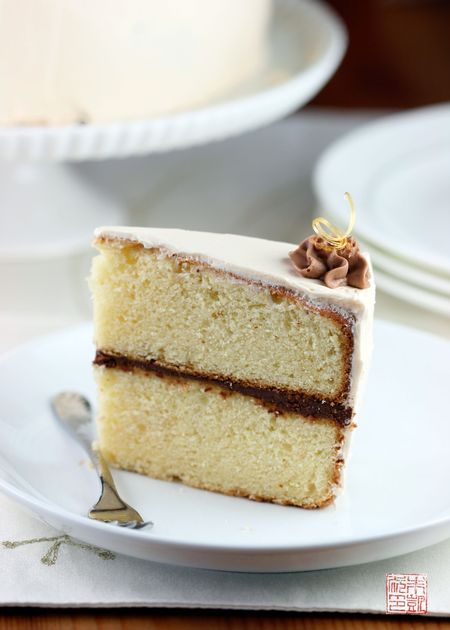
All those wintry shades of pale inspired me when I came up with this cake. I wanted to take a basic vanilla cake and play around with the flavors. I decided to use one of my favorite techniques, browning butter, to oomph up the flavor. If you haven’t browned butter, I actually did a how-to video on Chow.com. Browning turn the simple taste of butter into a fabulous melange of caramel, nutty, and butterscotch, adding a lovely complexity to whatever you add it to. Depending on how dark you take your browning butter, you can get some really rich, caramelly notes – but be careful not to burn it! I always take my butter off right before it gets to the color I want, since it will keep cooking for a little bit afterwards. I was curious as to whether it would affect the color of the cake, but if you look at the final picture, you can see it’s a beautiful creamy yellow – probably because of all the eggs in the cake recipe! Making the cake was also a great chance to use some of my precious vanilla beans. The texture is nicely firm and tight-crumbed, perfect for making a layer cake. Don’t overbake this cake so it dries out – I think I would have pulled my cakes out a little sooner, maybe around the 35 minutes.
Since the boyfriend is a big fan of yellow cake with chocolate frosting, I filled the cake with my whipped chocolate ganache, using a nice Guittard 72% that would stand up to the richness of the browned butter cake. Don’t be shy about spreading the ganache on – your guests will thank you!
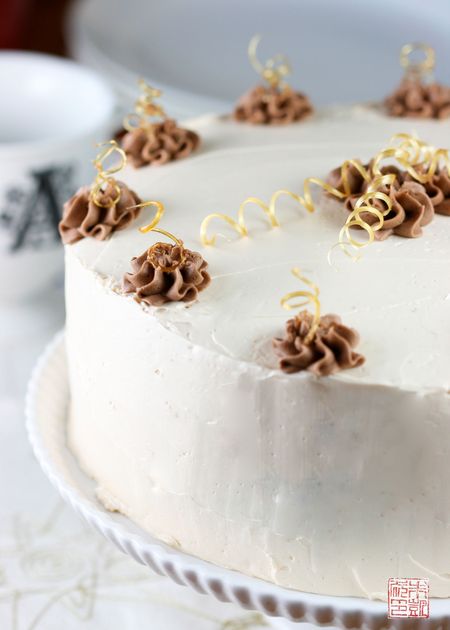
Finally, to frost the cake I wanted to add a third flavor so I took Dorie Greenspan’s reliable Swiss meringue buttercream and added in a generous measure of caramel. The result is a innocuously pale buttercream, its hue somewhere between antique lace and eggshell, with a sweet golden taste of caramel.
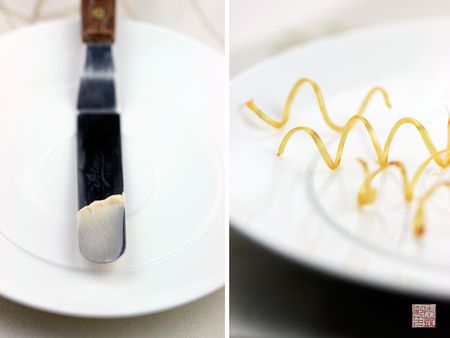
To give a hint to this I tried my hand at a few caramel spirals to decorate the top of the cake. I recently had someone ask me how to keep their kitchen clean when working with sugar, and my response was that I was still trying to figure it out myself! Caramel threads have a way of floating everywhere, like fairy floss. I just try to stay in one area as much as possible to avoid trailing caramel all over the place. Silicone mats are also your friend – easy to rinse off and clean up. You can also spray any metal tools you’re using lightly with cooking spray, so the caramel won’t stick to it.
The soft, snowy appearance of this cake reminds me of those hills so briefly shrouded in white. I like this cake so much, though, I don’t think I’ll wait until the next snow in the Bay Area to make it!
Browned Butter Cake
adapted from Kate Zuckerman’s The Sweet Life
makes (2) 9-inch round layers
1 vanilla bean
12 ounces unsalted butter
1 2/3 cups sugar
2 eggs plus 4 egg yolks, room temperature
2 1/2 cups plus 2 tablespoons flour
3 teaspoons baking powder
1 teaspoon salt
1 1/4 cups milk, room temperature
To make the cake: Split over the vanilla bean and scrape out the seeds.
Place bean and seeds in a medium saucepan and add in the butter. Cook on medium-high heat until the butter begins to turn brown and smell nutty. Swirl the pan so the butter cooks evenly.
When butter is rich brown (you can leave it lighter for a more subtle flavor, but don’t let it get too dark and burn). remove from heat. Take out vanilla bean and place melted butter in a container. Refrigerate for an hour until butter has resolidified.
Preheat oven to 350 degrees F. Butter and flour two 9-inch round pans.
Place solid browned butter in a stand mixer. Beat on medium until it softens and becomes creamy,
Add sugar and beat until it goes from dry and clumpy to fluffy and smooth. It may take a few minutes.
Add in eggs and egg yolks one at a time, beating between each addition until fully incorporated.
Combine flour, baking powder, and salt in a medium bowl.
With mixer set on slow, add in flour mixture and milk in 5 additions, starting and ending with the flour. Beat just until incorporated.
Divide batter among the two pans and bake for 35-40 minutes, until a toothpick inserted into the center comes out clean.
Remove and place on wire racks. Run a knife around the edges for easier removal. Let cool for about 20 minutes and then invert pans to remove cakes. Let them finish cooling before decorating.
Whipped Chocolate Ganache
8 ounces semisweet chocolate, finely chopped
1/2 cup heavy cream
Place chocolate into a medium heatproof bowl.
Place cream in a medium saucepan and place over medium heat. Heat just until it comes to a simmer.
Pour cream over chocolate and let sit for a minute before stirring to combine. Stir until chocolate is fully melted and the mixture is smooth.
Pour into a container and chill in refrigerator for an hour until it is firm.
Place ganache in a stand mixer and whip with whisk attachment until it is ligh
t and fluffy. Do not overwhip or it will become dry and crumbly, just like overwhipped cream.
Caramel Buttercream
1/2 cup heavy cream
To make the caramel: Place sugar to a small saucepan and add enough water to give it the texture of wet sand.
Cook sugar on low heat until it has dissolved.
Raise heat to high and let cook until it turns golden. Do not leave it unattended – it can burn very quickly.
Meanwhile, place cream in glass measuring cup and microwave for about 30 seconds just until the cream is warm. Or, you can heat it on another saucepan on the stove.
Once the sugar has turned golden brown, remove from heat. Pour in cream in a slow stream and whisk to incorporate. If any hard chunks of caramel form you can place over medium heat to melt.
Let caramel cool and thicken while you make the buttercream.
3/4 cup sugar
4 large egg whites
1 ½ cups unsalted butter, room temperature, cut into 1-in pieces
Combine the sugar and egg whites in a medium metal bowl and place over a pan of simmering water.
Whisk the sugar mixture constantly over heat until the sugar is dissolved and the mixture looks smooth and shiny. Continue whisking until the mixture reaches 160 degrees F.
Remove mixture from heat and pour into a stand mixer bowl. Whisk on medium speed for about 5 minutes until the mixture has cooled.
Switch to the paddle attachment and with the speed on low, add the butter a few pieces at a time, beating until smooth. Do not add the butter too quickly or beat too quickly or the buttercream may break.
When all the butter has been added, beat the buttercream on medium-high speed for about 6-10 minutes until it is very thick and smooth. It may appear to separate briefly but continue beating and it should come back together.
Be sure the caramel is still liquid and flows thickly. If it has cooled too much and solidified, warm it up slightly on the stove. Add the caramel to the buttercream and beat to combine.
The buttercream is ready to be used. Place a piece of plastic wrap against the surface until you are ready to use it to prevent it from drying out.
To assemble the cake: Level off cake layers if necessary. Place one cake layer on a cake board or cake decorating stand.
Spread the whipped chocolate ganache over the layer evenly. You can reserve about half a cup for decorating the top of the cake if you want.
Place the second cake on top.
Spread a crumb coat of caramel buttercream over the top and sides of cake (see here for tips on doing a crumb coat). Refrigerate for about an hour to let the frosting set.
Spread the rest of the caramel buttercream over the top and sides of cake with an offset spatula.


This is truly beautiful, and I love the way you wrote about the snow 🙂 like reading a book!
simple and elegant.. what a perfect cake for white christmas! :))
It looks magical! I went of a walk on Tennessee Valley Road in Marin when it was all frosted and it was the most unbelievable sight, everything looks amazing covered in white snow. The drive to Sacramento can be boring, but the snow can add a lot of beauty.
Gorgeous! So simple and elegant.
This looks gorgeous and definitely yummy. Especially from the way you raved about it…it must be real good!
looks really delectable!
A very simple decorated cake but also beautifulst, compliments.
What a GORGEOUS cake!! YUM!!
You know how I love the caramel corkscrews…and to put them on top of such a delicious cake well…heck…I am all over it!
This is quite an intense-looking cake that I must try very soon. Very lovely photos.
Very elegant. It’s almost too beautiful to eat!
It’s beautiful! Now if only I could find an excuse to make it…
This cake looks gorgeous, soo beautiful !
Anita,
So incredibly lovely! I saw your new book was featured on the epicurious blog … congratulations!
How did you make the caramel spirals? The cake is a definite show-stopper for sure, almost too beautiful to eat indeed.
That is pretty and would fit in beautifully with this weather (we’ve got snow now, so come on back :)!
I’m not sure if my comment got through (I didn’t see any message), so I’m posting again. How did you do the caramel swirls? The cake looks lovely, the more and more I look at it, the more and more it looks like it came out of a restaurant or patisserie shop like the one you visited in Hong Kong.
We had three inches of snow here in Oakland! It was the craziest thing…
Wow, that’s gorgeous Anita! I’m jealous of everyone that got to have some – I really really want a slice right now 🙂
It looks gorgeous and I love the sugar twists on top – so elegant
I know, you are the queen of caramel and sugar work! I bow to you!
Thanks Ivonne! I didn’t even know it was mentioned – will have to check now!
Hi Z’s Cup of Tea,
It takes a bit of practice but once you get the hang of it it’s not too hard. Until I manage to write my own tutorial, here’s a good step-by-step:
http://cooking4chumps.com/Skills%20Sugar%20Work.html
You will need a knife sharpening steel or other clean metal rod, and a parchment or silicone mat lined surface to place the spirals on. Best part is, if the spirals don’t come out right, you can throw them back in the pot to melt down. Practice and good luck!
Thanks for the link, Anita! It looks fun and I’ll definitely be trying it. I’ll blog my results when I do.
Looks gorgeous! I’ll have to try it out sometime I need to make a cake!
Ahh…the sweet life, how could I forget the delicious brown butter desserts from this book? Great job with the caramel corkscrews, they look perfect!
oooooh! this looks great!
The spirals are gorgeous, wow!
what a beautiful cake!
You have got me craving cake now. If only I had eggs in the house. *sigh*! What a scrummy looking cake, and those swirls…yum!
Oh my, somehow i haven’t stumbled upon you until now. And to find browned butter AND caramel in the same cake? Genius. Grateful Dorie Greenspan mentioned you and your book. Will have to check it out. Cheers, Molly
Cakes looks fantastic and its a great tip in using the whipped chocolate ganache with the browned butter cake.
Wow! thank you so much for the ingredients i will try doing this,i love cakes so much and this is so great. 🙂
vee
I wanted something special to bake my husband before he deployed, and this was it. I came across your blog recently and was struck by this cake. I’ve used a similar caramel buttercream for filling in chocolate Whoopie Pies, but the last few times I tried to make it, it broke on me. Reading your recipe, which has a few more details, I think I now know what I was doing wrong. Anyway, the cake has come out beautifully. Hopefully, he’ll really enjoy it!
So I absolutely LOVE this idea, but I can’t find a tin like this ANYWHERE!!! I’ve looekd at Macy’s, JC Penny, Kohl’s, even Michael’s didn’t have them!!! Any ideas on where I can find one???
Hi Elsie,
Do you mean tins as in baking pans for the cakes? You can find 9″ round baking pans at cooking stores like Sur la Table, Crate and Barrel, Williams Sonoma, or even Target or Bed Bath and Beyond. If you mean something else, let me know!