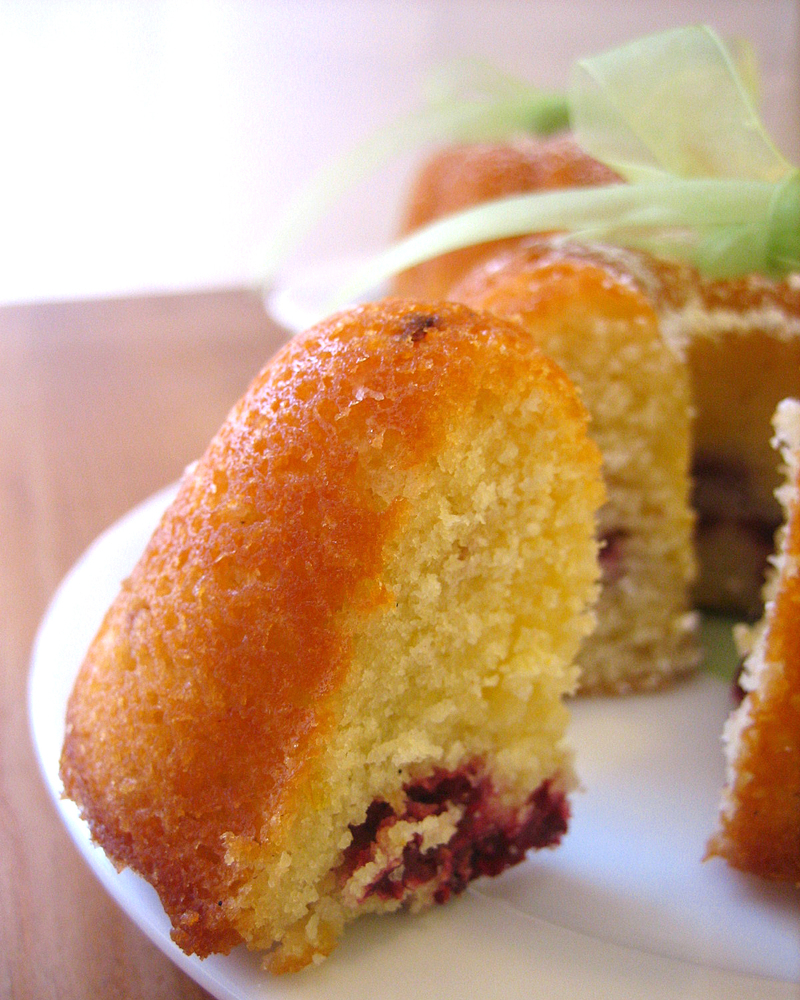
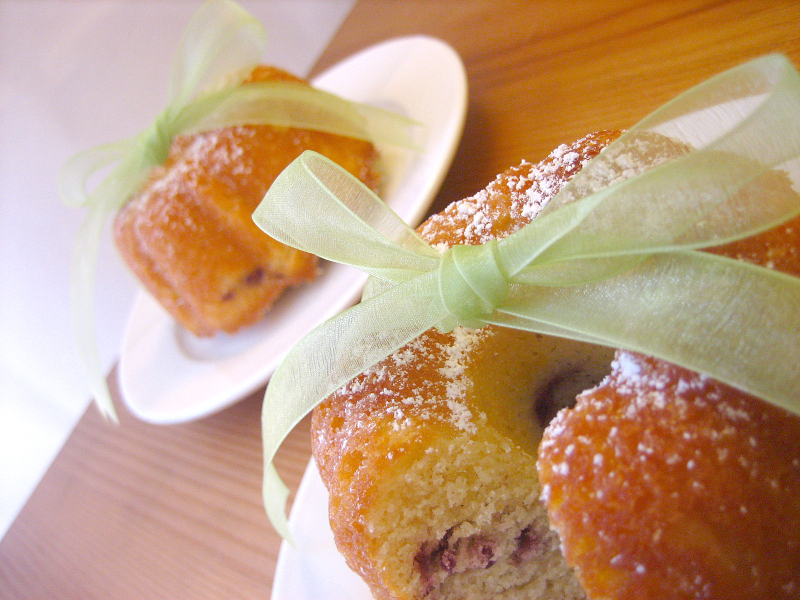
Although I have not succeeded in reducing my pile of recipes to try – on the contrary, it seems to grow longer all the time – sometimes it’s nice to revisit an old recipe and remember what you loved so much about it (Not to mention all the times my friends and family get fixated on one of my desserts and insist on it over and over again, despite all attempts to entice them with new creations). This vanilla bean lemon cake is from a recipe by the Barefoot Contessa and is one of my favorites – I’ve made and devoured it happily many a time. It is a gorgeous example of pound cake: a moist, velvety crumb under a soft golden crust, with a rich, tangy-sweet lemon flavor (it smells so fabulous straight out of the oven). I added some raspberries this time to celebrate summer – not only do they add some pretty color, they make the cake even moister, and the raspberries pair quite well with the lemon. A perfect bite for tea-time.
In trying to shoot pictures of the cake, I was inspired by a talk I attended the night before at the Apple Store – a very fortuitous last-minute discovery of a presentation on food photography! As the Apple Store is but a short walk from where I live, and I had no plans for that hour, it was perfect timing all around.
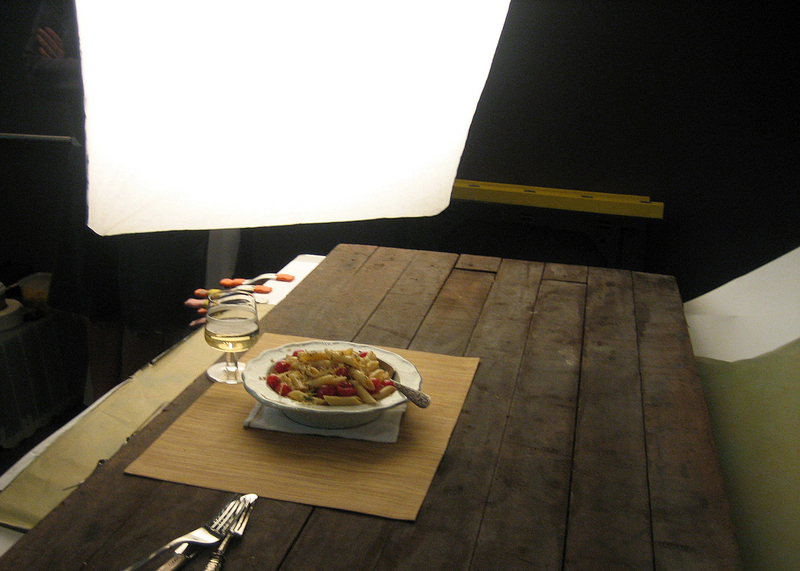
The store was packed – although I should not be surprised that San Francisco would have an abundance of photography enthusiasts, foodies, and/or both! I was lucky enough to sit near the front and watch a food photography session with food photography Caren Alpert and food stylist Basil Friedman. They had a basic setup with a Canon EOS 30D, a backdrop and a light with diffuser, and proceeded to take a picture of a bowl of pasta. Of course the camera was hooked up to an Apple laptop so all the shots could be instantly projected onto a screen for the audience to see:)
A shot of the setup. You can tell from the poor quality that the lighting really wasn’t that good in that part of the store! Unfortunately, I could not get a copy of the final shot, but go to Alpert’s and Friedman’s websites for some beautiful, mouthwatering examples of their work.
It was fascinating to watch the progress of the shoot, as Alpert and Friedman discussed props, angle, and placement. While Alpert has the photographer’s background and Friedman the chef’s training, the shoot was clearly a collaborative effort as they discussed whether the colors of the napkins went with the food or how the pasta should be arranged.
It was also interesting to hear their insights into professional food photography – for example, how Alpert will often shoot photos for with deliberate blank areas, so that text can be placed there. She stated how she always shoots "full-page", because if she shoots a picture that can be shrunken and put on a corner of the page, that’s what will happen many times! Alpert also said that many magazines have not gone to digital photos yet, which was a surprise to me. Responding to a question from the audience about depth of field, Alpert indicated that many magazines are moving away from the shallower DOF that is so popular now and towards shots with more of the background/surroundings in focus. She did note that she still prefers the shallower DOF, but will shoot both ways for clients for them to choose.
Friedman shared some funny stories and tricks about how to make food look good – when asked about the dilemma of shooting steam, he replied that a classic trick was to have someone smoking a cigarette on set who would blow smoke into the shot! He also remembered a shoot involving coffee where they made the room as cold as possible and brought in a very hot cup of coffee- which created visible steam for about 30 seconds. Perhaps not the most comfortable of shoots!
In attending the talk, I actually came away impressed with the quality of photography to be found on blogs these days. Professional food photography shoots have oodles of technical equipment and gadgets, a warehouse worth of props, and team of artists – the photographer, the food stylist, the prop stylist, and all the assistants – to create those gorgeous pictures you see on magazine covers. But I look at what Bea, Nicky, J, and so many others I don’t have room to list have done all on their own and I think those shots are just as wonderful. In the end, if you have a passion for what you do, it will show through!
Vanilla Bean Lemon Cake with Raspberries
adapted from the Barefoot Contessa
1 3/4 sticks butter, room temperature
2 cups sugar
Zest from 4 lemons
4 large eggs, room temperature
3 cups flour
1/2 teaspoon baking powder
1/2 teaspoon baking soda
1 teaspoon salt
1/4 cup lemon juice
3/4 cup buttermilk, room temperature
1 teaspoon vanilla bean paste
1-2 cups raspberries, depending on how many you want
Preheat the oven to 350 degrees. Mix the butter and sugar together in a mixer until light colored and fluffy. Add the eggs, one at a time. Add in the lemon zest.
Sift the flour, baking powder, baking soda, and salt together. Combine the lemon juice, buttermilk, and vanilla in a small bowl.
Add the dry and liquid mixtures to the mixing bowl alternately, beginning and ending with the dry mixture. Mix just until everything is combined.
Pour batter into pans. This batter with fill two 8 1/2 x 4 1/4 x 2 1/2 loaf pans, or about (24) 3 1/2 x 2 x 1/2 mini loaves, or about (16) 3 1/2 diameter mini bundt pans as pictured – it’s a lot of batter!
Place raspberries on top of the batter, and using a spoon or spatula, gently swirl them into the batter. I’ve found that if I fold them into the batter sooner, they tend to sink to the bottom of the cake. This method allows for a more even distribution.
Bake until a tester comes out clean -about 45 minutes for a large loaf, 25-30 minutes for minis. Let cool on wire rack.
Tagged with: vanilla bean lemon cake + food photography


Gorgeous cake! I might just have to try baking it. 🙂
You take such nice photos. Thanks for posting about food photography, too. I’ve got a lot to learn!
Yum! Your picture looks great!
So pretty! and what a great way to learn about food photography 🙂
I love this cake too. I use it a lot for brunch.
Why do families always do that? You make something one time and, as long as turns out pretty well, you’re making it for every future family gathering. Although with something like this I can definitely see why they would want it repeated. Beautiful photos!
Oh my, that does look delicious!
As far as food photography goes- your pix are as nice as any I’ve seen.
What a swell way that would be to make a living!
Thanks for sharing your experience. I couldn’t make that talk so its great to hear about it. Your pics are beautiful. It was fun meeting you guys this evening. Happy eating!
This looks/sounds wonderful. My new resolution is to try to make some of Ina Garten’s recipes. Your cake is definitely encouraging!
hi, simply gorgeous cake – i can see what a perfect crumb it possesses from your sublime picture and virtually inhale its perfumed scent just looking at it 😉
Oh my goodness … that is so beautiful. So beautiful! Your description of the photo session is very interesting. It makes me realize how much I have to learn when it comes to photography.
But I just keep going back to the cake. Gorgeous!
I think you need to add yourself to that list, your photos are always exceptional.
And this cake looks beautiful, I love moist cakes.
What a lovely cake Anita, and very nicely photographed! delicate and tempting!
Hello from another bay area baker. I just found you here (via 52 Projects). Wow! What a beautiful site! I’ll definitely be visiting your blog again to drool over your recipes and pictures.
Great looking cake.
WOW – just linked to your site, and I absolutely LOVE your blog! The way you write and your pictures!
(Which I find by the way far more mouth-watering than Caren Alperts…)
Really enjoyed those food-looking-good stories.
Have just started a foodblog myself, I’m so excited to try all this new things! =)
Really hope you’ll check it sometimes!!!
Incredibly lush pictures Anita! And I love the summery touch of pale green ribbon. Very interesting story…I agree that passionate foodbloggers have a legup on techie food shooters. When you’ve made the subject with loving care you have an integral connection with the food. Like the way I feel about making my own paint..Nice to learn about shallow depth of field trends too 🙂
I am drooling over this cake. Yoir pictures are always so incredibly mouth watering.
Deb,
Thanks for visiting! I visited your site and I’ll have to check back in to see how your chocolate business is going!
Rachel,
Thank you! It was fun putting it together!
Kat,
The food photography session was inspiring, I guess – I took these pictures the next day!
Peabody,
Glad to hear you’re a fan too! I always eat too much when I make it!
Natalia,
I guess families like the familiar – I’m guilty of asking my mom to make my favorite dishes when I go home! Thanks for stopping by!
Maura,
Thanks! I agree, it would be dreamy to make a living taking photos of food all day long!
Catherine,
Thank you! It was great to meet you too and I’m enjoying exploring your blog!
Jennifer,
This is definitely one of the best ones – I’m sure you’ll love it!
J,
Thank you – my cakes are blushing at the undeserved praise – your comments are as lyrically written as your own posts!
Ivonne,
We all have a ton of drool-worthy examples to follow and inspire us – I think your photos are great too!
Jen,
Thank you for the compliment! I like moist cakes too, this one doesn’t disappoint!
Bea,
Thank you! Always a compliment coming from you!
Hi Renee,
Thanks for stopping by! I’m going to visit your site too, looks fascinating!
j,
Thank you! I’m glad it turned out so well!
Julia,
Thanks for coming by, and I’m glad you like the site! Yours looks very yummy as well, I’ll be checking it out again!
Carol,
Well, when it comes to enthusiasm I am sure you are at the front of the pack:) I love your posts on matching your paint colors to the subject:)
Helen,
Thank you! I’m glad you like the posts, I love reading yours as well!
hi, i love everything about food, from desserts to main dishes.. lo0ve trying out different foods, you can say i have an adventurous tastebud, i would like to be able to eat many good food too. but i do not have the chance.hence, i always update myself in the food industry, reading food reviews and blogs..i aimed to be a gourmet but don’t know any links.could you help me?
Hi! I just found your blog, and love it! I love to bake, but am winging it for the most part… I just laugh if a recipe goes wrong, and chalk it up as a learning experience…
So, I made this cake the other day, and the flavor was amazing! However, it turned out pretty dense. I’m not sure if you might know something that could have made it more dense than normal? (like a trick of the trade you’ve learned along the way?) Also, does the pan I bake it in make a big difference? I used a bunt pan that is probably older than I am, and it turned darker on the outside. Not burnt, just darker… Would it help if I invest in a newer/better quality pan?
Sorry, I know these are strange questions, I just figured it would be worth a shot to ask. Your page is very inspiring to me, it makes me want to learn and grow in baking.
Thanks!!
Karen
Hi Karen,
I’ve tried to respond to your e-mail several times but it keeps getting bounced back. I hope you find this!
Anyway, I’m glad you tried the recipe and liked the flavor. There are
two things I can think of as to why your cake came out too dense. One
is did you beat the butter and sugar long enough so it was really
light and fluffy? I usually do it for several minutes because if it’s
not whipped enough the cake won’t rise as much in the oven.
The second thing is did you mix the batter too long after adding the
dry ingredients? This is almost the opposite of what I said for the
butter, but if you beat the batter too long after there is flour in
there the gluten in the flour will develop too much and the cake will
bake up tough and dense – you want to mix the batter just enough so
all the ingredients are mixed together but don’t let it keep going for
too long.
The last thing is that this is a pound cake – so the texture is
supposed to be pretty tight and firm – although not chewy or rubbery.
I know everyone’s tastes vary so I don’t know exactly how your cake
turned out. If you want your cake to be looser and fluffier try the
couple of tips I mentioned and see if it helps!
As for your other question about the pan, is it a dark non-stick pan?
Generally, darker pans will cause the cake to bake up darker (since
dark absorbs more heat than light). If you have a light colored
aluminum pan, it probably won’t get as dark. It depends on how you
like your baked goods – if you don’t want your stuff so dark, you can
leave it for less time in the oven (although don’t undercook it!) or
you can look for lighter-colored pans. Remember though that darker
usually means more flavor! I tend to want my stuff not super dark
either, so it’s finding a balance between nice color and nice flavor!
I hope I was able to help you a little. Let me know if you have more
questions and how your further baking adventures go!
I just made this cake last week. It was sooo yummy. Perfect crumbliness and moist and and and…
Thanks Anita!
So glad you liked it! Thanks!