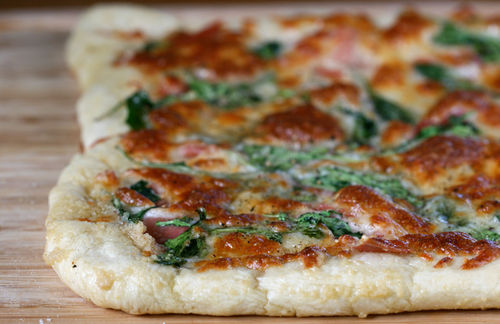
Hi dear readers and fellow Daring Bakers,
I did do the challenge but I'm running low on time to write a coherent post, so I'm hoping you all enjoy the pictures! The person who was most thrilled to hear about the challenge was my boyfriend, since he and I often make pizza at home, and now he knew we'd be doing it over the weekend!
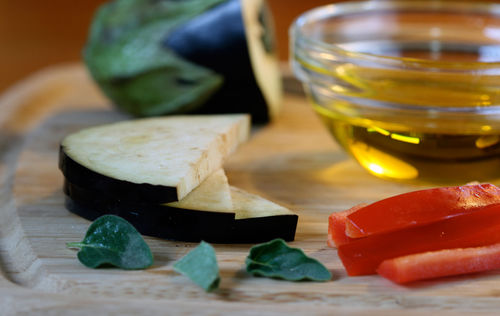
Per our usual M.O., we like to split the dough into two and cover with different toppings. I really wanted to a sweet pizza, but the candy book plus SHF had totally zapped my creative energies for the weekend, so we fell back on what we had in the refrigerator. First, a roasted eggplant and pepper pizza, topped with mozzarella and oregano, and brushed with olive oil and garlic out the oven. My boyfriend and I have found we're huge fans of thin crust pizza, and light to no sauce, to better let the ingredients shine through. It's amazing how much a little olive oil and garlic can contribute!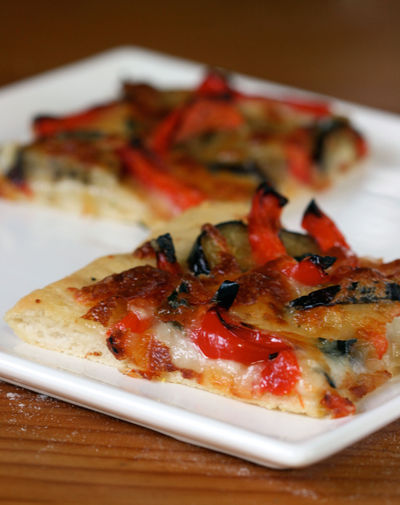
Second pizza: some wonderful prosciutto, arugula, and a bit of fontina cheese. A pizza peel is next on my list of Kitchen Tools to Buy When I Actually Find More Space in My Kitchen (it's gotten to the point where I think I'll have to institute a one-in, one-out policy), but I've found that flipping over a baking sheet pan works almost as well. Also, a light sprinkling of cornmeal over the pan before placing the dough on also helps the crust crisp up, and makes removing the pizza easier.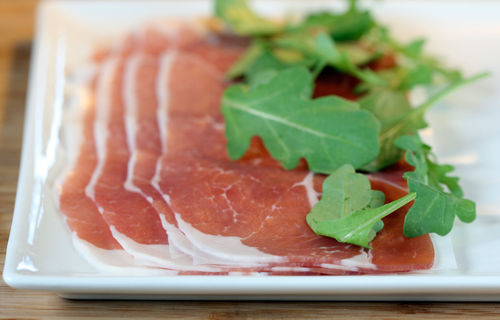
So, a rare non-sweet entry on Dessert First! I hope you enjoyed this little glimpse into what else I eat besides dessert! Thanks to the lovely Rosa for a great challenge! And, I am diligently working through all the SHF entries – I'm about halfway through the approximately 70 entries I got, so rest assured I'm getting to you! Everyone who sent in their entry will be included – so those of you who sent anxious e-mails about whether they made it in time, please don't worry! I hope you all look forward to the round-up on Friday (and likely part 2 on Monday!)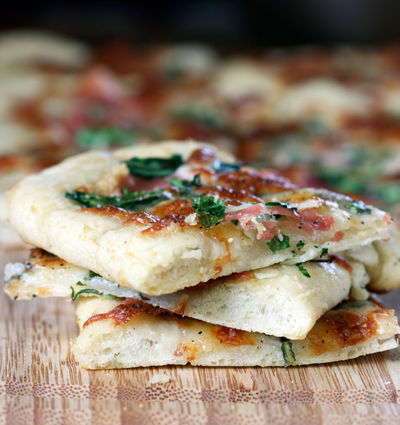
BASIC PIZZA DOUGH ~
Original recipe taken from “The Bread Baker’s Apprentice” by Peter Reinhart.
Makes 6 pizza crusts (about 9-12 inches/23-30 cm in diameter).
Ingredients:
4 1/2 Cups (20 1/4 ounces/607.5 g) Unbleached high-gluten (%14) bread flour or all purpose flour, chilled –
1 3/4 Tsp Salt
1 Tsp Instant yeast
1/4 Cup (2 ounces/60g) Olive oil or vegetable oil
1 3/4 Cups (14 ounces/420g or 420ml) Water, ice cold (40° F/4.5° C)
1 Tb sugar
Semolina/durum flour or cornmeal for dusting
DAY ONE
Method:
1. Mix together the flour, salt and instant yeast in a big bowl (or in the bowl of your stand mixer).
2. Add the oil, sugar and cold water and mix well (with the help of a large wooden spoon or with the paddle attachment, on low speed) in order to form a sticky ball of dough. On a clean surface, knead for about 5-7 minutes, until the dough is smooth and the ingredients are homogeneously distributed. If it is too wet, add a little flour (not too much, though) and if it is too dry add 1 or 2 teaspoons extra water.
NOTE: If you are using an electric mixer, switch to the dough hook and mix on medium speed for the same amount of time.The dough should clear the sides of the bowl but stick to the bottom of the bowl. If the dough is too wet, sprinkle in a little more flour, so that it clears the sides. If, on the contrary, it clears the bottom of the bowl, dribble in a teaspoon or two of cold water.
The finished dough should be springy, elastic, and sticky, not just tacky, and register 50°-55° F/10°-13° C.
3. Flour a work surface or counter. Line a jelly pan with baking paper/parchment. Lightly oil the paper.
4. With the help of a metal or plastic dough scraper, cut the dough into 6 equal pieces (or larger if you want to make larger pizzas).
NOTE: To avoid the dough from sticking to the scraper, dip the scraper into water between cuts.
5. Sprinkle some flour over the dough. Make sure your hands are dry and then flour them. Gently round each piece into a ball.
NOTE: If the dough sticks to your hands, then dip your hands into the flour again.
6. Transfer the dough balls to the lined jelly pan and mist them generously with spray oil. Slip the pan into plastic bag or enclose in plastic food wrap.
7. Put the pan into the refrigerator and let the dough rest overnight or for up to thee days.
NOTE: You can store the dough balls in a zippered freezer bag if you want to save some of the dough for any future baking. In that case, pour some oil(a few tablespooons only) in a medium bowl and dip each dough ball into the oil, so that it is completely covered in oil. Then put each ball into a separate bag. Store the bags in the freezer for no longer than 3 months. The day before you plan to make pizza, remember to transfer the dough balls from the freezer to the refrigerator.
DAY TWO
8. On the day you plan to eat pizza, exactly 2 hours before you make it, remove the desired number of dough balls from the refrigerator. Dust the counter with flour and spray lightly with oil. Place the dough balls on a floured surface and sprinkle them with flour. Dust your hands with flour and delicately press the dough into disks about 1/2 inch/1.3 cm thick and 5 inches/12.7 cm in diameter. Sprinkle with flour and mist with oil. Loosely cover the dough rounds with plastic wrap and then allow to rest for 2 hours.
9. At least 45 minutes before making the pizza, place a baking stone on the lower third of the oven. Preheat the oven as hot as possible (500° F/260° C).
NOTE: If you do not have a baking stone, then use the back of a jelly pan. Do not preheat the pan.
10. Generously sprinkle the back of a jelly pan with semolina/durum flour or cornmeal. Flour your hands (palms, backs and knuckles). Take 1 piece of dough by lifting it with a pastry scraper. Lay the dough across your fists in a very delicate way and carefully stretch it by bouncing it in a circular motion on your hands, and by giving it a little stretch with each bounce. Once the dough has expanded outward, move to a full toss.
NOTE: Make only one pizza at a time.
During the tossing process, if the dough tends to stick to your hands, lay it down on the floured counter and reflour yo ur hands, then continue the tossing and shaping.
In case you would be having trouble tossing the dough or if the dough never wants to expand and always springs back, let it rest for approximately 5-20 minutes in order for the gluten to relax fully,then try again.
You can also resort to using a rolling pin, although it isn’t as effective as the toss method.
11. When the dough has the shape you want (about 9-12 inches/23-30 cm in diameter – for a 6 ounces/180g piece of dough), place it on the back of the jelly pan, making sure there is enough semolina/durum flour or cornmeal to allow it to slide and not stick to the pan.
12. Lightly top it with sweet or savory toppings of your choice.
NOTE: Remember that the best pizzas are topped not too generously. No more than 3 or 4 toppings (including sauce and cheese) are sufficient.
13. Slide the garnished pizza onto the stone in the oven or bake directly on the jelly pan. Close the door and bake for abour 5-8 minutes.
14. Take the pizza out of the oven and transfer it to a cutting board or your plate. In order to allow the cheese to set a little, wait 3-5 minutes before slicing or serving.


Proscriutto and arugula, I see them as A-list pizza! Anita, your pizza really looks splendid!
Wow, both pizzas look fantastic! Love all the ingredients you used for the toppings.
Anita, great toppings and beautiful thin crust! I enjoyed your non-sweet post 🙂
I love the prosciutto/aragula version. Yum !
Gorgeous pizzas!! I can’t do savoury so I stuck with sweet, but seeing so many bloggers doing savoury, I wish I had some extra dough left to try it out!!
Wow, wonderful! Your pizzas look really scrumptious and perfect!
Cheers,
Rosa
They look great! I’m glad you found time to make this. I had lots of fun with mine too 🙂
I’m picking roasted eggplant and pepper (although fontina cheese sounds great)!
Good luck on the SHF round-up!
Oh, how lovely! The roasted eggplant and pepper pizza is exactly my kind of thing!
You may think that you weren’t being particularly creative, but I beg to differ. Your pizzas look fabulous! And I’m really looking forward to the SHF roundup!
Your pizzas look great! Beautiful pictures as always.
Both pizzas look delectable – great combos!
mmm pizza, looks delicious!
Nice! Great looking pizza
What tasty creations! Great job!
This pizza looks fabulous, Anita. And despite the fact that it’s only 5:32 AM, I could go for a piece! I started making homemade pizza dough years ago and never looked back. The texture and flavor is unparalleled, plus there’s something relaxing about kneading the dough.
ps-Did you receive my shf entry I sent on Sun?
Nice looking pizza’s. I want to try just brushing olive oil and garlic as the sauce next time. So simple but perfect.
the pictures looks divine, i want one of your pizzas now!
I made eggplant pizza too… This was such a fun and delicious challenge. Your pizza looks fantastic!
Mmm–I like your minimal sauce and cornmeal ideas. I’ll give it a try!
Your pizza look yummy. I love the idea of the aubergine and pepper one – sounds delicous. Good tip on the garlic oil too.
I love the fontina idea! And I agree about the thin crust with lots of toppings note too – that’s how I like my pizzas.
Was curious all morning whether you did a dessert pizza in line with your blog – or if you actually did in fact enter a savory post. Cool! Since I’m reading this close to lunchtime, the savory ones are sounding so much better to me than the sweet ones anyway. I have a feeling our boyfriends might get along… he too is a HUGE pizza lover (and also loves the puppy 😉
Your pizzas look so delicious! Wish I could have one for dinner tonight!
Anita, your pizzas look yummy! I love the topping ideas!
The roasted eggplant pizza looks so delicious!! You out did yourself once again!!
Beautiful pizzas, and your toppings sound delicious!
Mmmmm… delicious pictures!
I love the prosciutto/arugula idea. I used prosciutto and figs, but now that they are out of season I think I may copy your idea! beautiful!
Those are some seriously gorgeous pizzas, Anita! I want to make the dough again so I can try the prosciutto/arugula variation!
Simple and beautiful pizzas. We’re fans of thin-crust, little-to-no sauce variety of pizzas, too.
Wonderful pizzas! The first photo is particularly gorgeous.
i love savory baking, and pizza is always something to look forward to! i’d devour the eggplant one!
Yum. I’m really liking the fontina-prosciutto combo.
Nice to see a ‘savory’ post on your blog. Nice job on the pizzas and great choice of toppings – simple, yet tasty. I wish I would have remembered to brush my dough with olive oil!
anita – these pizzas look great. i love the eggplant version yumm!
Mmm, your pizzas look amazing! Awesome toppings too!
They both sound wonderful, and the photos are perfect as usual!
Well done Anita…they look fabulously delicious. Love the toppings!!
OH, they look delicious! I do not have a pizza peel either, but use a thin metal disc (one that one would ice cakes on, maybe a round cardboard that is used so oftern underneath cakes could do the trick (and stores easier than the long peel)
The joy of homemade pizza and the joy of seeing your wonderful ones!
so scrumptious!
Great pictures.
No! There’s always room for a pizza peel!!!
We have a wooden “in” peel and a metal “out” peel. I keep them on top of the fridge. I promise, they take up no space and they make you look cool when you invite people over. Plus, an absolute must for removing pies, cookie sheets, cakes, etc… I no longer constantly have little burns on my knuckles from bumping the oven racks 😛
your pizza looks delicious! love the various toppings you used