With Halloween coming up next week. I’m finishing all my preparations, which mostly involve putting together Isabelle’s costume and moving all the pumpkins in the house back to their designated places, after she’s moved them all again for the twentieth time. Apparently pumpkins are way more fun than her regular toys – who knew?
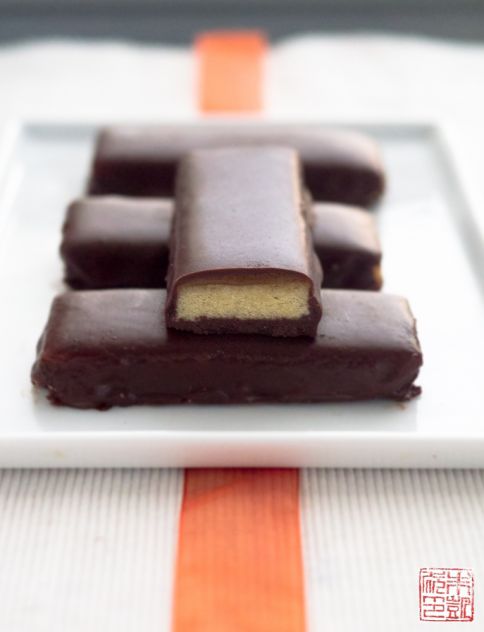
I’ve stocked up on candy for trick or treaters, but I couldn’t resist going into kitchen to make some sweets from scratch. This year, it’s a homemade rendition of one of my favorite candies from childhood – the Twix bar.
Twix bars are actually one of the easiest candy bars to duplicate in your home kitchen. Shortbread, caramel, and chocolate are all things I love making and working with individually. In fact, I’ve already done a Twix tart, one of my favorite tarts ever, so moving on the candy bar version seemed inevitable.
There are many quick and simple methods out there for making home versions of Twix bars; you can use all store-bought ingredients such as ladyfingers, caramel candies, and chocolate chips for a shortcut (and for a holiday that’s all about store-bought bags of fun-size candy, I’m not going to judge!), but if you’re looking to make a rendition that makes the leap to pastry school-and-restaurant dessert worthy, you’re singing my tune.
Again, none of the individual components are difficult to make, and it’s all about putting them together in a pretty package. The best method I found is in the excellent The Liddabit Sweets Candy Cookbook, and I’ve adapted their recipe here. Just be sure to read the recipe through carefully and have all the equipment laid out and prepared ahead of time. You’ll use quite a few baking sheets and pieces of parchment paper, so as long as you have them handy you shouldn’t run into any sticky (ha!) situations. The refrigerator is also your friend. If it looks like things aren’t setting up quickly enough or bars are softening faster than you can enrobe them, just stick them back in the fridge to keep things cool. Let’s go!
The cookie base is sweet, buttery shortbread that’s crumbly but not too crumbly: that’s the trick to be able to cut it into bars without the whole thing disintegrating into pieces under your knife. The addition of a couple eggs gives the cookie the structure it needs to hold together, yet remain pleasingly tender and short. Whenever I make something where butter is the main component, I like to use a really good butter, like Kerrygold or Plugra, to make it really shine. The higher butterfat levels in these premium butters will give your shortbread extra richness.
The caramel is your standard cooked sugar syrup generously enriched with cream and more butter. I found the trickiest part of this whole recipe not the cutting or the enrobing, but actually covering the cookie layer with the caramel. It’s important that you roll the cookie layer out so it almost fills the baking sheet you’ll assemble the bars in. Otherwise when you pour the caramel in, if there’s too much space around the cookie, you end up drowning your cookie in a sea of caramel, which is extremely hard to remove from the sheet once it firms up. I’m considering a different method next time where I might press the cookie layer into a smaller pan like 13″ x 9″, so that there are no gaps for the caramel to flow into. Just be judicious when you pour the caramel on – lining the baking sheet with parchment paper also helps, as it’s easier to loosen then trying to free caramel stuck straight to the pan.
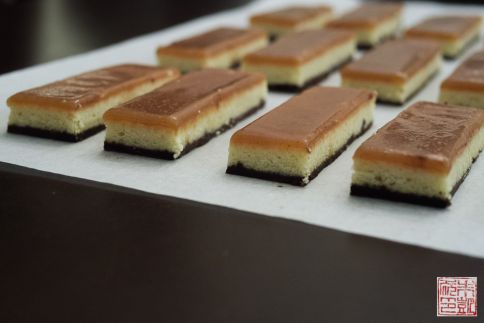
Here is the “slab” of caramel-topped shortbread, with the bottom layer of chocolate already poured, and then cut into bars. At this halfway point, they remind me that I’m essentially making another version of millionaire’s shortbread, that ultimate lily-gilding of the classic butter-rich cookie with layers of caramel and chocolate. You can probably serve these bars as is, and they have a very elegant layered look to them, but of course the goal of this post is homemade Twix bars, and for that we need to finish the enrobing process.
If you’re looking to go the whole nine yards, tempering chocolate is the how you get that perfect crisp shell. However, if at this point you just want to eat those candy bars as soon as possible, I’m a big fan of confectionery coating, also known as candy coating or summer coating. It’s a combination of melted chocolate and oil, which makes a smooth mix for dipping and sets up into a firm, shiny finish. It’s not as hard or glossy as tempered chocolate, and dipped chocolates should be kept in the refrigerator so they don’t soften too quickly, but it’s a great timesaver if you just don’t have the time or mental fortitude for tempering chocolate. They also sell bags of pre made candy coating at kitchenware/cooking shops, but it’s so easy to make at home, I’d highly recommend doing it so you can choose the chocolate to use: for these bars, I like a mix of bittersweet and semisweet – dark enough to balance the sweetness of the caramel, but not so dark that it overpowers the rest of the candy.
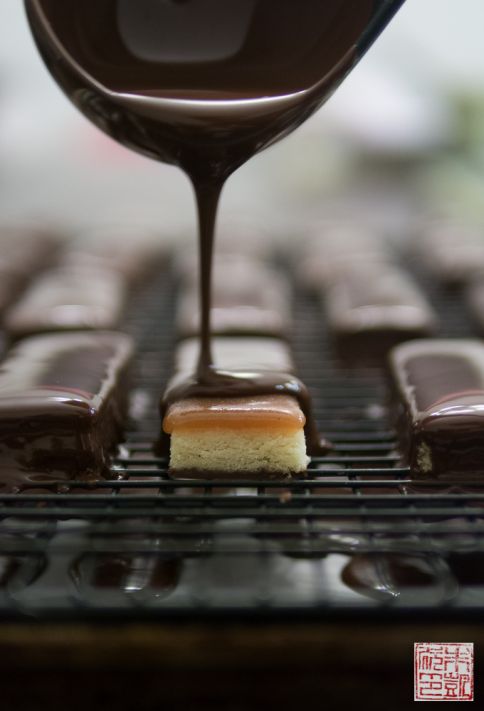
Probably my favorite part of this whole process. There’s nothing as glorious as freely ladling warm chocolate over something sweet and making it even sweeter. It’s pretty exciting to see rows and rows of freshly enrobed bars and feel like a candy factory in miniature.
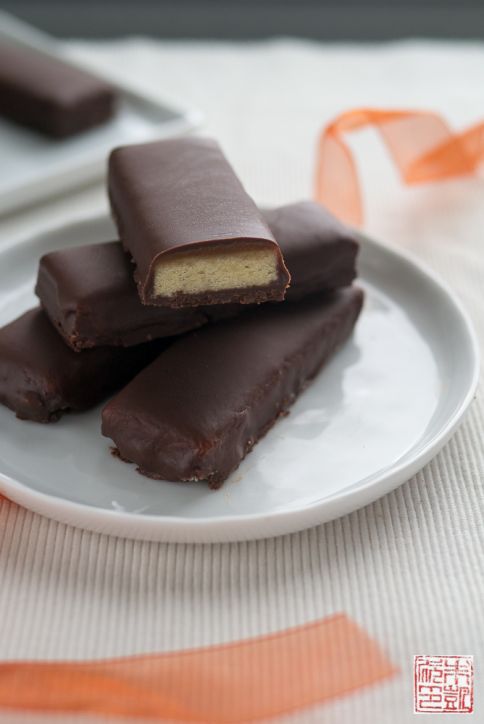
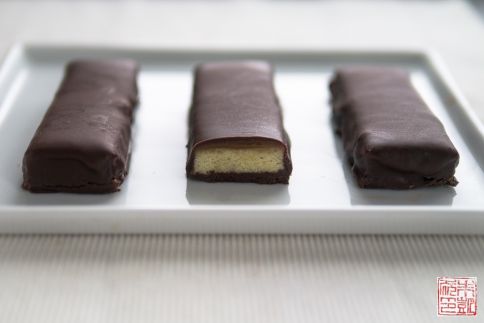
The combination of crisp shortbread, creamy caramel, and rich chocolate is unmistakably reminiscent of a Twix bar, but with a decadence all its own. I’ve been known to scarf down half a bag of those mini bars in one sitting, but I find one of these bars is plenty for me. So hoard a few for yourself, and share the rest with your favorite -and luckiest- trick or treaters.
Looking forward to ghosts, pumpkins, and lots of sweets next week!
Cookie Layer
- 1/2 lb (225 g) unsalted butter, room temperature
- 2/3 cup (133 g) sugar
- 2 large egg yolks
- 1/2 teaspoon salt
- 2 cups (250 g) all-purpose flour
- 1 teaspoon vanilla extract
Caramel layer
- 1 1/2 cups (300 g) sugar
- 1/2 cup (175 g) light corn syrup
- 1/4 cup (60 g) water
- 1 cup (230 g) whipping cream
- 5 tablespoons (70 g) unsalted butter
- 1/2 teaspoon vanilla bean paste
- 1 teaspoon flaked sea salt
Chocolate Glaze
- 2.5 lb (1.13 kg) dark chocolate, roughly chopped
- 1 cup (225 g) vegetable oil
For the cookie layer:
- Combine the butter and sugar in bowl of a stand mixer. Beat with paddle attachment on medium speed for several minutes until fully combined and the mixture is light and fluffy.
- Add the egg yolks, one at a time, beating to combine thoroughly. Add the salt and beat to combine.
- Add the flour in two additions, beating just to combine with each addition. Add the vanilla and beat to combine.
- Turn out dough onto a piece of parchment paper. Place another piece of parchment paper on top and roll out the dough between the two sheets to about 1/4" thick. The dough should be about as big as the sheet of paper; if it's smaller, it's okay. Place the dough, still between the sheets of parchment paper, onto a baking sheet and refrigerate for a hour to firm up.
- Preheat oven to 350 degrees F. Take out dough from refrigerator and peel off top layer of parchment paper. Bake for 20 to 25 minutes, until edges of the cookie are turning golden brown and surface of cookie is dry. Remove from oven and let cool.
For the caramel layer:
- Combine sugar, corn syrup, and water in a medium saucepan. Bring to boil over high heat and cook until mixture reaches 300 degrees F.
- Meanwhile, place the cream, butter, and vanilla bean paste in a separate saucepan and bring just to under a boil over medium heat. Don't let it boil but keep it warm until the sugar mixture finishes cooking.
- When the sugar mixture reaches 300 degrees F, remove from heat. Slowly pour the warm cream mixture into the sugar, a little at a time, as the sugar will bubble up vigorously. Stir with a rubber spatula to combine.
- Return mixture to the heat and cook over medium-high heat until it reaches 250 degrees F.
- Place cookie layer (still on the sheet of parchment) in a rimmed baking pan. Carefully pour the caramel over the cookie layer, spreading it out evenly with a metal spatula as needed. It's ok if the caramel spreads off the edge of the cookie layer - the rim of the baking sheet will keep it in. You should have enough caramel to cover the cookie layer but try not to let the caramel completely fill the baking sheet, or you will have a hard time removing the candy from the baking sheet.
- Let caramel set for a minimum of 2 hours, preferably overnight. If it is warm or the caramel doesn't seem to want to firm up, you can place it in the refrigerator until it is firm enough to cut.
For the chocolate glaze:
- Place chopped chocolate in a metal bowl and set over a bowl of simmering water. Melt chocolate, stirring occasionally. (If you want to temper the chocolate, you can also do so, and not add the vegetable oil).
- Remove bowl of melted chocolate from heat. Stir in the vegetable oil until it is a smooth, shiny mixture. Let cool for about 10 to 15 minutes.
To finish the bars:
- Place a cutting board large enough to fit the cookie layer on the counter. Run a knife around the edge of the baking sheet to loosen any caramel that stuck to the edges.
- Place a sheet of parchment paper over the top of the caramel layer. Place the cutting board over the parchment paper, and then invert the entire assembly so that the candy comes loose from the baking sheet and is now cookie side up on the cutting board.
- Take about 1 cup of the chocolate glaze and pour over the cookie layer. Use a metal spatula to spread it out evenly, covering the whole layer.
- Let chocolate set, about 10 minutes. You can place in the refrigerator to speed up the process, about 5 minutes.
- Flip the slab of candy over so that the set chocolate side is now on the bottom. Using a ruler and a sharp knife, trim off the edges of the candy so it is an even rectangle. Cut the slab into 1 in by 3 in bars.
- Place the bars chocolate side up on a baking sheet lined with parchment paper. Chill in refrigerator for half an hour to let the chocolate fully set and to keep the candy bars firm.
- Rewarm the chocolate glaze. Place a wire rack over a baking sheet lined with parchment paper. Arrange the candy bars, chocolate side down, in rows on the rack, leaving enough room between them to pour the chocolate.
- Using a ladle, pour the chocolate over the candy bars, making small side to side motions to get chocolate on the sides of the bars. Tap the wire rack on the counter a few times to let the chocolate settle.
- Use an offset spatula to move the bars from the wire rack onto a baking sheet lined with parchment paper. You can also use the offset spatula to cover any spots you missed on the bars. Let bars set, about 20-30 minutes. Again, if it's warm or it seems like it's taking a while for the chocolate to set, you can put them in the refrigerator to speed up the process.
- Store the finished bars in an airtight container between sheets of wax paper, for up to 3 weeks.


I love Twix bars! these look and sound so much better than the ones at the store. Love it.
I’m not sure if I’m super happy I saw this post because they look delicious or if I’m upset because I know I’m going to gain 10 pounds from eating all of these! Great photos 🙂
I wish I had these as a snack!!!
Yum, I would love these, they look delicious!
I’m not a very good baker because I don’t have the patience for it (although, I wish I did). I much prefer to cook and even then – very simple meals. I’m no fun in the kitchen, but I’d gladly help my baker-friends eat their creations.
They look better and prettier than packaged Twix bars!
YUM! I doubt mine would turn out as pretty as these, but they don’t have to be pretty to be delicious, right? 😉 Thanks for sharing!
I never knew how easy twix bars were to make at home! I actually just bought some today for a kids’ halloween party. Wish I made them myself!
My kids are forever moving the pumpkins around, too! It drives me NUTS! Love these homemade twix! I totally want one.
I have always wanted to try a homemade twix recipe – these look amazing!
Very cool. Happy Halloween.
PS: Loved the pumpkin moving about story. Good stuff.
this must taste 100 times better with all the great ingredients! beautiful photos too!
I want to shove 100 of these in my face right now. This is fabulous.
I just pinned this recipe! I want to give this a try, but I know mine will never look nearly as nice as yours! Worth a try though! TFS this recipe!
I am so impressed! These look so beautiful and I bet they taste better than the processed stuff too!
I didn’t even know this was a thing! I didn’t think you could make your own. How cool! This looks awesome.
Wow, Twix are one of my favorite candy bars and I love that you made your own. They look amazing, Anita! Can’t wait to try this – pinning!
So I just popped over to look at the twix tart you made and dear lord it looks incredible. These are so perfect too. They could have popped straight out of a cook book!
Katie <3
Yum! Yum! Yum! These look magnificent!
aaaah woman after my own heart. I love twix so much x
These look so perfect and delicious, Twix are my favorite!
These are so ridiculously cute!
I never would have thought to make them. How fun!
I love Liddabits, their candies are so addictive! I haven’t done it but I would totally agree that ladling chocolate over caramel and short bread would be very soothing, especially if I get to stick my finger in some of the drippings when you lift the tray!
As much as I love making things from scratch, I don’t think I’ve ever made homemade Twix bars before. I can already tell the homemade version is 1000x better than the store bought!
omg…this looks awesome…but i think i just need to stick to buying twix at the grocery store! lol. i suck at baking.
Twix are so delicious, so I can just image how fantastic this homemade version is! Great tutorial!
First, your photos are gorgeous! Second, twix was the first (and only) candy bar I ever made. Didn’t look like this, but my mom flipped over them. I have to try your way. She may babysit for life.
I bet these are even better than the original! I always find that homemade versions are. 🙂
Twix are by far my favorite candy bar, so I love this at home version!!
Twix is my favorite candy bar so I love the idea of making them at home. I also like that I can make the cookie part just a little bigger since that is what I love most about a Twix 🙂
I love twix!! How fun to make them at home!
Twix are one of my favorite candy bars. I cannot wait to try this recipe! I pinned it
I really appreciate the fact that you made all of the components yourself. These look fantastic. You did a great job! I can tell by the way you measure and explain things you’re a fellow pro culinarian! ^_^
Pinned this on Pinterest! This is awesome!
Wow — had no idea that I can make these at home. I love Twix. I am pinning to return to these goodies. Thanks for sharing.
Thrifting Diva
http://www.thriftingdiva.com
I feel like homemade desserts are always better than name brand! These look so good!
Just made them, absolutely delicious.
Quick note though, the amount of chocolate required in the recipy is quite excessive. I used about 600g instead of the 1100g suggested in the recipe, and it was more than enough.
Still though, can’t wait to share these things.
Hello Magnus,
Thanks for your kind note and I’m glad you liked them! I appreciate the note about the chocolate as well, I always make extra to be safe but perhaps I can reduce it to a smaller amount! Thanks again!
WOW!!!! Just wow! this is my first time on your site and I’ll admit that I am a little intimidated but amazed at the same time! WOW
I used to love Twix. I had a desire for one recently and was disappointed. They are just cheap Millionaire’s Shortbread. Your version made from scratch would be amazing. Millionaire’s Shortbread is amazing.